

Your forms could be working twice as hard. These 7 PlatoForms settings are simple to enable but double your completion rates.
In this blog, we’ll explore:
1. Let users edit after submitting
The reality check: Sarah’s biggest customer complaint wasn’t her product - it was typos in submitted job applications. Candidates would panic after hitting submit.
Why this matters: Everyone makes typos. Let users fix mistakes = fewer support emails, happier users.
Turn it on in 30 seconds:
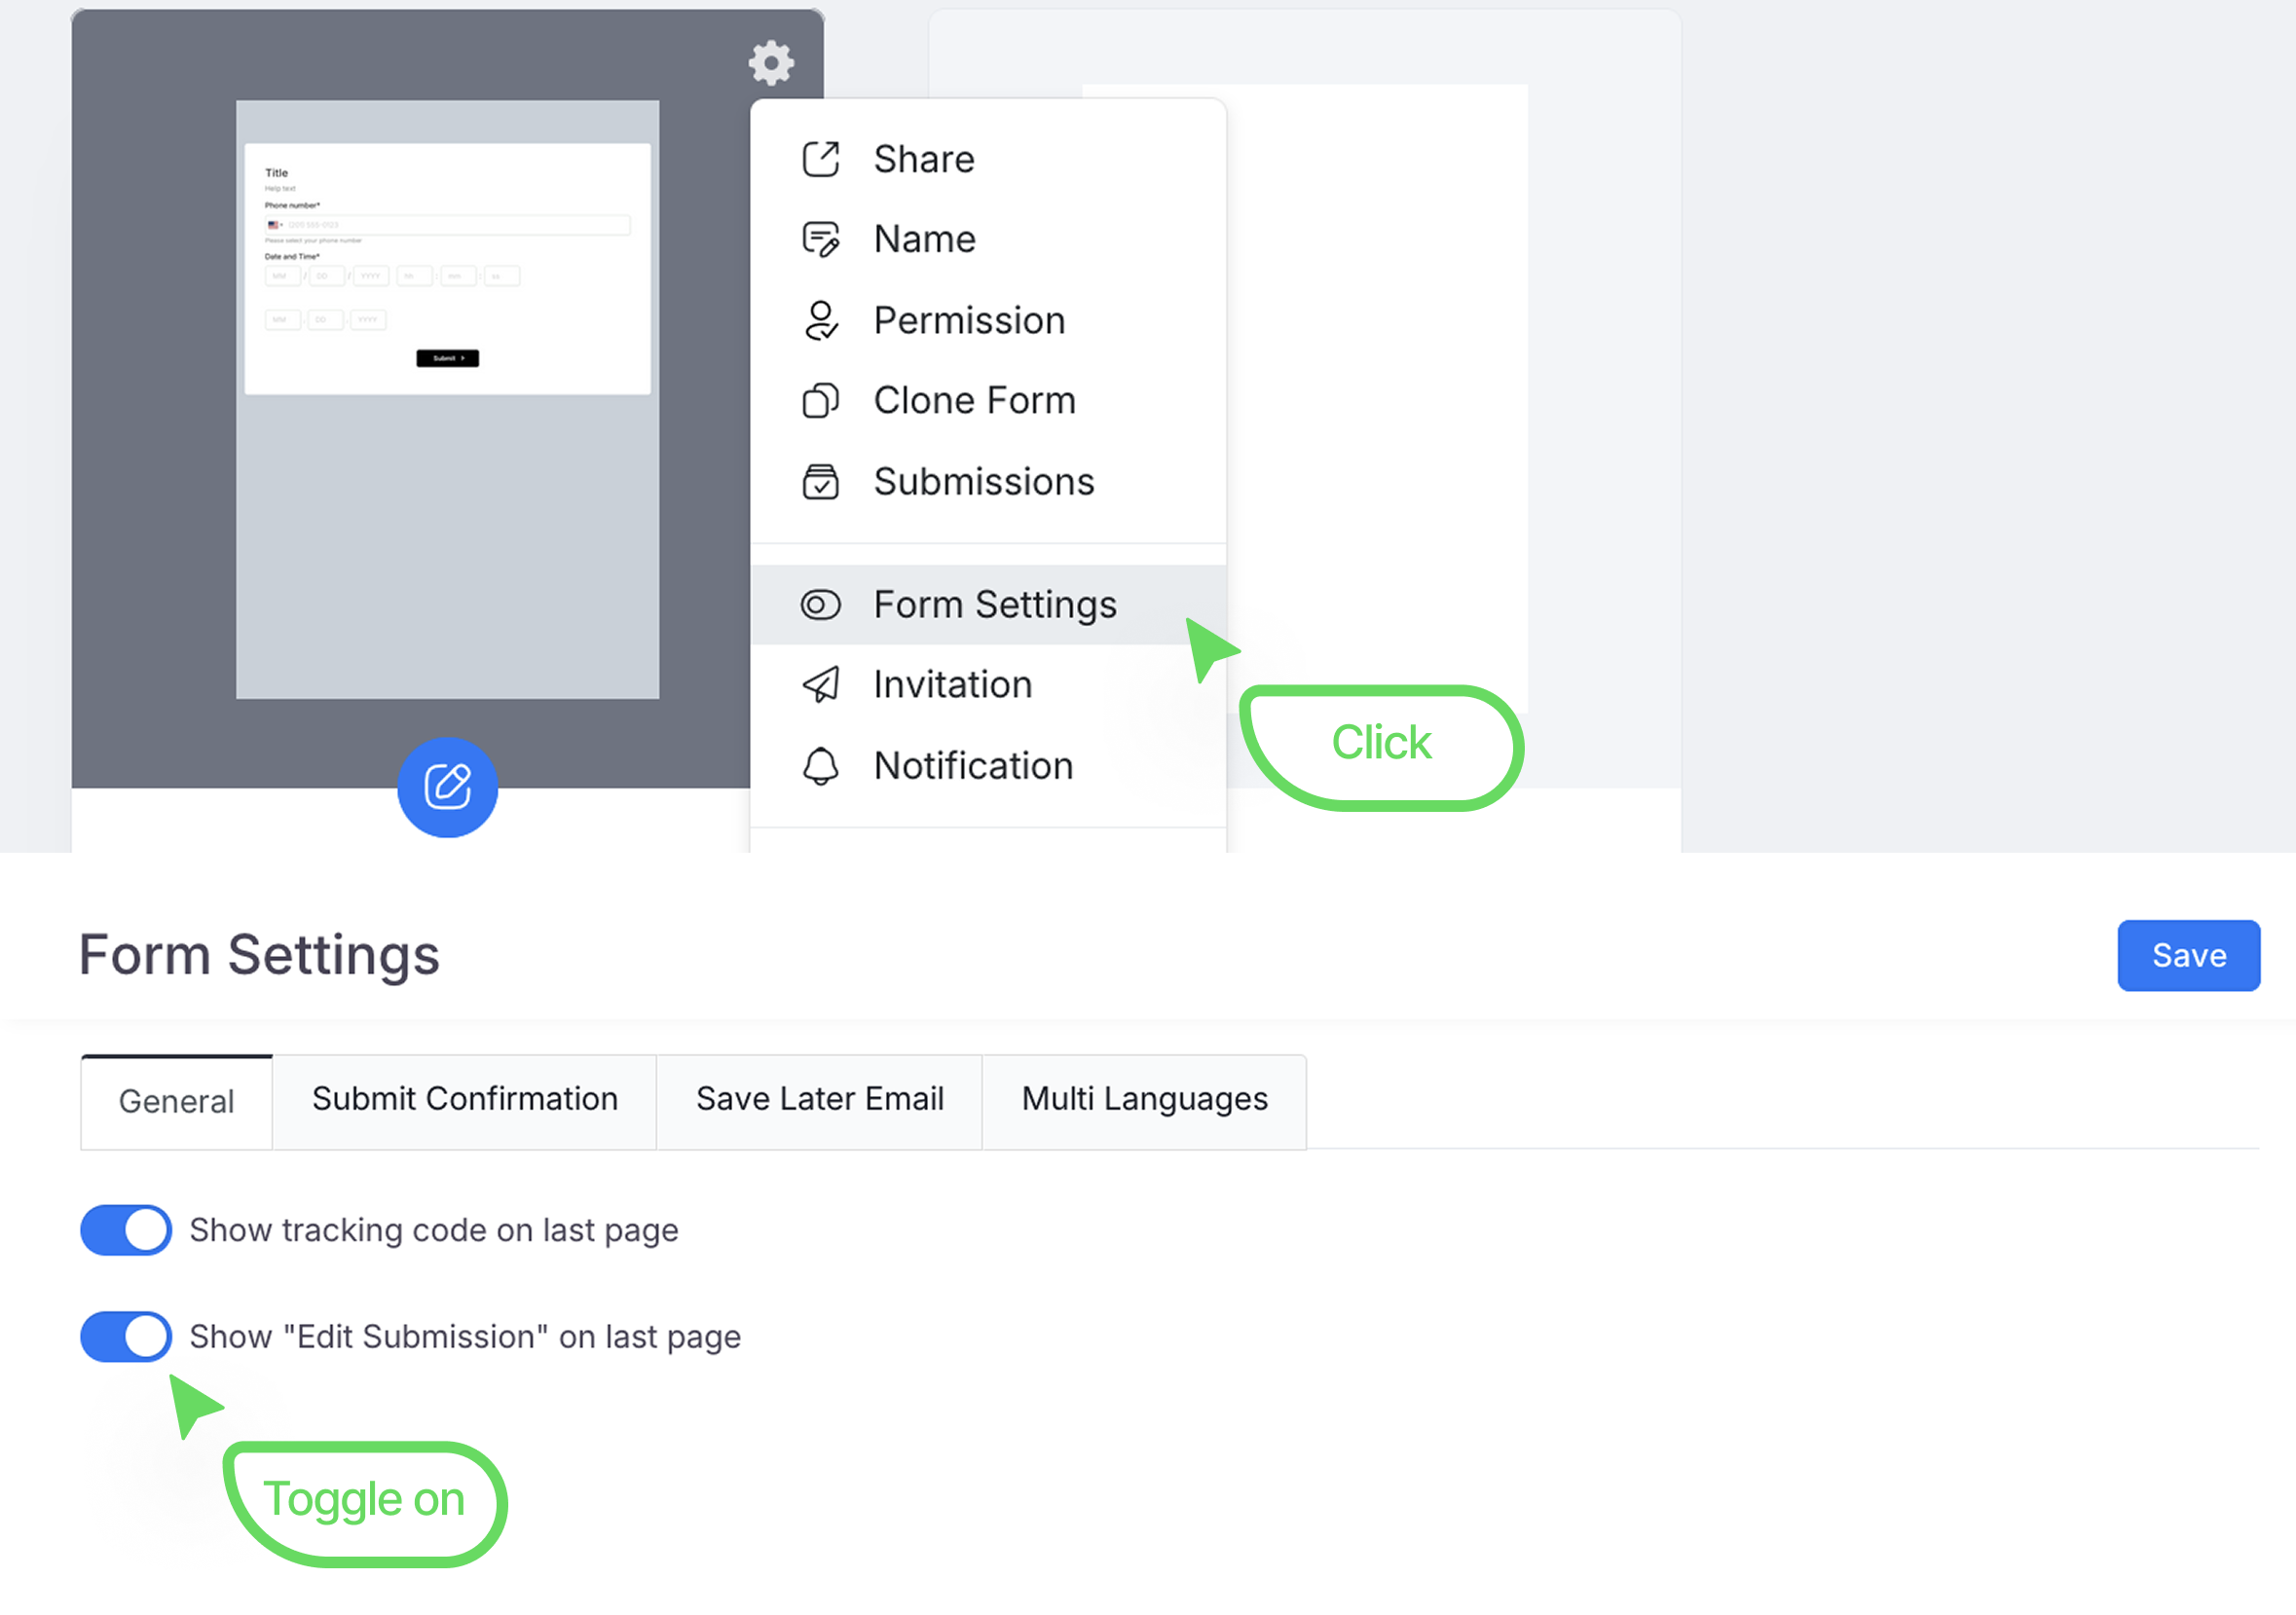
- Go to Settings → Form Settings.
- Under General, switch on Show “Edit submission” on last page.
What happens: Users get an Edit your submission option after submitting.

Perfect for: Job applications, university admissions, conference registrations, or any form where accuracy is crucial and stakes feel high to users.
Bottom line: Fewer support tickets = more time for important work.
2. Save progress for later
The reality check: Marcus runs a consulting firm with detailed project intake forms. His biggest frustration? Potential clients would start the 15-minute form, get interrupted, and never come back. Lost customers, every single day.
Why this matters: Long forms trigger “commitment anxiety.” People see a big form and think “I don’t have time for this right now” - then never return. You just lost a potential customer.
Turn it on in 30 seconds:
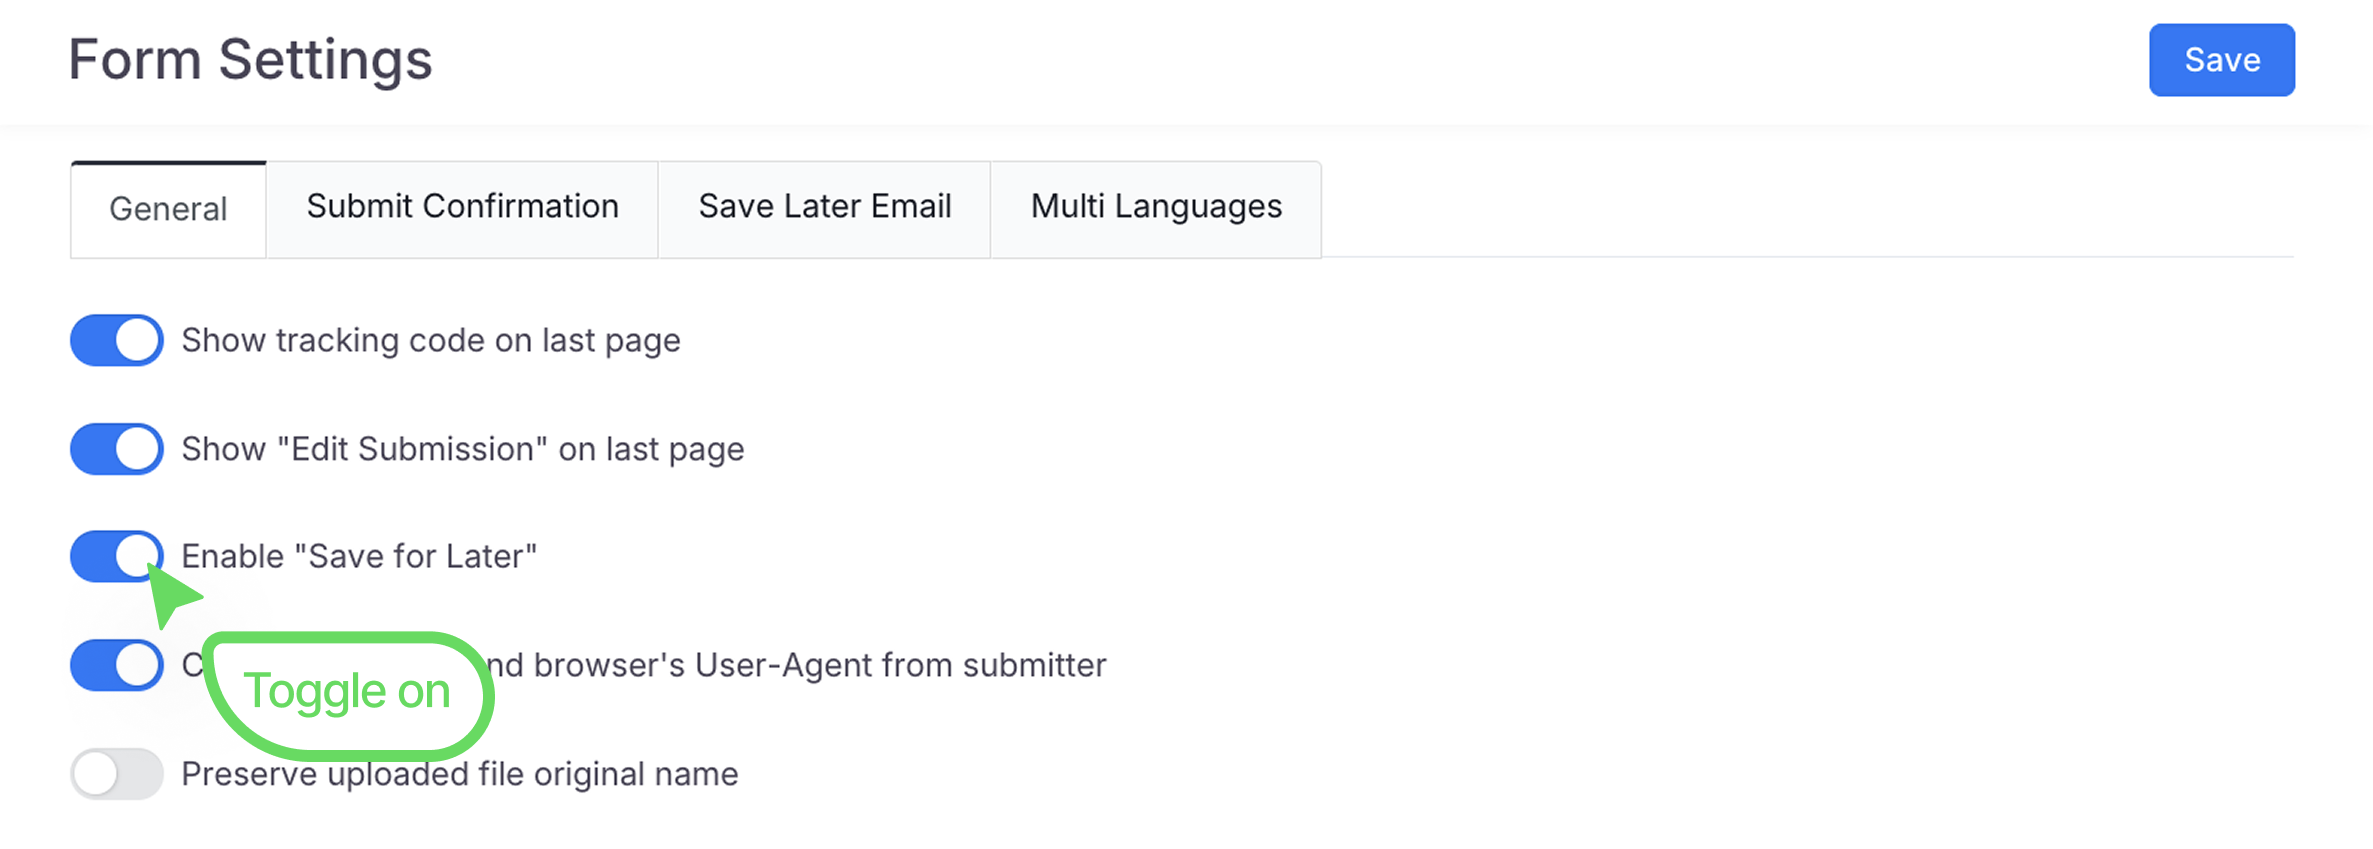
- Go to Form Settings → General.
- Check Enable “Save for Later”.
What happens: A “Save for Later” button appears on your form. Users click it, get a secure link, copy it or sent it to their email, and finish the form whenever they’re ready.

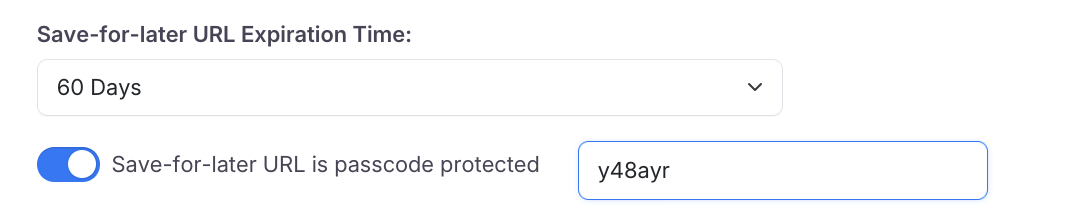
Bonus: You can set how long the link works (7 days, 30 days, etc.) and even add password protection.
Perfect for: Job applications, insurance forms, client intake forms, or any form longer than 2 minutes.
Bottom line: More completed forms = more customers. It’s that simple.
3. Multiple languages (This one’s underrated)
The reality check: Elena was creating separate forms for English and Spanish speakers - double the work. Then she discovered that PlatoForms form could handle both languages.
Why this matters: Your audience speaks different languages. Instead of losing potential respondents or managing multiple forms, let them choose their preferred language instantly.

How to set it up:
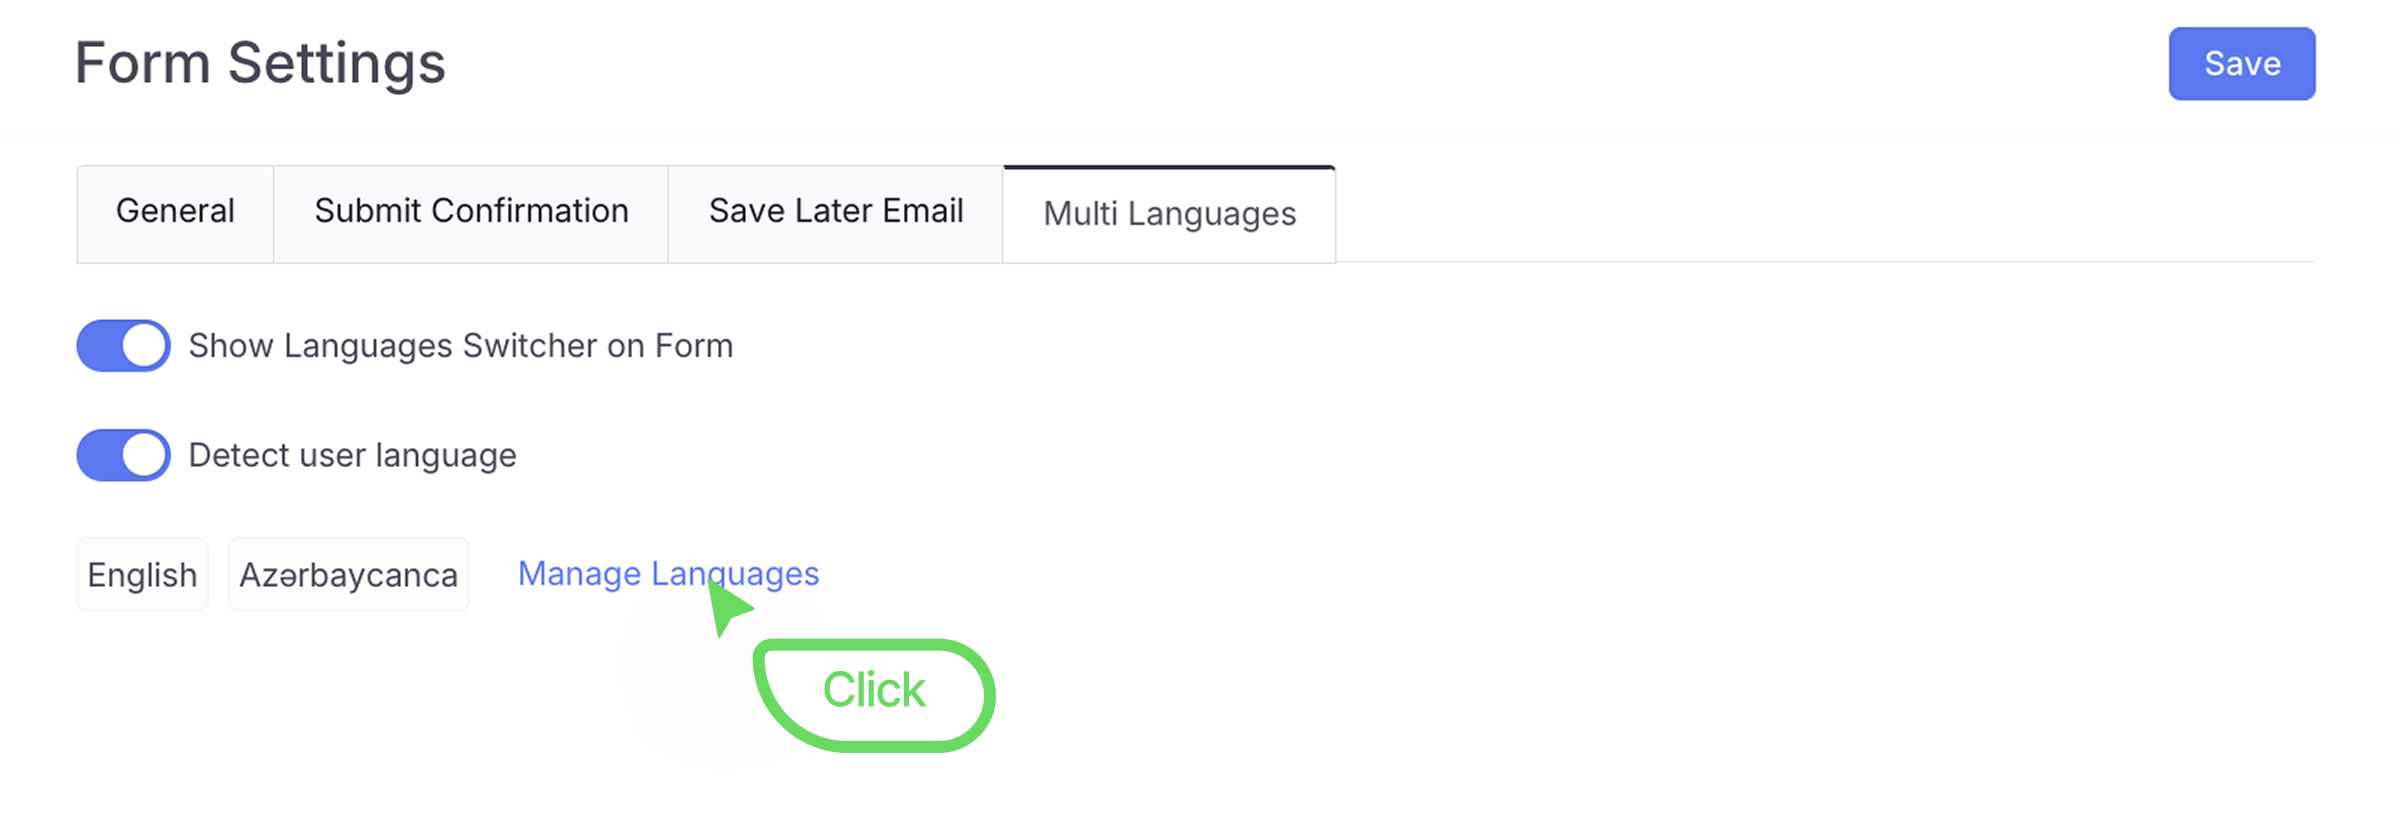
- Go to Form Settings → Multi Languages tab.
- Click Manage Languages.
- Select a language and click Add New Language.
- Add your translations (or upload an Excel file for bulk translation).
- Enable “Detect user language” for automatic detection.
What happens: Your form becomes multilingual. It auto-detects the user’s browser language or lets them switch via a dropdown. Each language version has a unique shareable URL and QR code.
Translation pro tips:
- Use the Excel import feature - Download the translation template, fill it out, and upload. Much faster than manual entry.
- Test your layout - Some languages take up more space than others (e.g., German is ~30% longer than English). Preview each language to avoid cut-off text.
- Adapt for local context - Don’t just translate words. “ZIP code” vs “Postal code” vs “PIN code” depending on your audience’s location.
Bottom line: Speak your users’ language = more completed forms. It’s that simple.
4. Set response limits
The reality check: Dr. James Chen’s workshops often faced last-minute registrations and high no-show rates.
The fix: Setting submission limits adds urgency and improves attendee commitment.

How to set it up:
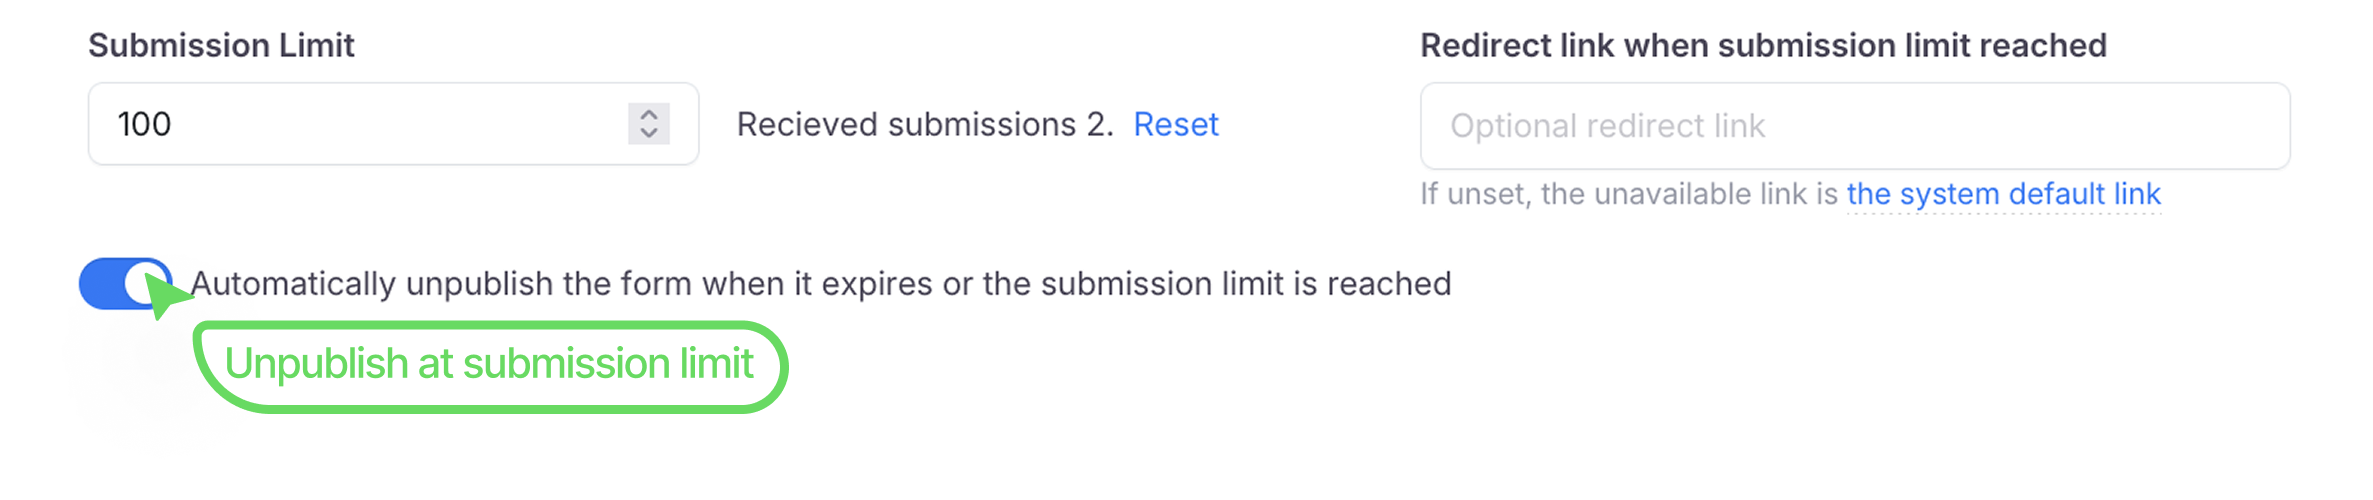
- Go to Form Settings → General tab.
- Scroll down to Submission Limit and set the maximum number of responses.
- (Optional) Customize the message shown when the limit is reached, or redirect users to a waitlist or promo page.
- (Optional) Enable auto-unpublish to switch the form to “Draft” when full.
Smart tips:
-
Set limits slightly below actual capacity - Dr. Chen caps his form at 30, though he can handle 35—creating healthy scarcity without overbooking.
-
Enable waitlists with auto-notifications - When someone cancels, the next person is emailed instantly and given 24 hours to claim the spot. To enable this, you usually connect your form to automation tools like Zapier, Make, or Integrately.
Best for:
| Use Case | Benefit |
|---|---|
| Events & workshops | Encourage early signups, reduce flakiness |
| Beta programs | Control feedback volume |
| Discovery calls | Keep intake manageable |
| Scholarship forms | Naturally competitive |
| Early bird pricing | Close after a fixed number of signups |
5. Custom branding that actually matters
The reality check: Camille runs a boutique consulting site and was tired of clunky forms that didn’t match her brand—or worse, redirected users off her site entirely.
The fix: With PlatoForms’ custom branding features, Camille now embeds sleek, on-brand forms that blend seamlessly into her website and client experience.
How to set it up:
-
After publishing your form, switch to Embed Script.
-
Pick your mode:
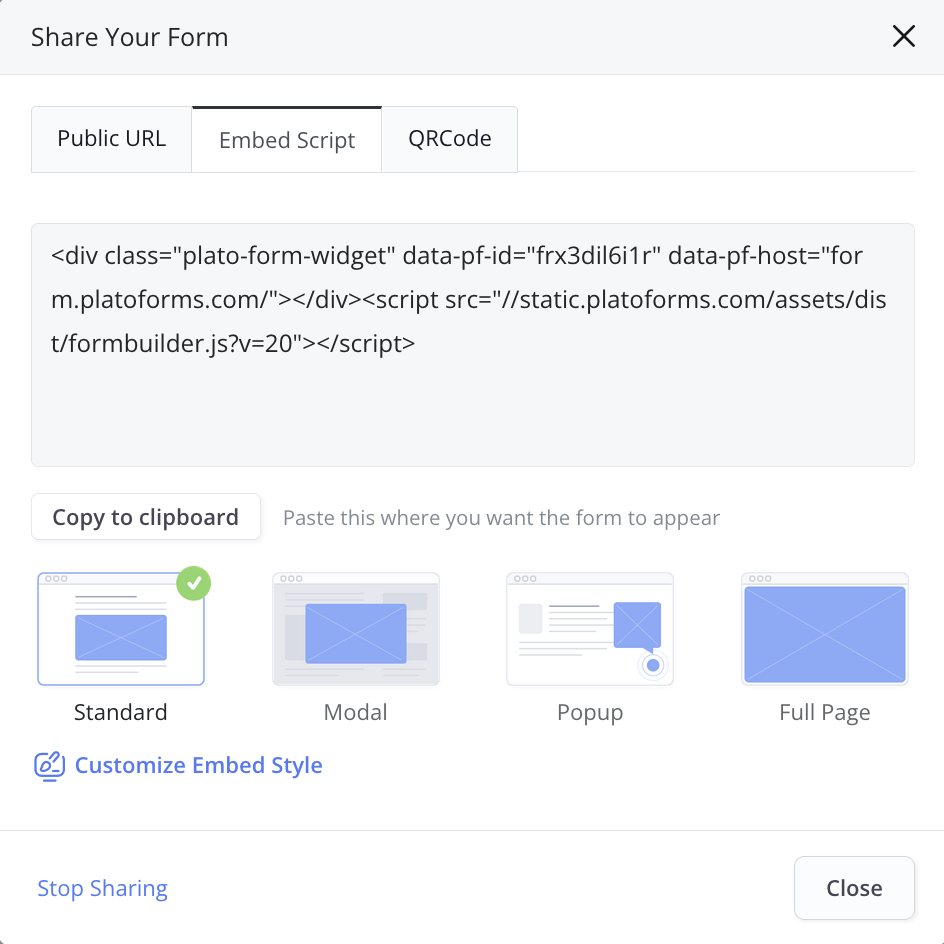
Standard- basic inline embedModal- open form in a button-triggered popupPopup- floating form with toggle buttonFull Page- take over a whole section
-
Customize dimensions, button text, and colors to match your style.
-
Copy the updated script and paste it into your site.
Smart tips:
-
Use modal or popup modes on landing pages - Camille uses a floating form on her homepage that grabs attention without disrupting flow.
-
Save time with shared themes - Reuse design styles across all your forms by clicking Save as Shared Form Theme in the design editor.
-
Add custom logic and flair with JavaScript - In Preview, go to Design Form > More Custom Styles > JS Tab to tweak labels, apply advanced logic, or animate elements—available for forms on custom domains.
Best for:
| Use Case | Benefit |
|---|---|
| Agencies | Deliver branded, white-label forms for clients |
| SaaS products | Maintain UI consistency without building in-house forms |
| Small businesses | Embed beautiful, functional forms on any website |
| Product launches | Capture leads in style, not spreadsheets |
| Team collaboration | Share form styles to stay visually aligned |
6. Customize your submit confirmation
The reality check: Marcus Thompson’s SaaS demo requests ended with a bland “Thank you for your submission” message. Users would submit, then vanish—no follow-through, no engagement, just crickets.
The fix: Transform your confirmation page into a strategic touchpoint that guides users to their next action and keeps momentum alive.
How to set it up:
-
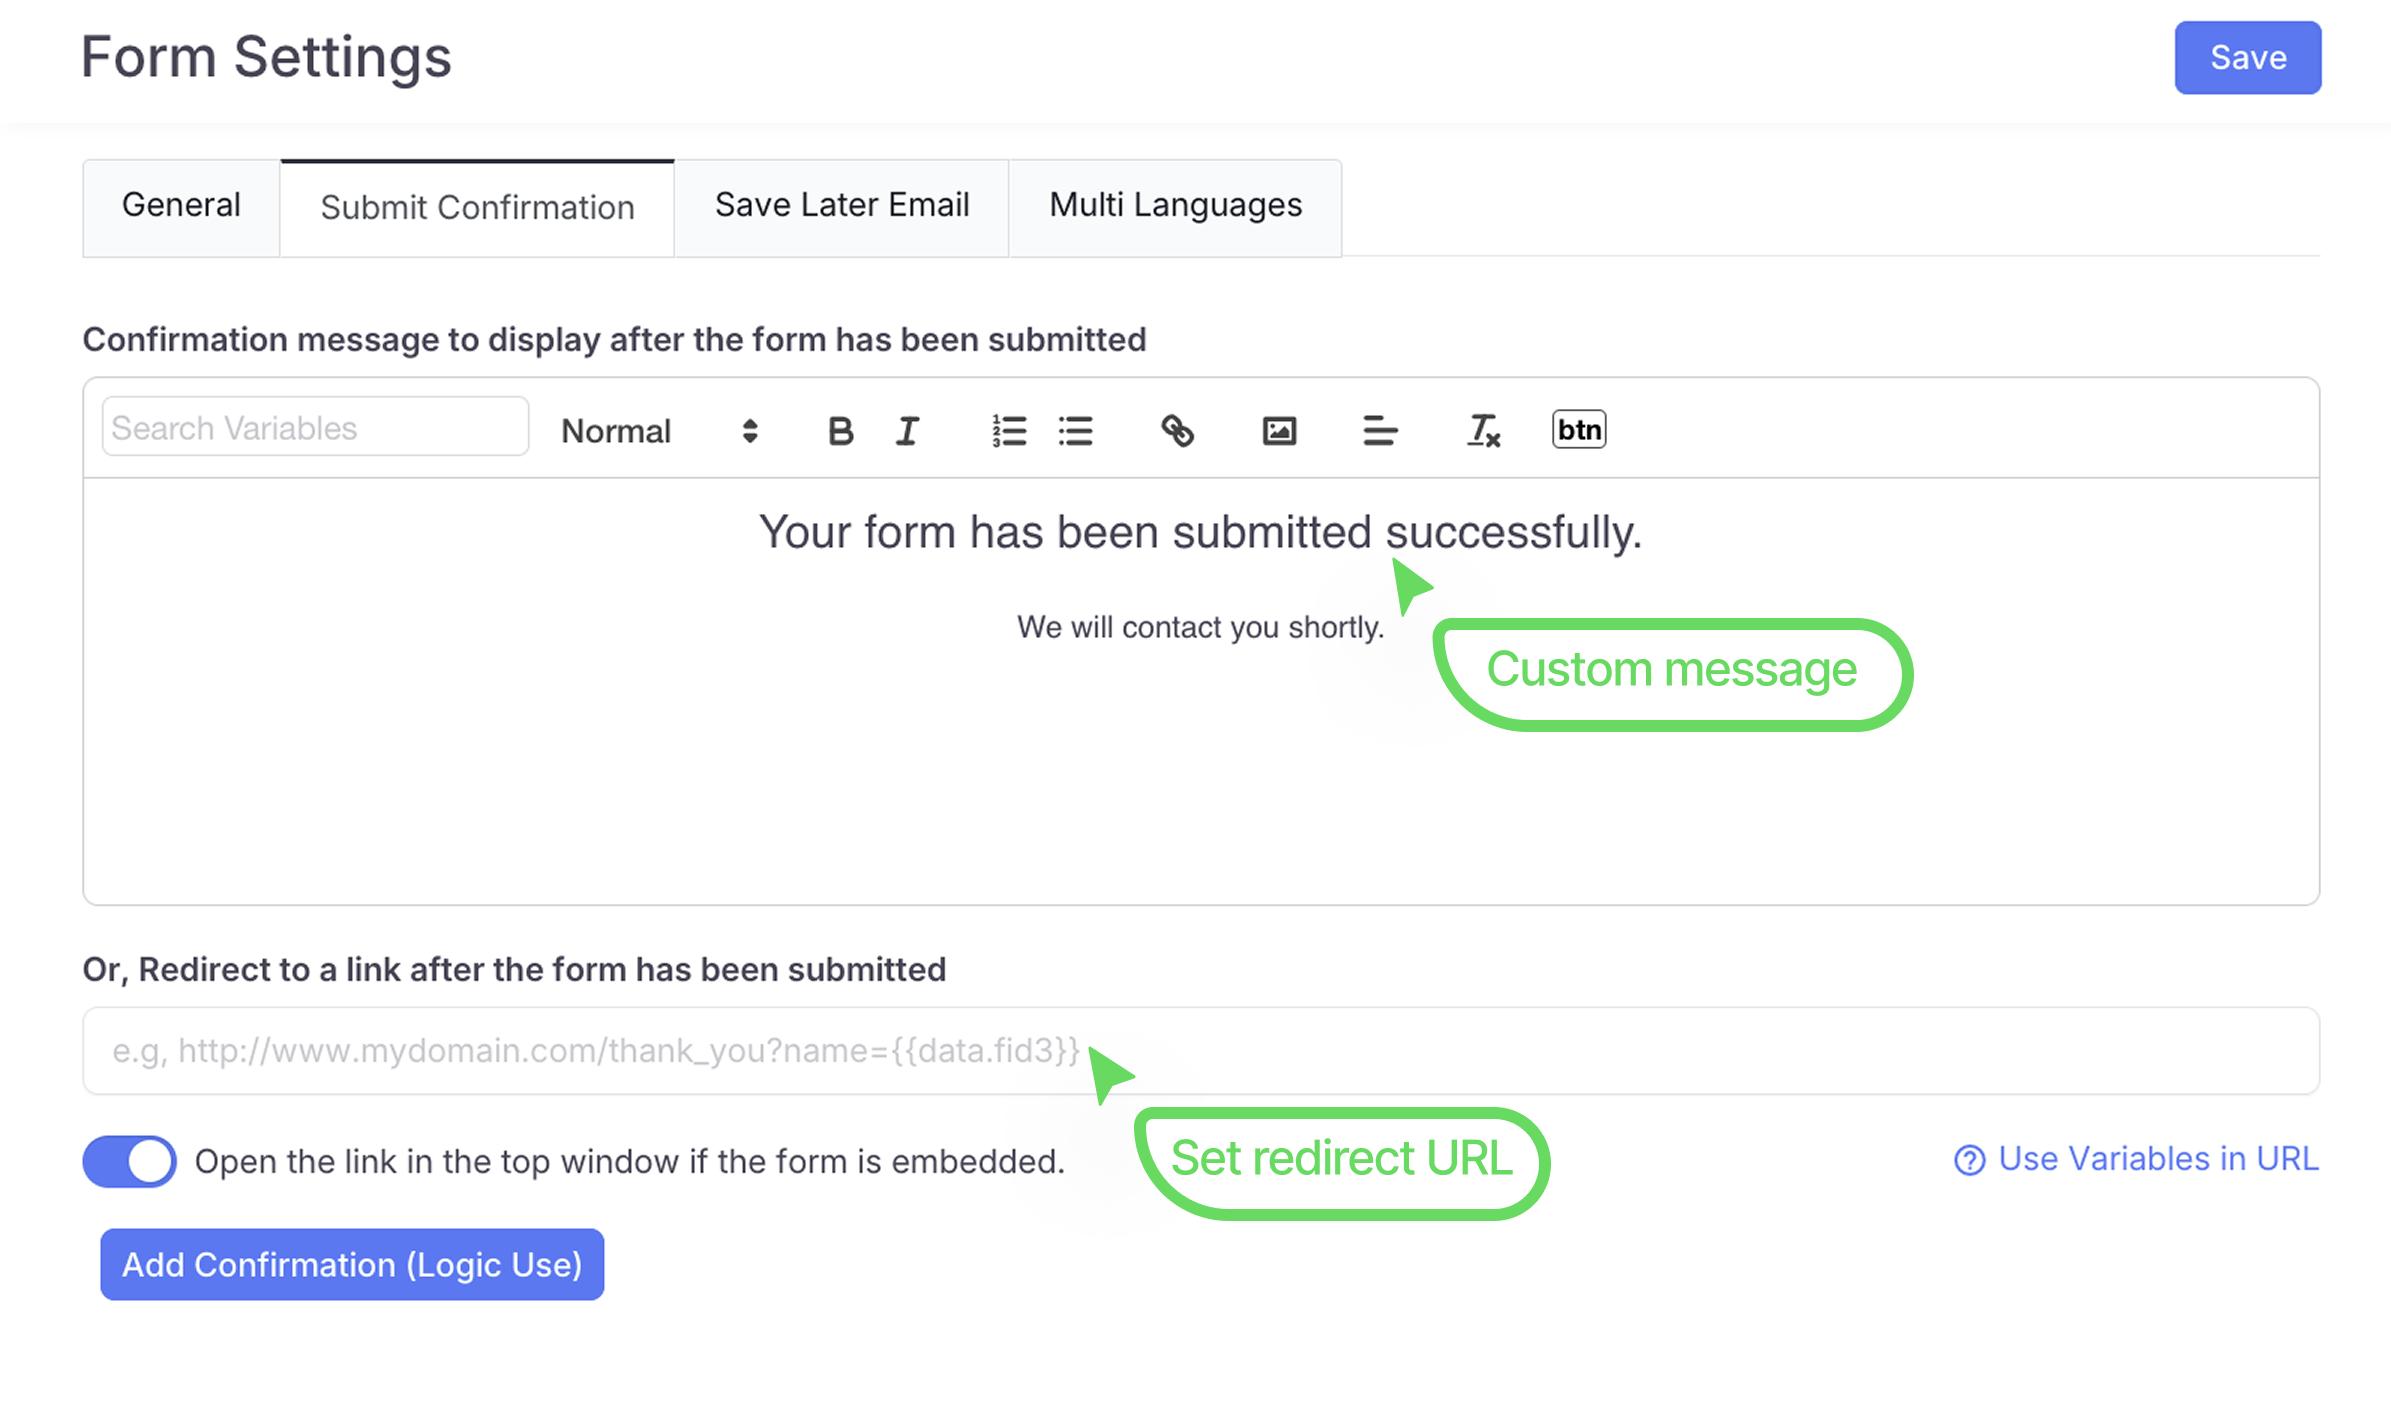
Go to Form Settings → Submit Confirmation tab.
-
Choose your confirmation type:
- Custom Message - Replace generic text with branded, actionable content
- Redirect URL - Send users to a dedicated landing page or dashboard
-
Personalize with variables like
{{name}},{{tracking_code}},{{submission_id}}for dynamic content. -
(Optional) Add next-step buttons or links to keep users engaged.
Smart tips:
-
Create urgency with time-sensitive next steps - Marcus now shows “Your demo is being prepared! Check your email in 5 minutes for access instructions”.
-
Use confirmation pages as mini sales funnels - Add links to case studies, free resources, or social proof while users are still engaged.
-
Include tracking codes for easy reference - Display
{{submission_id}}prominently, so users can reference their request in support conversations.
Best for:
| Use Case | Benefit |
|---|---|
| Demo requests | Set clear expectations and next steps |
| Lead magnets | Guide to immediate download or access |
| Event registrations | Share agenda, prep materials, or calendar links |
| Support tickets | Provide tracking numbers and estimated response times |
| Application forms | Explain review process and timeline |
| Newsletter signups | Redirect to welcome series or exclusive content |
7. Convert submission date/time for global consistency
The reality check: Sarah Martinez runs a global coaching program. When reviewing submissions, she sees confusing timestamps like “3 AM” for what were actually daytime submissions—making follow-up scheduling a nightmare.
The fix: Setting up proper time zone conversion ensures all submission times display in your preferred zone, eliminating confusion and streamlining your workflow.
How to set it up:
-
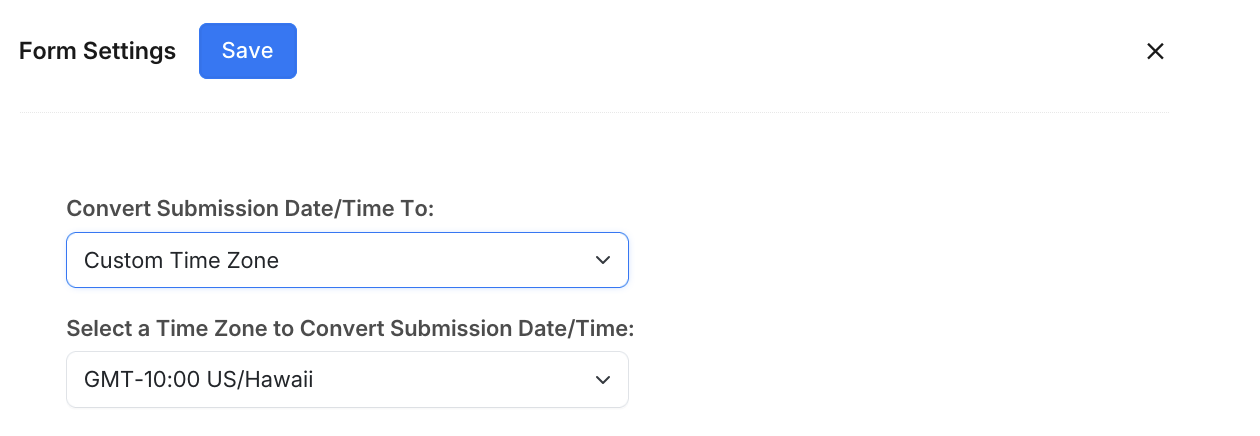
In Form Settings → General tab, scroll to Convert Submission Date/Time To.
-
Select your preferred option:
- Submitter’s Time Zone - Shows when they actually filled it out
- Form Creator’s Time Zone - Converts everything to your local time
- Custom Time Zone - Pick any specific zone (great for team collaboration)
-
Ensure your form contains a proper date or date/time field for this to work.
-
(Optional) Add a note in your form explaining which time zone will be used for scheduling.

Smart tips:
-
Use “Form Creator’s Time Zone” for solo operations - Sarah switched to her Pacific Time zone—now all submissions show in her working hours context, making response prioritization instant.
-
Choose “Custom Time Zone” for distributed teams - Set it to UTC or your team’s primary office location, so everyone sees consistent times regardless of their personal location.
-
Display the time zone in confirmation messages - Add text like “We’ll contact you within 24 hours (Pacific Time)” to set clear expectations.
Best for:
| Use Case | Benefit |
|---|---|
| Global coaching & consulting | Schedule calls without timezone math |
| International events | Coordinate across multiple regions |
| Remote team forms | Keep internal processes synchronized |
| Customer support intake | Prioritize responses by business hours |
| Webinar registrations | Avoid “3 AM” registration confusion |
| Multi-location businesses | Standardize reporting across offices |
Final thoughts
Smarter forms mean fewer errors, smoother workflows, and happier users. Whether you’re managing job applications, launching a product, or conducting a global survey, these 7 settings can transform your online forms from basic to brilliant.
Quick checklist:
✅ Can users edit or save progress if needed?
✅ Are your forms multilingual and time-zone aware?
✅ Do you have clear submission limits and engaging post-submit actions?
✅ Is your branding consistent across all touchpoints?
Start with one or two tweaks, then expand—your improved form experience awaits!


