


Most document workflows involve at least three tools. You write in Word or Google Docs. You convert to PDF. You upload to a signature tool, send it out, chase the response, download the signed copy, and file it somewhere.
Each handoff is a chance for something to get lost, delayed, or formatted incorrectly.
PlatoForms’ PDF Document Creator — PDF Maker for short — collapses this into a single workflow: describe the document, refine the design, convert to a form, collect signatures, and export the final PDF without leaving the platform.
This article walks through that workflow end to end.
On this page
- What PDF Document Creator does
- Step 1: Describe what you need
- Step 2: Review and refine the design
- Step 3: Style it without starting from scratch
- Step 4: Convert to an online form
- Step 5: Collect signatures
- Step 6: Export the signed PDF
- What this workflow replaces
- When to use it — and when not to
- Frequently asked questions
What PDF Document Creator does
PDF Document Creator is a document design tool built into PlatoForms. It works differently from AI form generators that produce a list of fields — it produces a complete, designed document: headers, body text, sections, tables, and form fields laid out on a canvas.
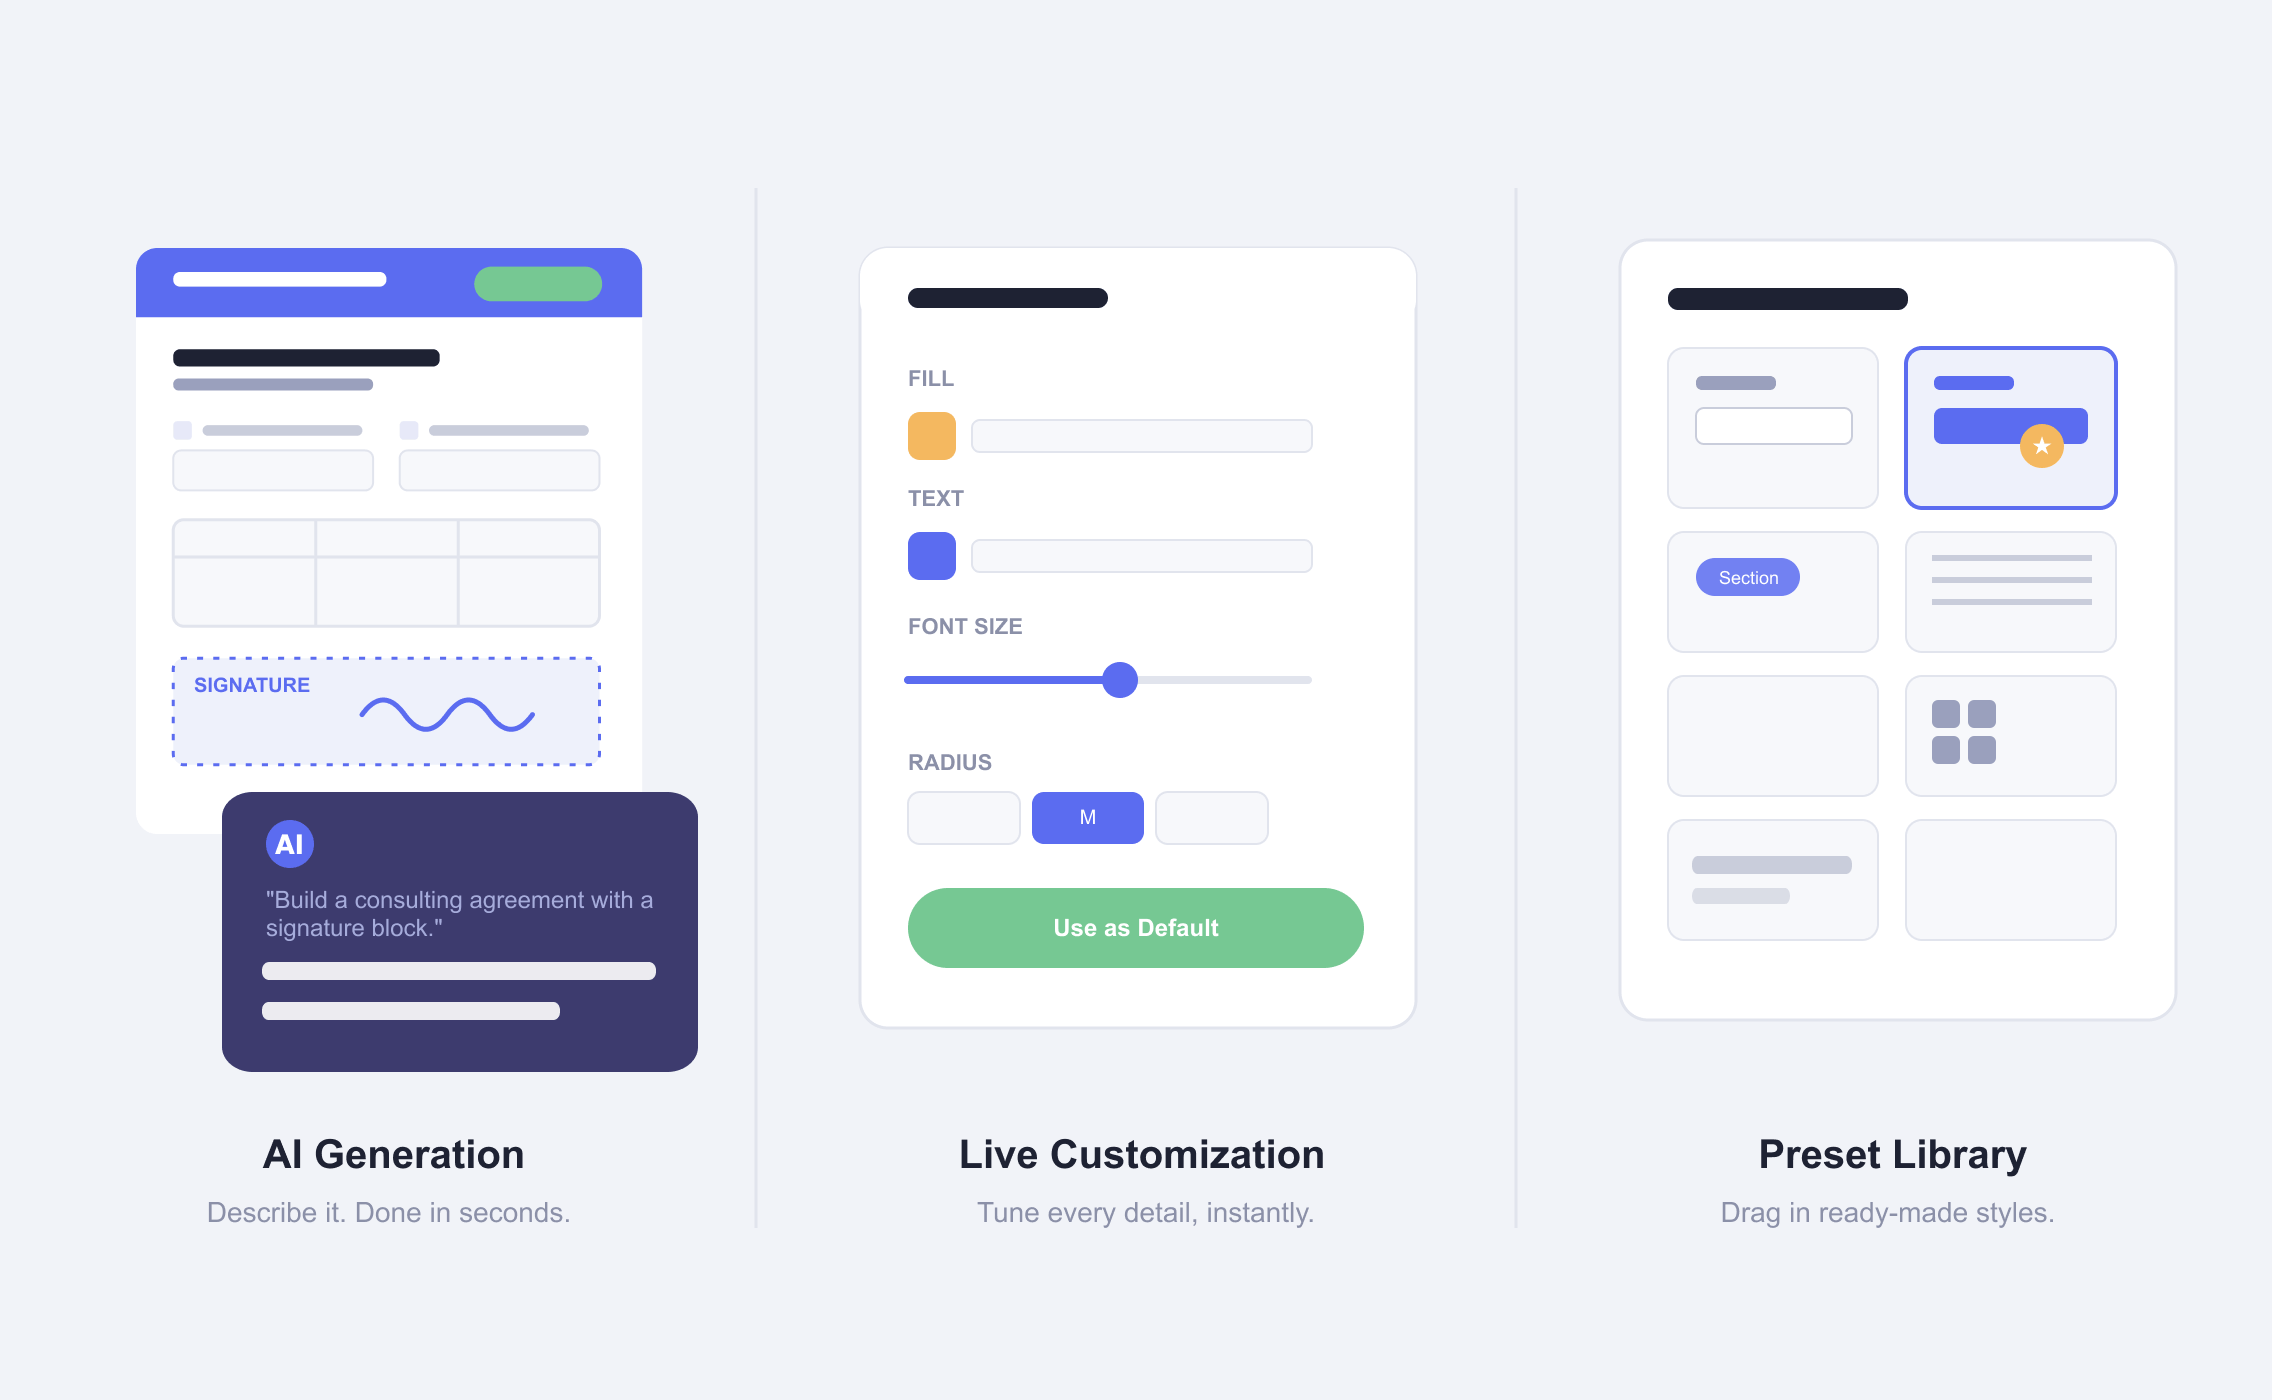
The AI component accepts plain-language prompts and returns a structured document in seconds. You can then refine the layout visually, apply a theme, and — when the document is ready — convert it into an online form to collect data and signatures.
The key distinction: you are not filling in a template someone else designed. You are describing a document and getting a first draft that you can edit.
Step 1: Describe what you need
From the PlatoForms Dashboard, click Start to build and select PDF Document Creator. Choose Start with AI chat.
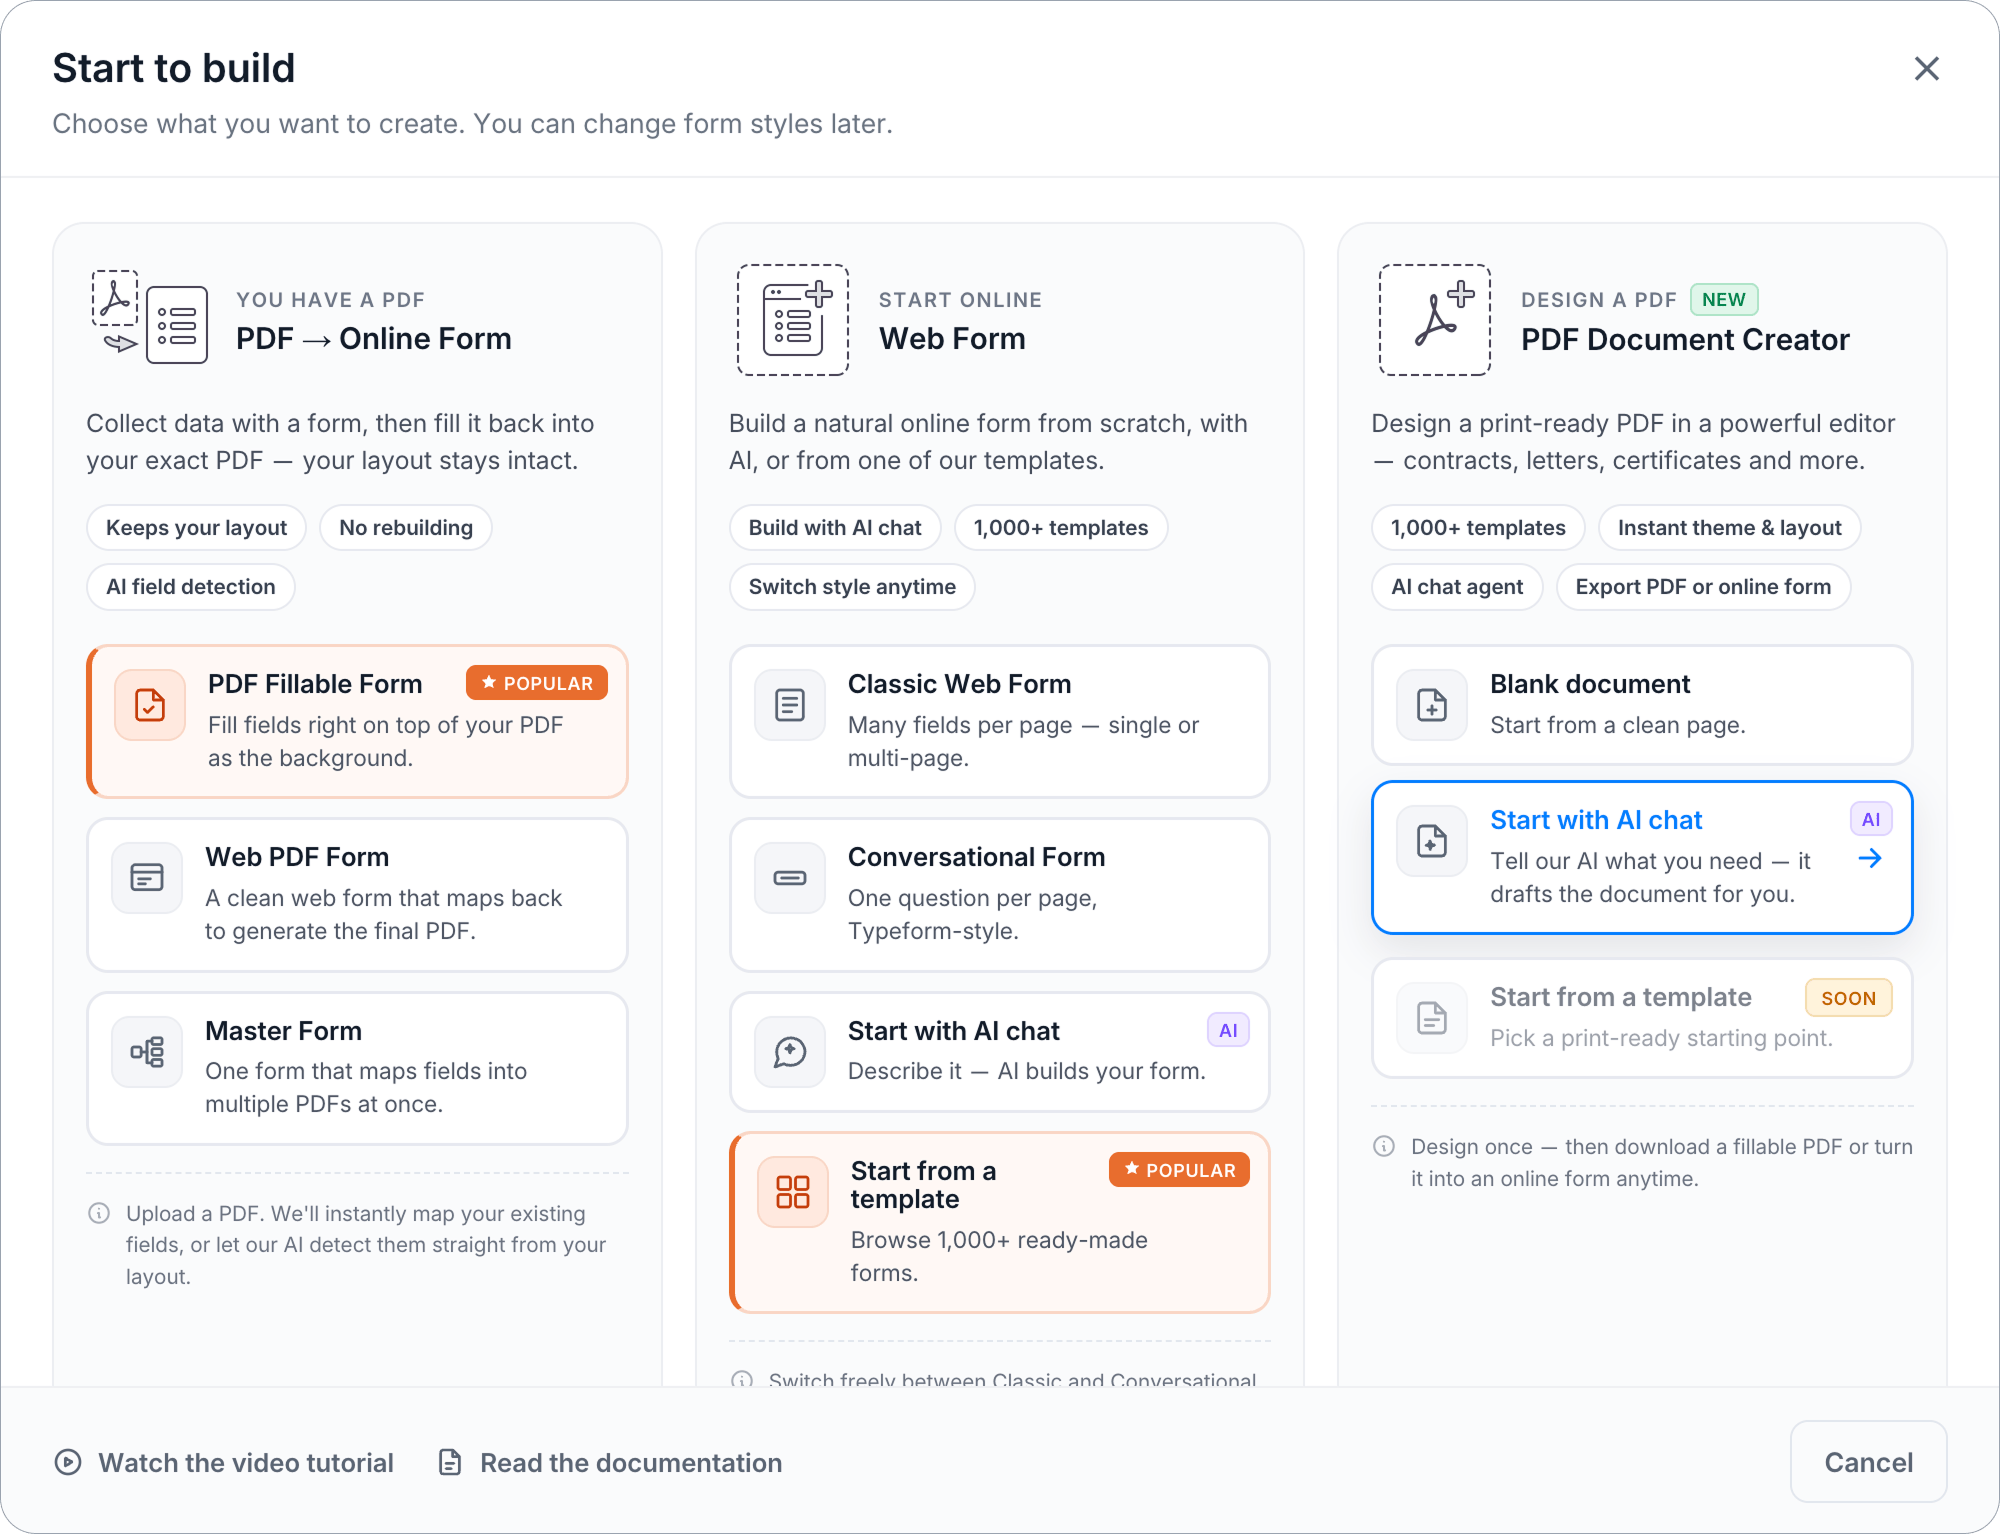
In the Chat panel, describe your document in plain language. Some examples:
“A freelance service agreement with payment terms, scope of work, and a signature block for both parties”
“A one-page employee onboarding checklist with sections for personal information, equipment requests, and policy acknowledgment”
“A client intake form for a legal practice — name, contact details, case type, referral source, and a consent signature”
The AI does not make you wait. As soon as you send the prompt, the document starts building itself on the canvas — widgets appear section by section, in real time, so it feels more like watching something being assembled than waiting for a result. Most documents are ready in under a minute.
To give a concrete example: the prompt “A freelance service agreement with payment terms, scope of work, and a signature block for both parties” produced a complete three-page contract with 31 widgets — an agreement overview block, a side-by-side Client & Freelancer info section, a detailed Scope of Work (description, deliverables, dates, revisions), Payment Terms (fee, deposit, schedule, late payment policy, expenses), Terms & Conditions (confidentiality, IP, termination), and a dual signature block with printed name, title, and date fields for both parties — all from one sentence.
The document is a starting point, not a finished product. Adjust anything that does not fit, or keep prompting: the AI accepts follow-up instructions after the initial generation.
What the AI actually understands. It does not just add fields — it reads context. When asked to unify the style of selected components to match the rest of the page, it adjusted colors, fonts, and borders, and also updated a section title that no longer made sense given the new position (“Contact Us” became “Description” automatically). That kind of contextual judgment is what separates this from a basic drag-and-drop tool.
Prompting tips:
- Include the document type, purpose, and any specific sections you want
- Mention layout preferences: “one page”, “formal tone”, “table for itemized costs”
- After the initial generation, use follow-up prompts to modify specific parts: “Make the header more minimal” or “Add a field for the client’s company name”
- To target specific components, select them on the canvas first. The AI reads the intent behind your instruction: for precise edits (changing a field’s border, renaming a label), it modifies only what is selected. For style or theme instructions (“change the header to warm color”), it updates the selected component and matches the rest of the document to keep everything consistent. You get surgical control when you need it, and automatic consistency when you ask for it.
Step 2: Review and refine the design
Once the AI generates the document, review it on the canvas.
Move and resize components. Drag the grid handle (the blue square in the top-left corner of any selected component) to reposition it. Drag any corner or edge handle to resize — all elements scale proportionally, so text and fields stay in the right position relative to the container.
Add components manually. The left sidebar contains individual component icons — text blocks, images, dividers, tables, signature fields, and more. Hover any icon to see its name and a “Drag to add” prompt. Both dragging and clicking work; the interaction is smooth enough that it does not interrupt the design flow.
Duplicate, group, and delete. Use Cmd/Ctrl + D to duplicate any component, Cmd/Ctrl + G to group multiple components, and the Delete key to remove them. Right-click anywhere on the canvas for a full context menu.
Manage pages. Content flows automatically to the next page when it exceeds the page boundary — no manual page management needed for most documents. To force a break at a specific point (for example, before a signature section), add a Page break from the fields panel.
Step 3: Style it without starting from scratch
The structure is there — now make it look right. Two tools handle most of the styling work: the Widgets Library and the Theme system.
Use the Widgets Library
The Widgets Library — accessible from the icon at the bottom of the left sidebar — contains pre-styled variants of every widget type. Text inputs alone come in 11 styles: Classic/Standard, Horizontal Label, Modern/Material, Shadow, three Floating Label variants, Large Rounded, Multiline, Date, and Time. Section headers offer 8 styles, including a full-width image background banner.
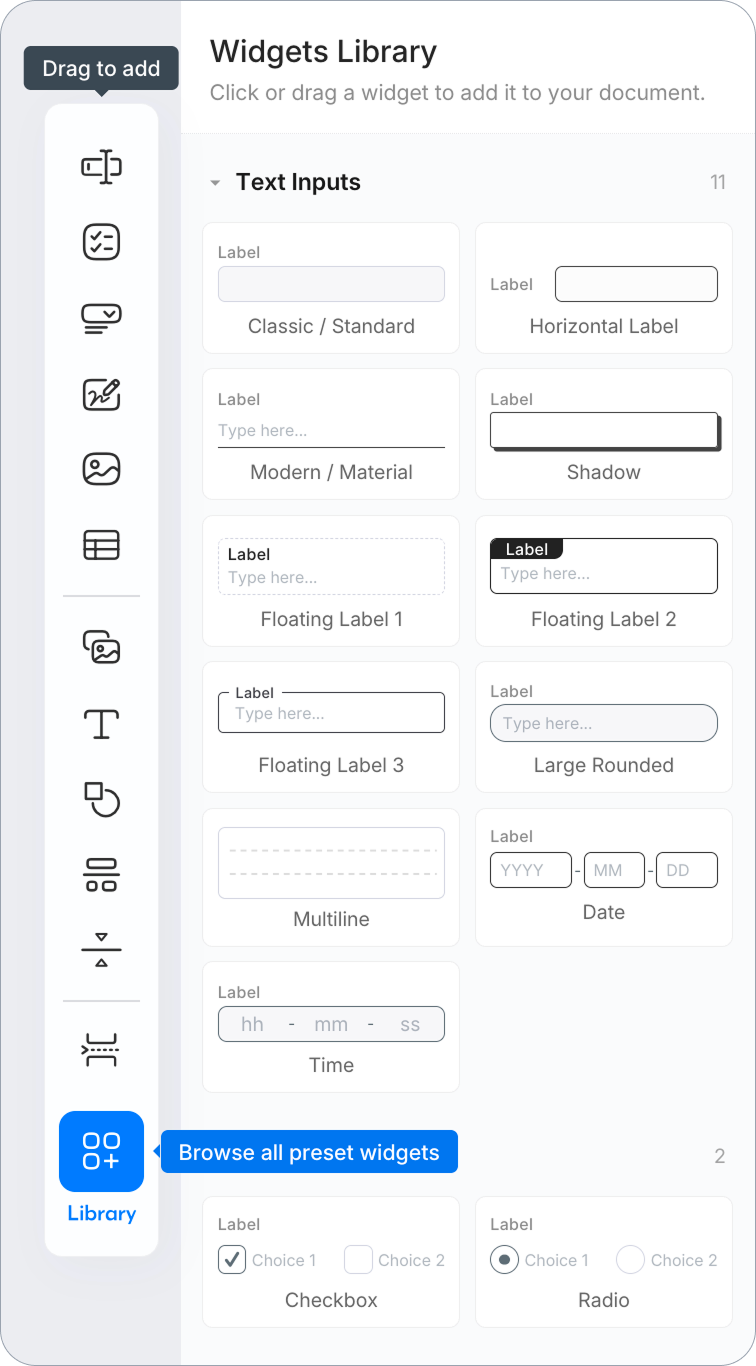
Two details make browsing faster than it sounds. First, hovering any thumbnail shows a short description of what makes that style distinct — “Classic / Standard” shows “Label above, full border, rounded corners”, so you know exactly what you are getting before clicking. Second, dragging a widget out of the library shows a live preview card that follows your cursor to the canvas, so you can see where it will land before you let go.
The practical effect: if the AI generated a widget that looks close to what you want but not quite right, you can swap it for a pre-styled variant in one drag. No CSS, no border radius sliders, no guesswork.
Apply a theme
Open the Theme tab and hover any option — the canvas responds immediately, repainting the entire document before you click anything. There is no loading state, no delay. Move your cursor from theme to theme and the document keeps up. It is the fastest way to find the right look because you are previewing on your actual content, not a generic sample. Themes are grouped into five families: Default, Professional (Black, Blue, Grey, Red), Bold (Indigo, Emerald, Rose, Amber), Classic (Navy, Charcoal, Burgundy, Forest), and Pastel (Lavender, Peach, Mint, Sky).
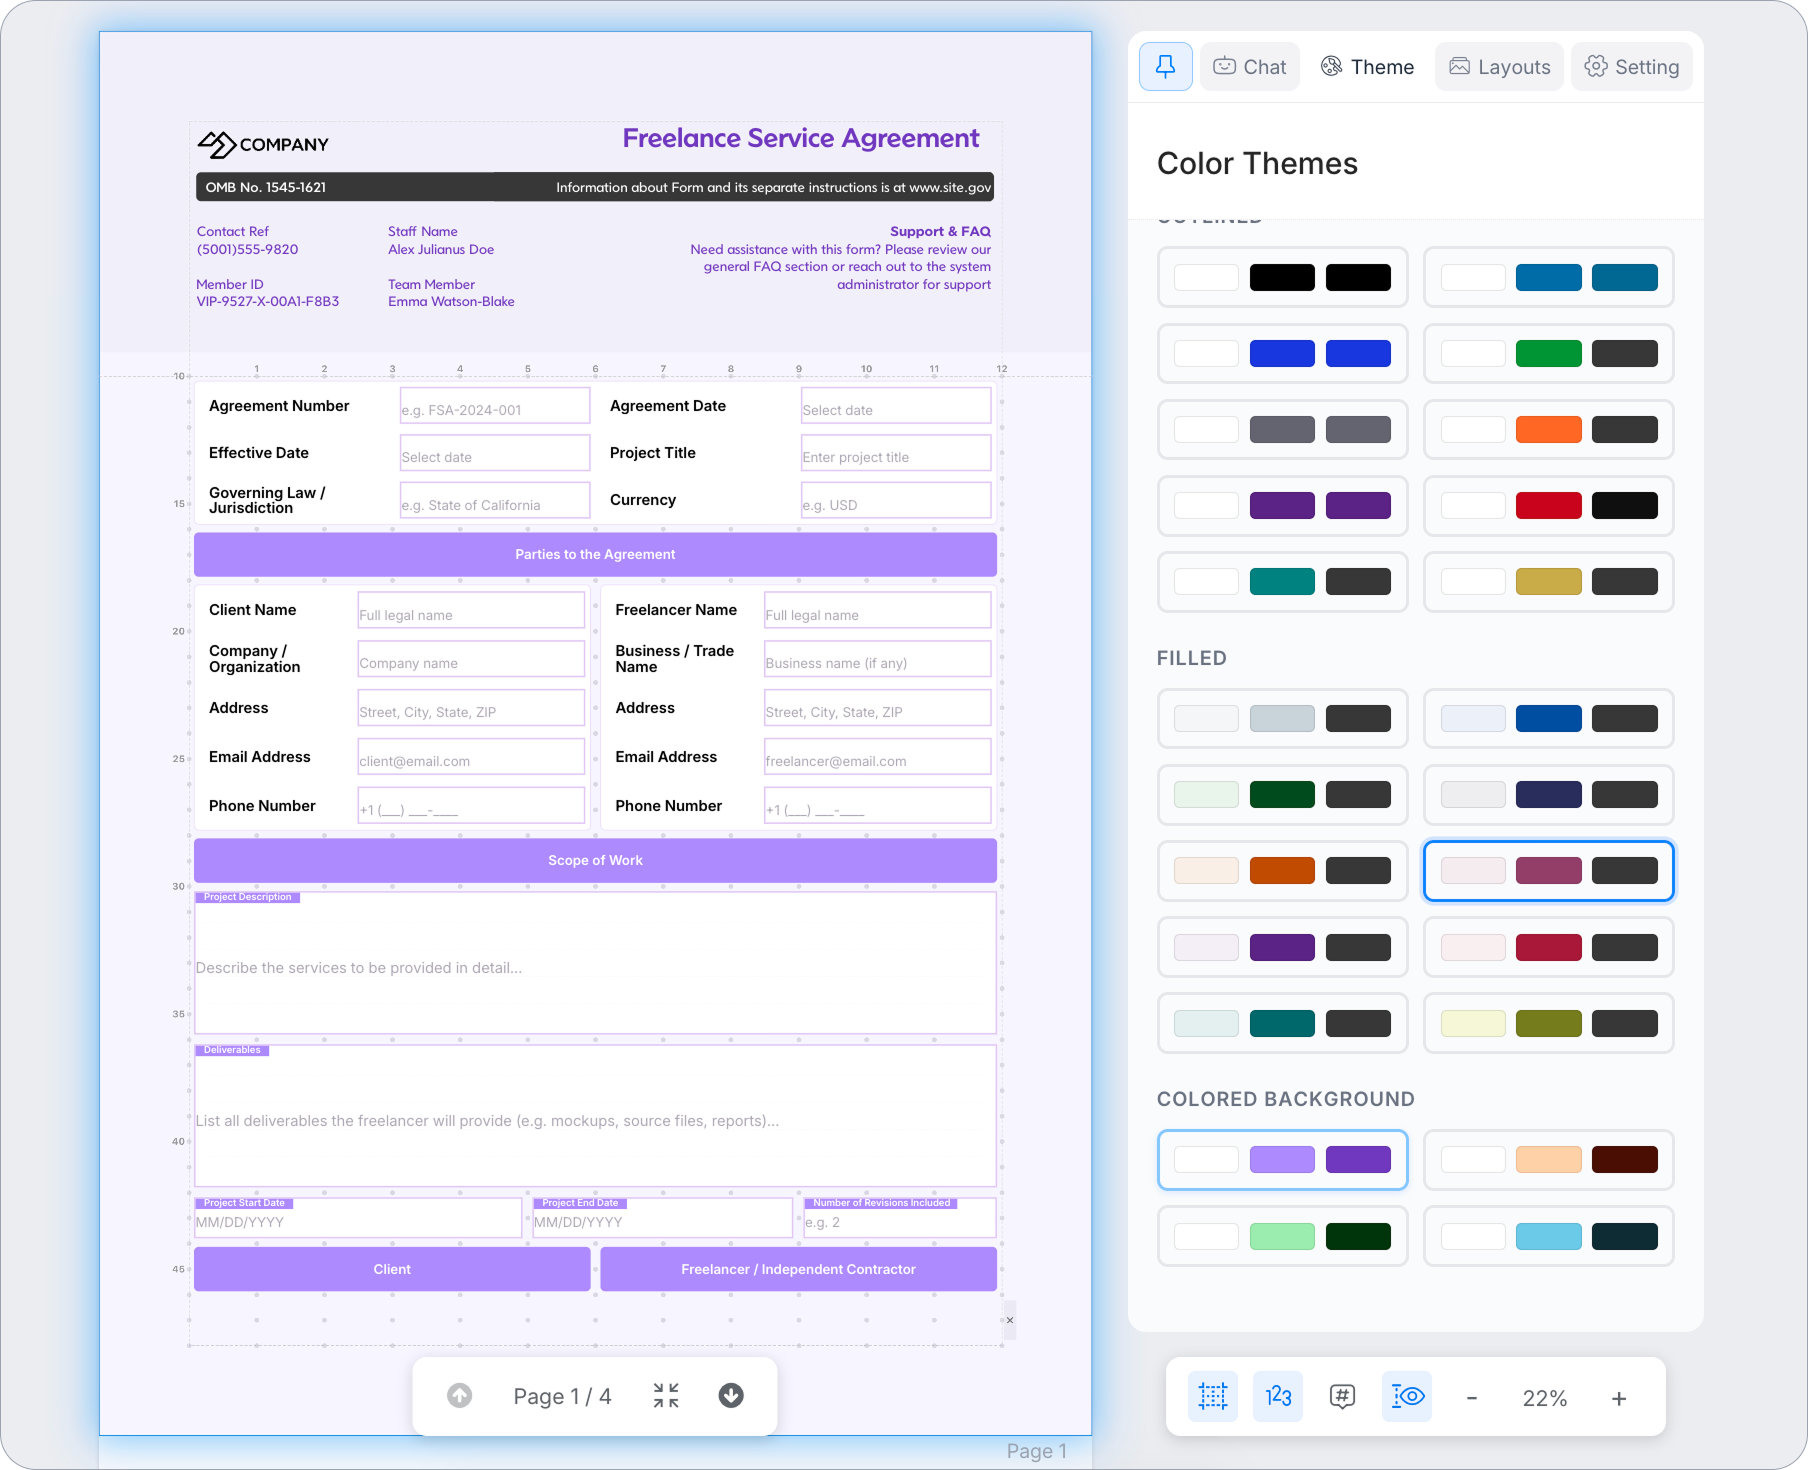
For brand-precise work, click Customize to fine-tune individual color tokens — page background, text colors, border colors — each one separately. Changes apply instantly. When the theme is ready, click Share to Team to make it available across your workspace. Every document your team creates will use the same palette without anyone needing to remember the hex codes. Click Reset Colors to restore the original values at any time.
Step 4: Convert to an online form
When the design is complete, click Make Online Form in the top navigation bar. A dialog appears asking you to choose a conversion path.
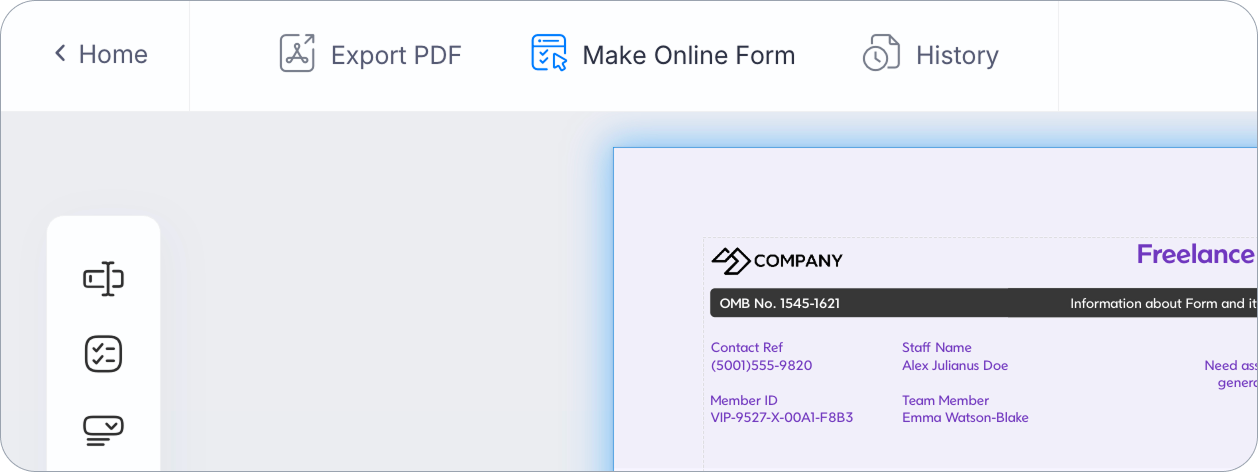
Choose a conversion path:
| Path | What it looks like | Best for |
|---|---|---|
| PDF Fillable Form | Your PDF design is the background; fields are interactive overlays | Contracts, agreements, and any document where the PDF layout must be preserved in the signed output |
| Web PDF Form | A clean web form, optimized for mobile; submitting it generates a PDF matching your original layout | When the filling experience matters more than the PDF appearance |
For a freelance agreement or contract — where the signed PDF output needs to look exactly like the designed document — PDF Fillable Form is the right choice. The conversion produces a browser-based form your recipient can open and fill in without any software, and submitting it generates the completed PDF automatically.
After choosing a path, configure each field:
- Required — prevents submission without completion
- Read-only on Form — shows pre-filled content the respondent cannot edit
- Hidden on Form — carries data without displaying it to the respondent
- Logics — show or hide fields based on other field values
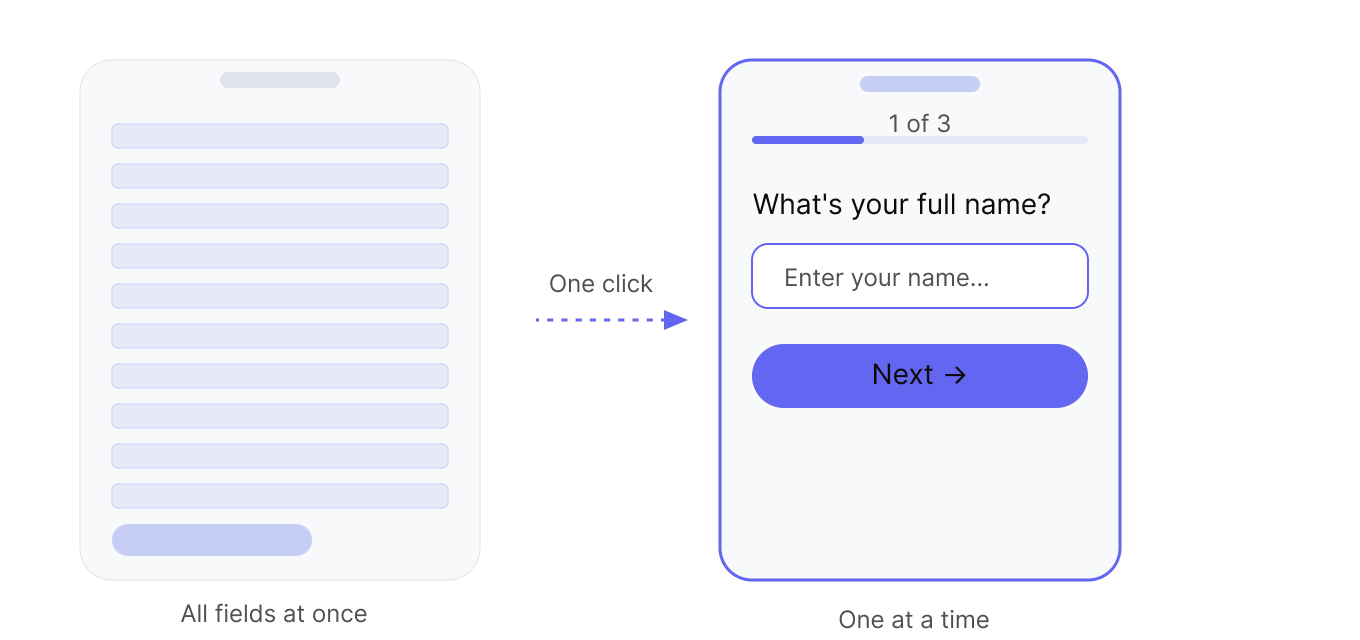
If the converted form has many fields — a long intake document, for example — switch it to Conversational mode with one click. The same fields are presented one at a time, which reduces overwhelm and improves completion rates on mobile without any rebuilding.
Step 5: Collect signatures
In the form editor, add a Signature field to any section that requires a signature. Then send the form through an invitation or workflow step with the Signature Certificate turned on. The certificate records the consent notice, signer details, SHA-256 fingerprint of the signed PDF and a tamper-evident event timeline. Forms created before the September 2026 certificate upgrade also require Collected to Signature Certificate on the Signature field.
To send the form to specific people:
- Share a link — publish the form and send the URL directly
- Pre-filled invitation — use the invitation feature to send a link with the recipient’s name and other details already filled in
- Bulk invitations — upload a CSV to generate pre-filled links for multiple recipients at once
When the recipient submits, PlatoForms generates the completed PDF automatically. It appears in your Submissions dashboard, ready to download.
To route the signed document to different recipients based on form answers — for example, sending one copy to the client and a different notification to your internal team — use Logic-based Email Notifications. Set up conditional routing rules so each party automatically receives the right version without manual forwarding.
Step 6: Export the signed PDF
From the Submissions dashboard, open any submission to download the completed, signed PDF. The document reflects the original design — your layout, branding, and content — with the submitted field values and signature filled in.
If you need to archive or distribute the signed document:
- Download directly from the Submissions dashboard
- Set up automatic cloud storage sync (Google Drive, Dropbox, OneDrive, or Box) to archive every signed submission automatically
- Configure email notifications to send the signed PDF to the respondent and your team on submission
If a single submission needs to generate multiple distinct documents — for example, a client contract, an internal record copy, and a payment receipt — use Master Forms. Design each document separately in PDF Document Creator, then link them to a single Master Form. One submission fills all three simultaneously.
For documents with retention requirements — legal contracts (often 6–7 years), healthcare consent forms (HIPAA requires 6 years), or HR records — configure a data retention policy at the account level. Submission data is automatically deleted after the period you set, or kept indefinitely if the workflow requires it.
For healthcare or legal workflows requiring compliance documentation, see the Trust Center for PlatoForms’ data handling and signature certificate standards.
Watch the tutorial below for a quick walkthrough:
What this workflow replaces
| Old workflow | With PDF Document Creator |
|---|---|
| Write in Word/Google Docs → manually format → export to PDF | Describe in plain language → AI generates a designed document in seconds |
| Open Figma or Canva to design layout → export → rebuild as a form | Design and convert in the same tool; layout carries over automatically |
| Upload to Adobe Acrobat to add form fields → separate license cost | Fields added during design; no separate tool or account needed |
| Upload to DocuSign/Adobe Sign → separate account and cost | Signature collection built in |
| Download signed copy → manually file or email | Auto-download and cloud sync on submission |
| Rebuild as a form if you need to collect data online | Convert the same design to a form — no rebuilding |
The consolidation matters most for teams handling recurring documents — contracts, intake forms, agreements, checklists — where the setup cost of a multi-tool workflow compounds over time.
When to use it — and when not to
Good fit:
- Contracts, service agreements, NDAs, and other documents that need a signature
- Internal forms where the PDF output matters (HR, compliance, operations)
- Documents with a specific visual design that must be preserved in the signed output
- Teams that want consistent document branding without a dedicated designer — the Widgets Library and Theme system handles the styling
- One-off documents where rebuilding in a separate tool is not worth the time
- Healthcare providers collecting patient consent forms — enable HIPAA compliance on your team account to meet Privacy and Security Rule requirements, including encrypted storage and a signed BAA
Less ideal:
- Complex multi-step approval workflows with many reviewers — use PlatoForms Workflow for that
- High-volume data collection where document design is not the priority — a standard Web PDF Form may be faster to set up
- Documents requiring specific legal certification beyond a signature certificate
Frequently asked questions
How is this different from Canva or Google Docs?
Canva and Google Docs produce static documents — you cannot collect form data or signatures without exporting to another tool. PDF Document Creator produces a document that is also a live form: the same design can be exported as a static PDF or converted into a fillable form or online form, all within PlatoForms. The Widgets Library and Theme system gives you Canva-level design control; the form conversion gives you something Canva cannot. PlatoForms also integrates directly with Canva — see the Canva app integration for details.
Can I edit the document after the AI generates it?
Yes — the AI output is fully editable. You can move, resize, add, or delete any component. You can also continue prompting: select specific components on the canvas and send a follow-up instruction. The AI reads intent — for precise edits it modifies only what is selected; for style instructions it updates the selection and keeps the rest of the document consistent automatically.
What happens to my design when I convert to an online form?
Your layout, fields, and styling carry over automatically. For PDF Fillable Form, the PDF becomes the background and the fields become interactive overlays. For Web PDF Form, the fields are rebuilt as a web form, and submitting it generates a PDF that matches your original design.
Is the AI generation a one-time step, or can I keep prompting?
You can keep prompting at any point during the design process. Select components on the canvas to target specific parts, or leave nothing selected to modify the whole document. The AI retains context within the session, so follow-up instructions like “make the header more minimal” or “change the color scheme to something corporate” work without re-describing the whole document.
The full workflow — prompt, design, style, convert, sign, export — takes minutes for a straightforward document. For recurring document types, the setup time is a one-time cost.
Start building with PDF Document Creator →
Related reading: HIPAA-Compliant Online Forms · E-Signature Security: What Makes a Signature Legally Binding? · PDF Document Creator documentation


