Integrate with Cloud Drive
Tabs
PlatoForms smoothly works with cloud drives, letting you upload and save form submissions. Once you link your form to your cloud drive, any PDF created from a submission goes straight to your chosen cloud drive folder.
Video tutorial
Prefer a video walkthrough? Check the tutorial below:
Prerequisites
-
You need an active cloud drive account.
NotePlatoForms currently supports Dropbox, Box, OneDrive, and Google Drive.
-
Before using this feature, it’s a good idea to create a folder in your cloud drive for storing form submissions.
-
It’s also recommended to log in to your cloud drive account in a web browser beforehand.
Integrate with cloud drive
Connect with your cloud drive
The steps described below apply to all the cloud drive applications supported by PlatoForms.
-
Go to the Dashboard and select your desired form.
-
Click the Settings (gear) button at the top right of the form, then click Cloud Drive.

-
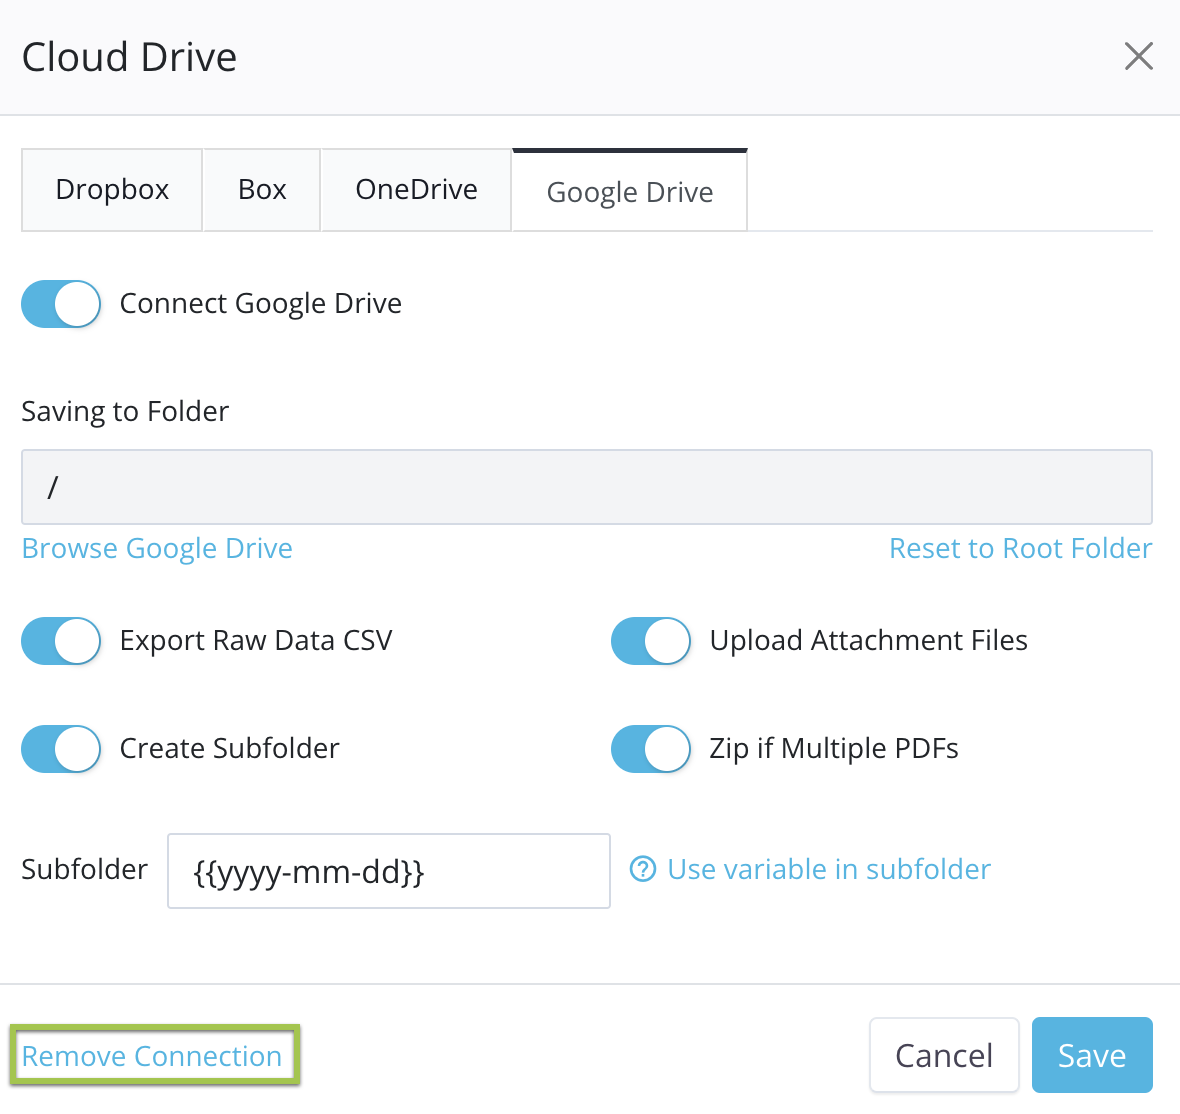
In the Cloud Drive window, select the tab for your preferred cloud drive, and switch on the Connect to option.
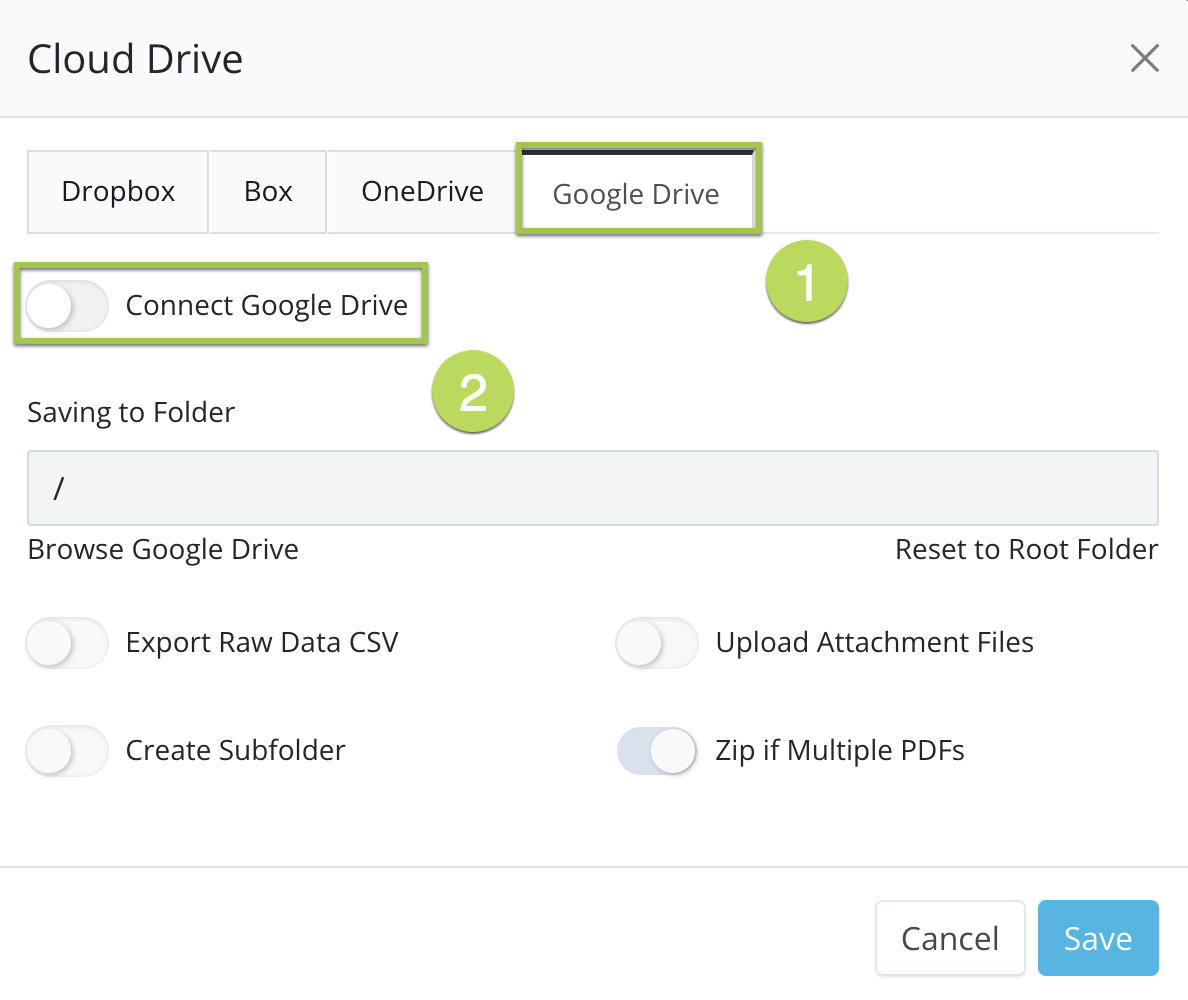
You’ll be asked to grant permissions for PlatoForms to access your cloud drive account. Follow the instructions to authorize access.
Customize integration settings
-
After successfully connecting your account, you can set up integration settings like:
-
Select a storage folder and creating a subfolder, see Set up the storage folder.
-
Name your subfolder using custom fields.
-
Enable or disable upload and export options as needed.
-
-
Click Save to save your settings.
Set up your storage folder
Choose a storage spot
When you’re setting up your integration settings, you can pick a storage folder and make a subfolder.
-
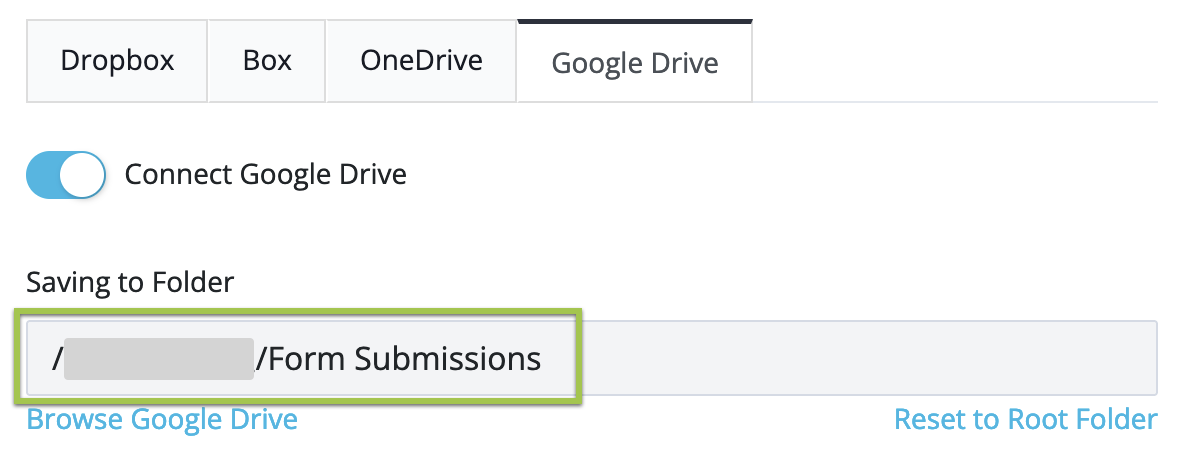
Click Browse to choose a folder from your cloud drive account.
 Note
NoteYou might need to grant access one more time. Click Browse again to see your cloud drive folders.
-
Select the folder you made for uploading submissions.
You’ll see the folder’s location in the Saving to Folder box.
Create a new subfolder
-
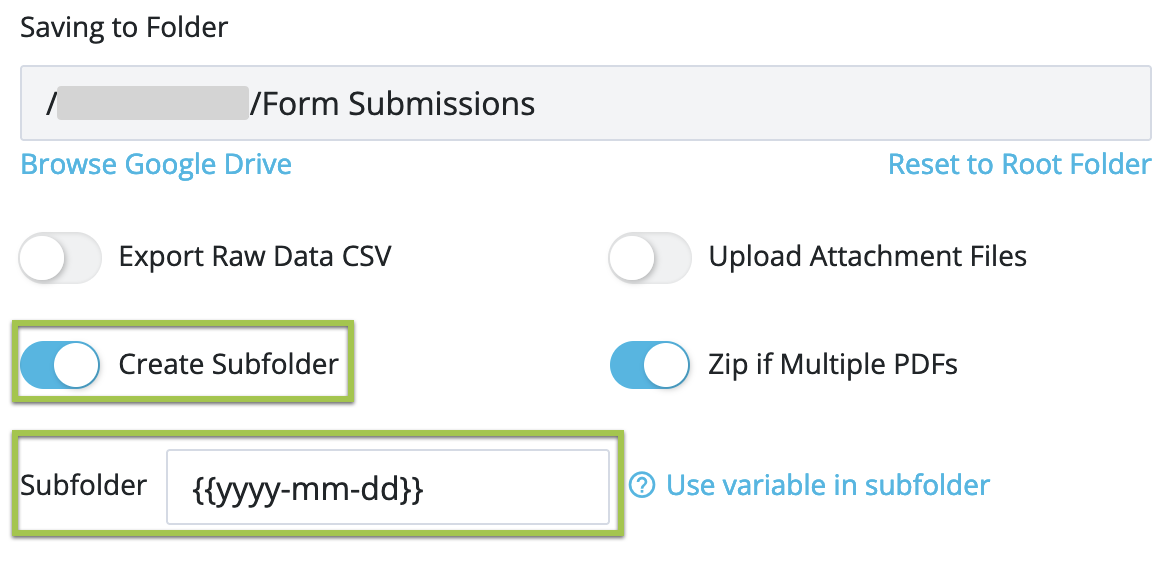
Switch on the Create Subfolder option.
-
In the Subfolder input box, enter your custom field to give a name to your subfolder.
 Note
NoteTo know what custom fields are available, check out the Name subfolder with custom fields section.
-
Click Save to save your settings.
Name subfolder with custom fields
You can include custom fields in the name of a subfolder, and when the subfolder is created, these custom fields will be replaced with their actual values.
Currently, the custom fields that are supported include:
-
{{index}}
A unique index of this form submission. Use this custom field if you prefer using a unique value as the subfolder name. -
{{yyyy-mm-dd}}The “file creation date”. It can be in any format you prefer. If you want to use dates as subfolder names, just paste this code in the subfolder setting section. Here’s an example: You can use formats like
{{mm.dd.yyyy}}or{{dd/mm/yy}}. In these formats,ddrepresents the date,mmstands for the month, andyyyyor yy represents the year. -
{{data.fidXX}}Use the data in the form submission to name your subfolder.
fidXXstands for the Field ID. You can locate this ID in the form builder.NoteKeep in mind that the form editor displays only the ID numbers, so you should add
fidbefore the number to reference the field correctly, likefid3.
-
{{form_name}}Use this to organize your subfolder with the same name as your online form. For instance, if your online form is named “sample.pdf”, your subfolder will be named “sample_pdf.”
-
{{tracking_code}}A code to track the submission in the submission page.

-
{{revision}}This custom field displays submission revisions, starting at
1and increasing with each edit and resubmission. You can check the submission revisions from Action dropdown on the Submissions page.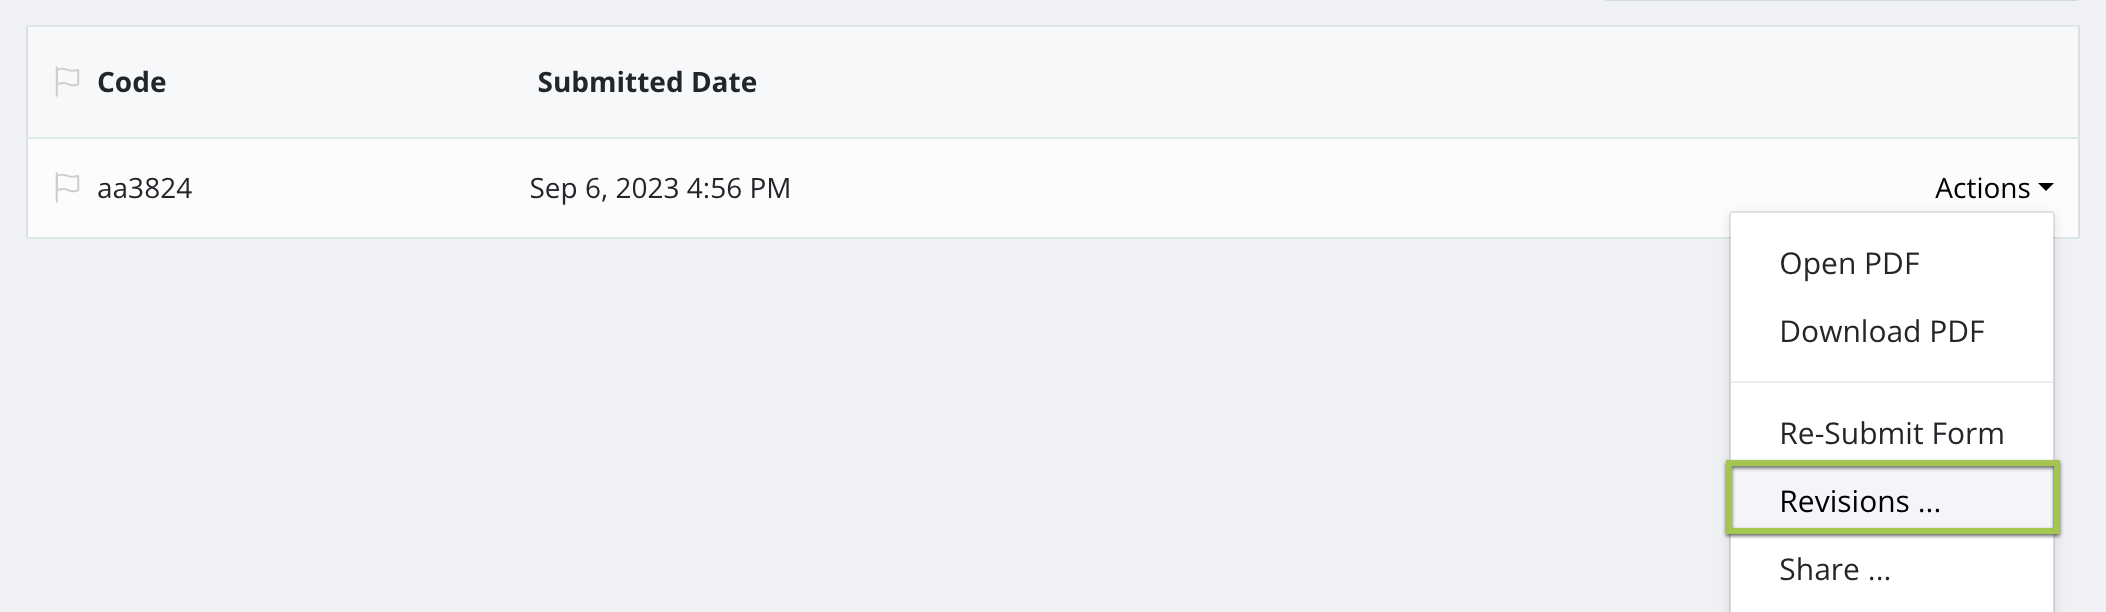
Remove connection
To remove the connection to your cloud drive, go to the Cloud Drive window you set up connection, and click Remove Connection > Confirm.
Here’s another video tutorial: