Configure form notifications
Tabs
When someone fills out a form, PlatoForms will send you a Dashboard notification and an email notification to the email addresses or team members you specify. You can adjust the email notification to your preferences.
If you haven’t specified any email addresses or a team to receive notifications, there will be no email or Dashboard notifications. Still, you can view submitted forms on the Submissions page.
Video tutorial
Not a fan of text? Check out these video tutorials instead!
Access Notification settings
-
On the Dashboard, hover over the desired form.
-
Click the Settings (gear) button on the top left corner, and then select Notification.

You’ll open the Notifications panel.
Customize Notification settings
In the Notifications panel, configurations include five major parts: Email From, Email To, Email Subject, Email Body and Add Customer Email for Logic (conditional routing). For detailed information on each part, refer to the chapters below.
Email From
Here are the sender details, including the sender’s Display Name (sender name) and Email From Address (sender email address). The default Display Name is Mailer, and the default Email From Address is mailer@platoforms.com.
To customize Email From details:
-
Upgrade to a paid plan.
-
In the Notifications panel, enter your custom Display Name and Email From Address.
-
Click This Email Only (High Bounces).
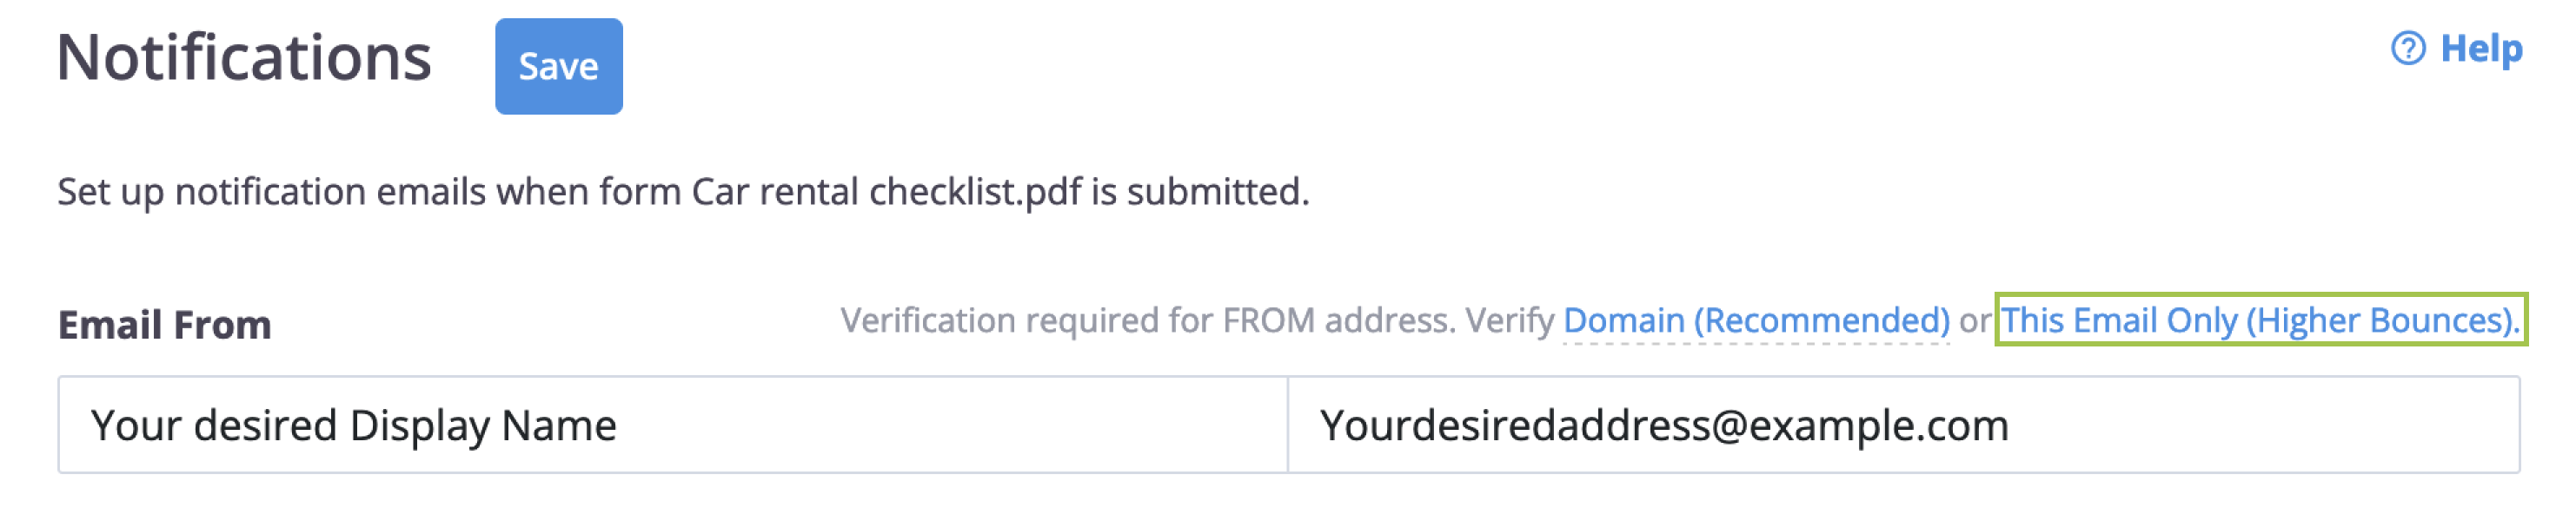
You’ll receive a verification email at the address you entered.
NoteYou can also verify the entire email domain by clicking Domain (Recommended). Refer to the Send email with custom domain section for more details.
-
Check your email inbox for the verification message and follow the instructions to complete the process.
Once verification is successful, you can use the customized Email From details to send notifications.
Notification tabs
Above the Email To section, you can manage different notification targets using tabs. By default, you have Email to Users and Email to Team Members.
You can customize the Email To, Email Subject, and Email Body under each tab to set distinct preferences for different recipients. For example:
-
Use Email to Users for external recipients (like clients).
-
Use Email to Team Members for internal team notifications.

You can click + Add Customer Email for Logic to create up to 3 additional custom tabs. These are designed for routing submissions to specific departments or recipients based on the form data. Switching between these tabs allows you to tailor the messaging for every scenario.

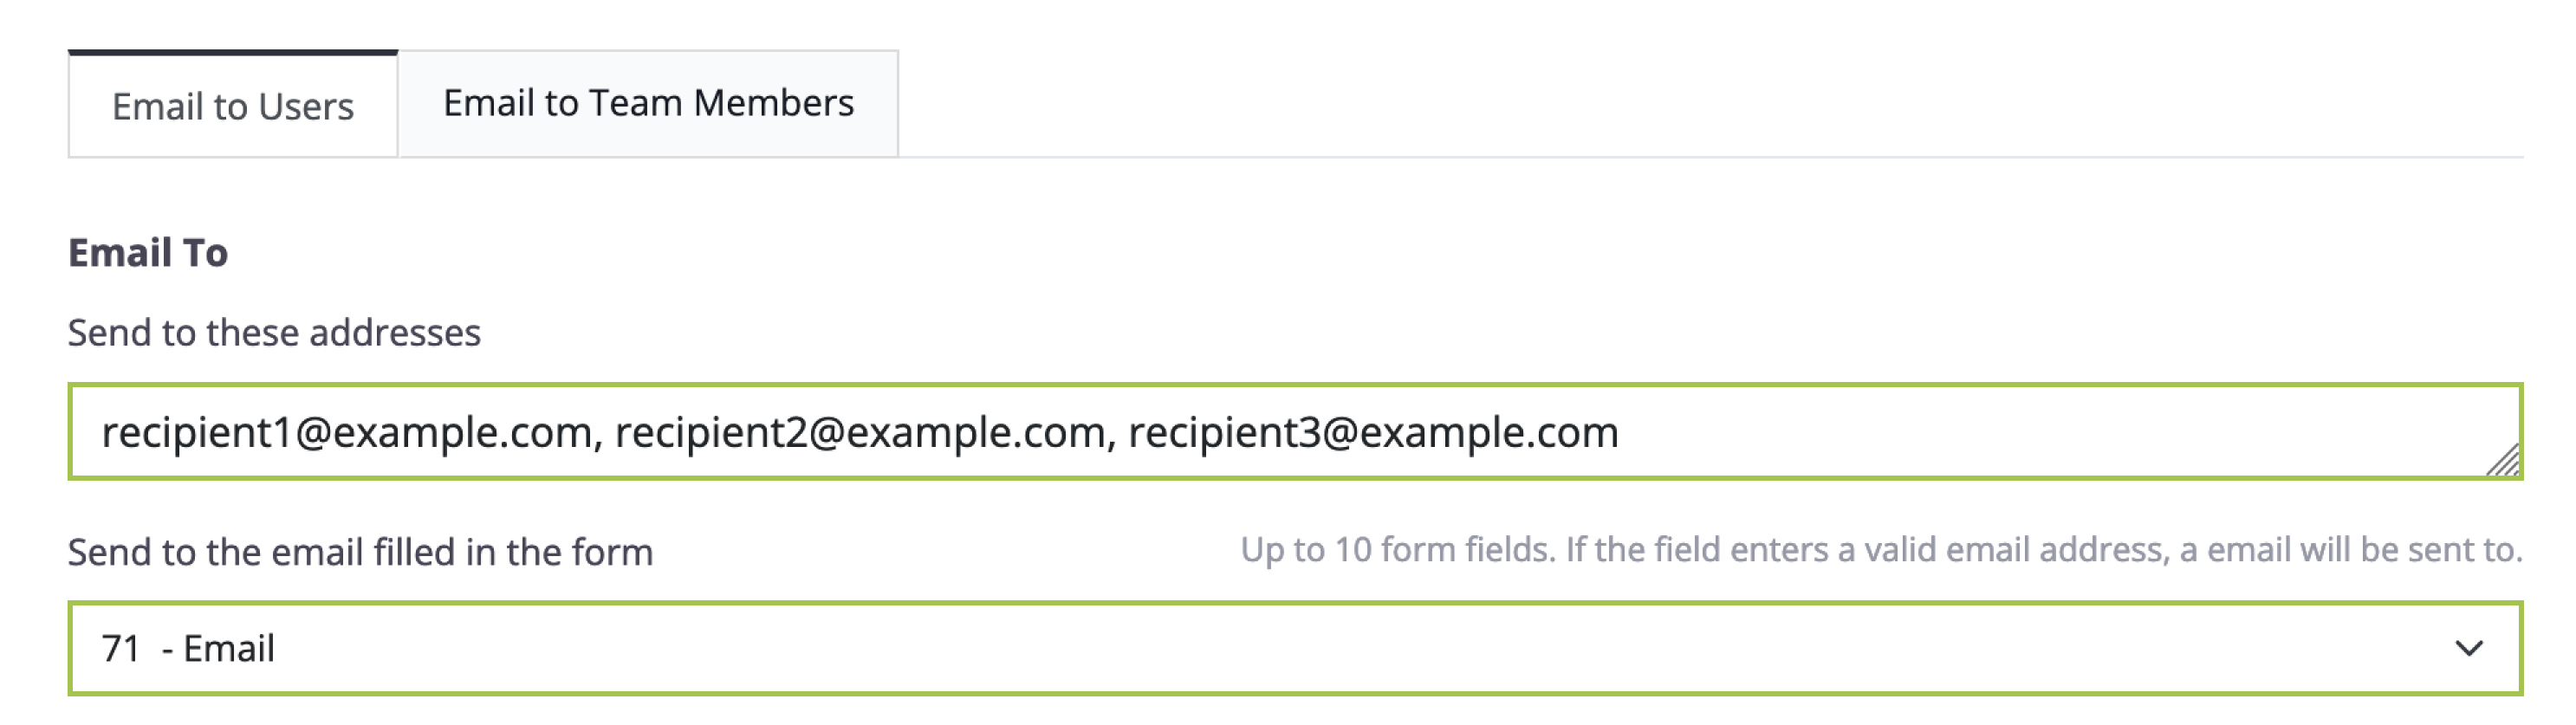
Email to Users
Under this tab, configure notifications for people on your mailing lists or those entering their emails in the form.
-
Send to these addresses: Enter a list of email addresses, not necessarily registered with PlatoForms. Separate them by commas.
-
Send to the email filled in the form: Choose up to 10 form fields. If a valid email address is filled out in any of these fields, a notification will be sent to that address.
Email to Team Members
Notify your team members with access to view submissions for this form. Switch to the Send to team members tab and toggle on the Send to team members option.
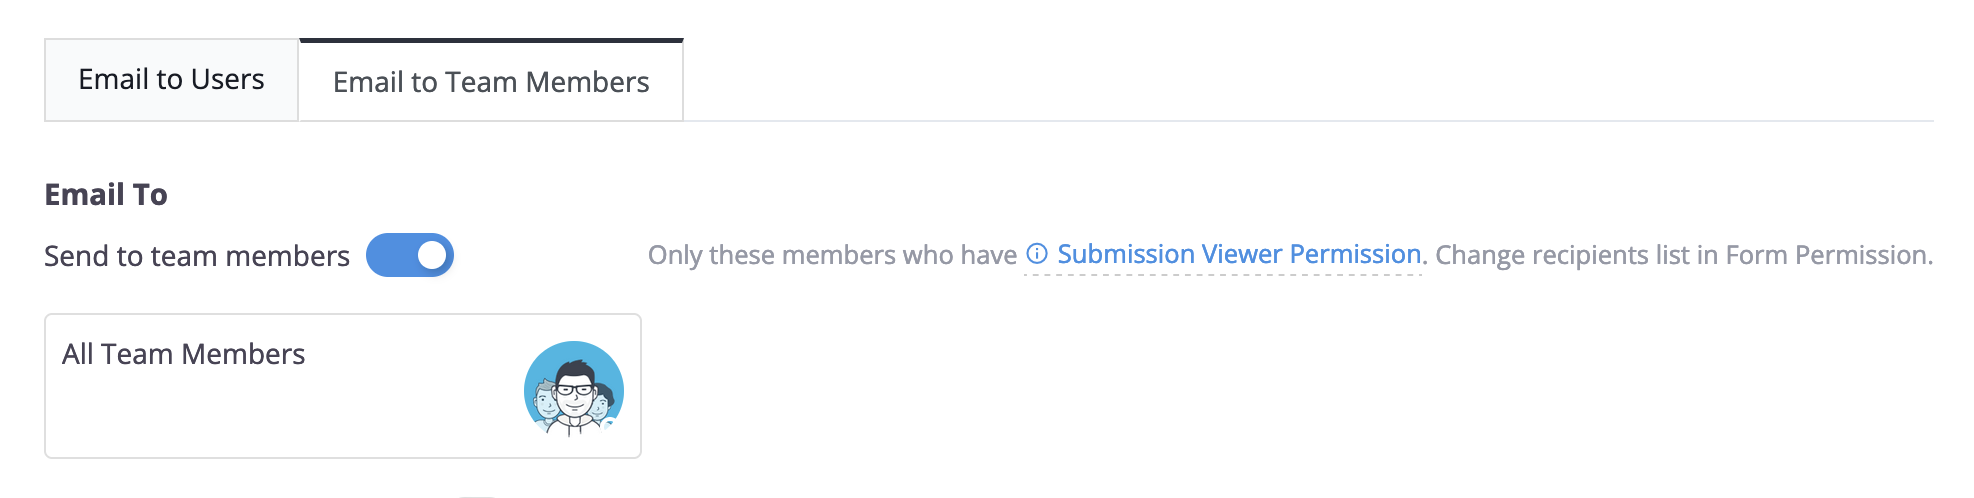
You can modify this team member list in the Permission window.
Add Customer Email for Logic
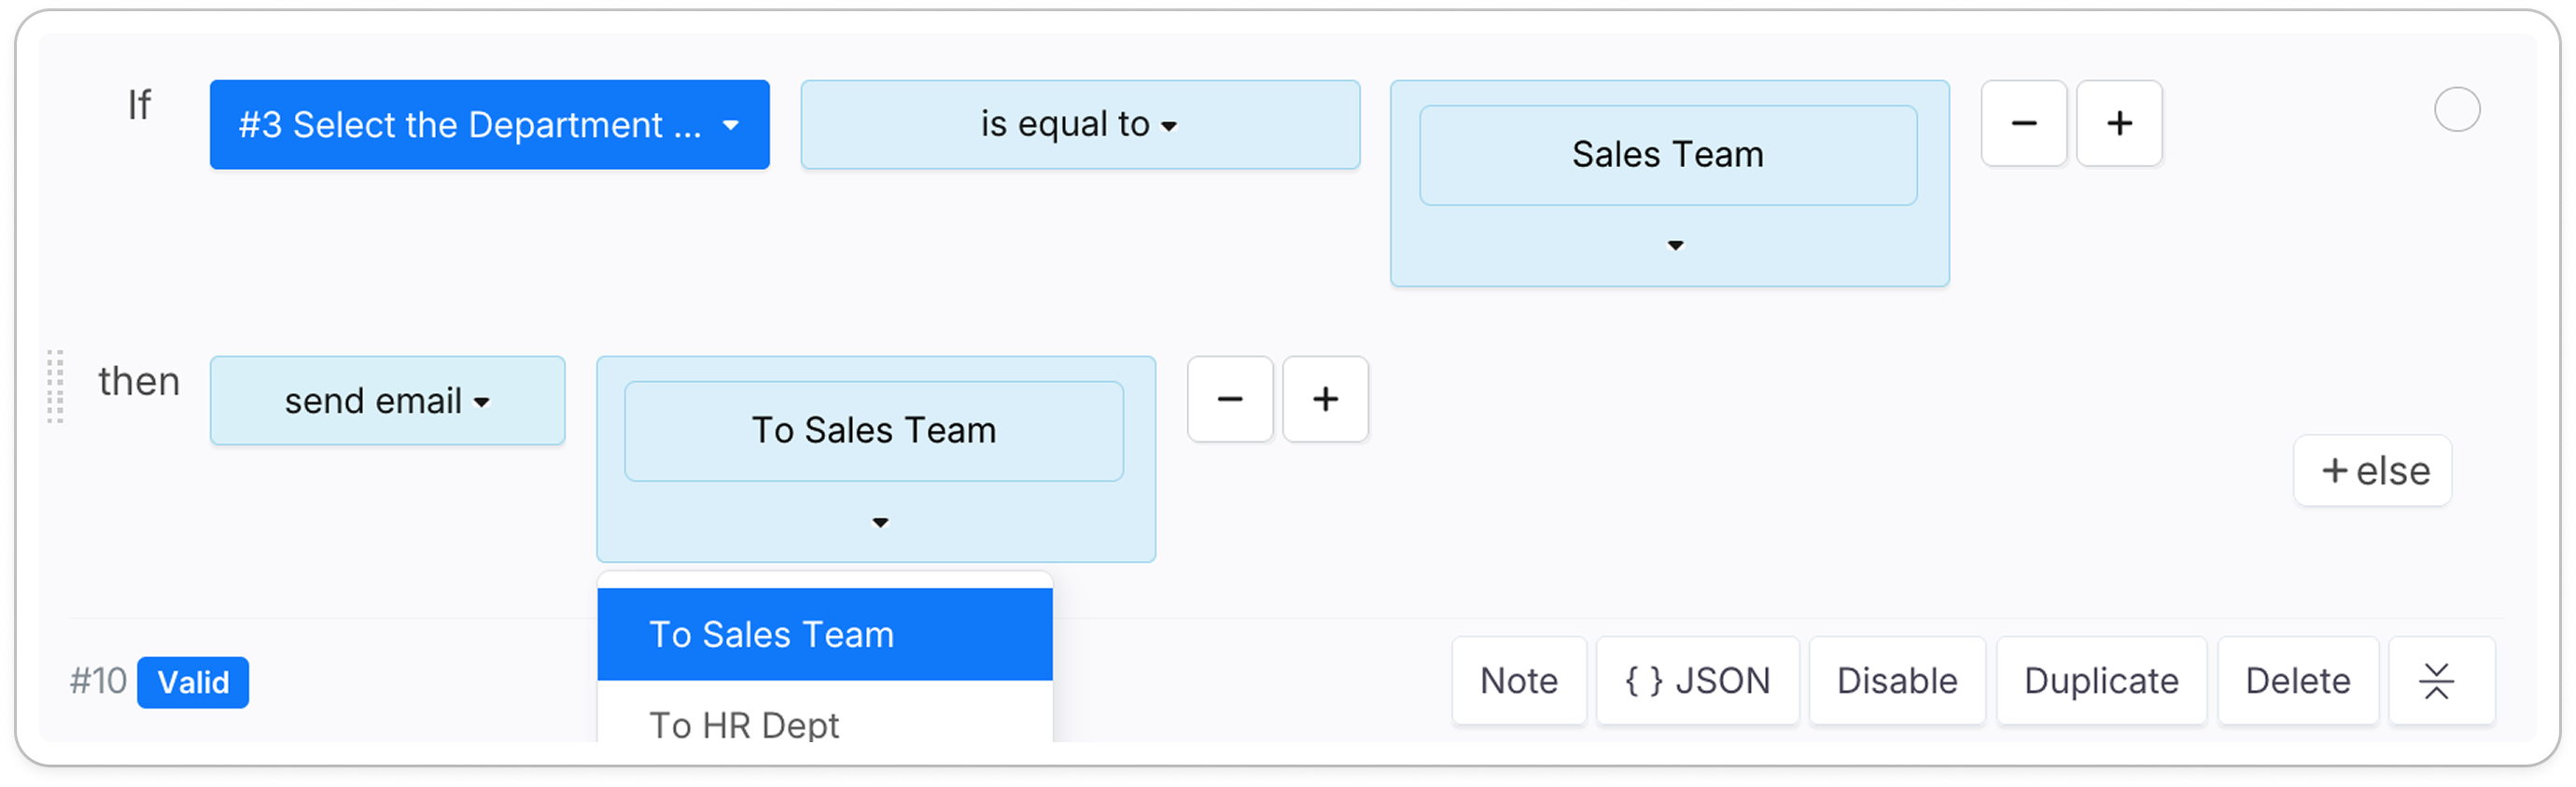
If you need to send different notifications to different people based on user input (e.g., routing to Sales vs. Support), use Add Customer Email for Logic to create custom routing targets.
-
Click + Add Customer Email for Logic to create a new tab.
-
Email Name: Give your tab a descriptive name (e.g., “To Sales Team”). This name is essential as it will appear as a target in your Logics settings.
-
Configure the Email To, Subject, and Body specifically for this routing rule.
This video tutorial might be useful:
Avoid duplicate notifications: When using logic-based routing, ensure the Email To field in the first tab (Email to Users) is blank. If it contains an address, PlatoForms will send a notification from both the default tab and your custom logic tab. Refer to our FAQ for more details.
Email Subject
The “Email Subject” section allows you to create personalized email subjects that can include a combination of a fixed title and dynamic variables. For example, you can craft subject lines like “Thank you for submitting the form - {{form_name}}” to make your email notifications both informative and tailored to the specific form being submitted.

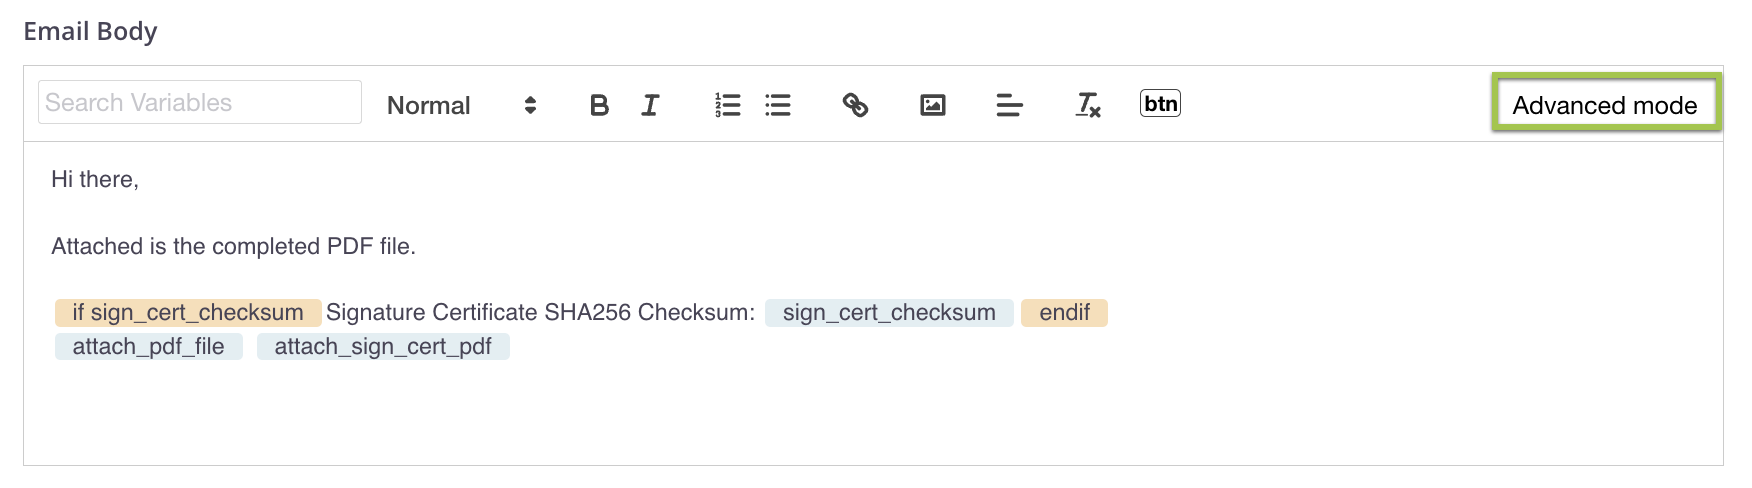
Email Body
The “Email Body” refers to the content and message that you include in the body of an email. Use the rich text editor to style your email body. You can add styles, links, images, and even variables. Switch to Advanced mode to use HTML tags and insert variables directly.
Use variables in Email Body
In your Email Body, find variables by using the Search Variables dropdown.

These variables let you include dynamic information like form text, links to shared PDFs or uploaded files, and specify whether this email should be attached to generated PDF or CSV formatted form data. This adds flexibility to your emails, going beyond static content. For more variable details, check the Available variables.
Link to conditional Logic
Creating a custom tab is the first step. To activate the routing, you must go to the Logics panel and create a rule where the Action is set to send email, then select your custom Email Name as the target.
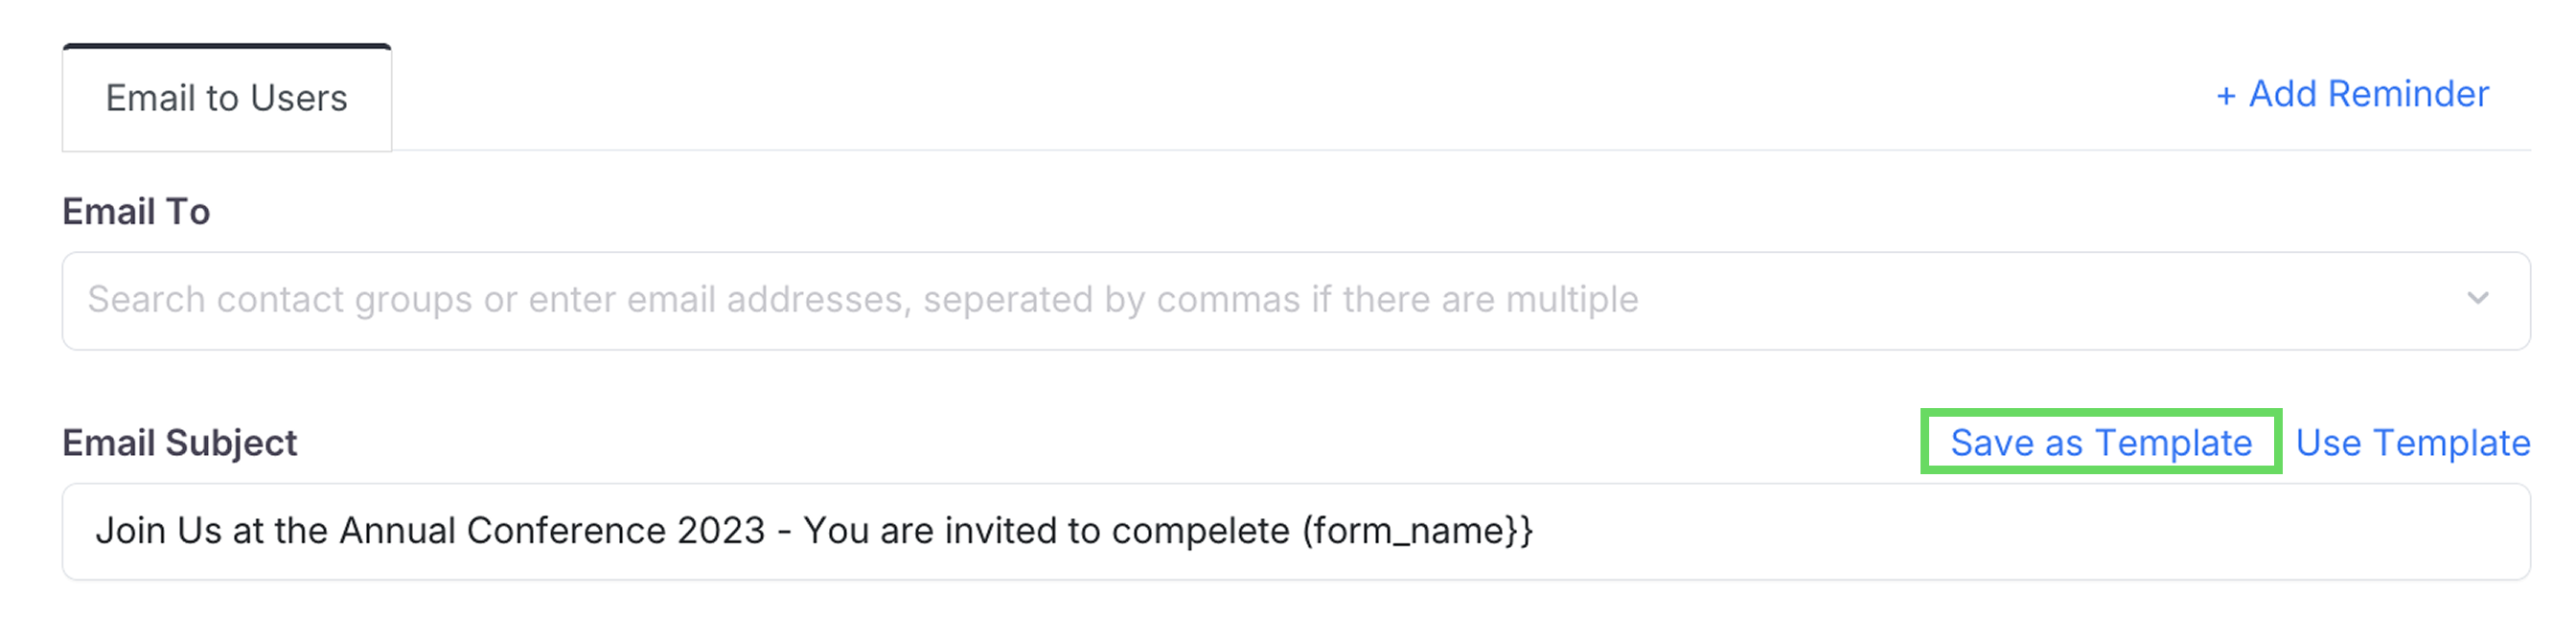
Save as template
To retain the current “Email Subject” and “Email Body” for future use:
-
After configuring all the details, select Save as Template and give it a distinctive name.
-
Once you created a new form, navigate to its Notification panel, and click Use Template.

-
From the available templates, select the desired one by name to apply the saved content.
Here is another video tutorial for your reference: