Create a Workflow
Tabs
This article provides a step-by-step guide on how to create a Workflow for efficient form processes.
Before you begin
Before you start, make sure to set up individual forms for each role involved in the form-filling process. You can create both online PDF forms and web PDF forms, and then combine them into a single Workflow. Here’s how:
-
Example
Create a car rental form tailored for the customer’s needs.
Video tutorial
Looking for a more visual guide? Watch the video tutorial below:
-
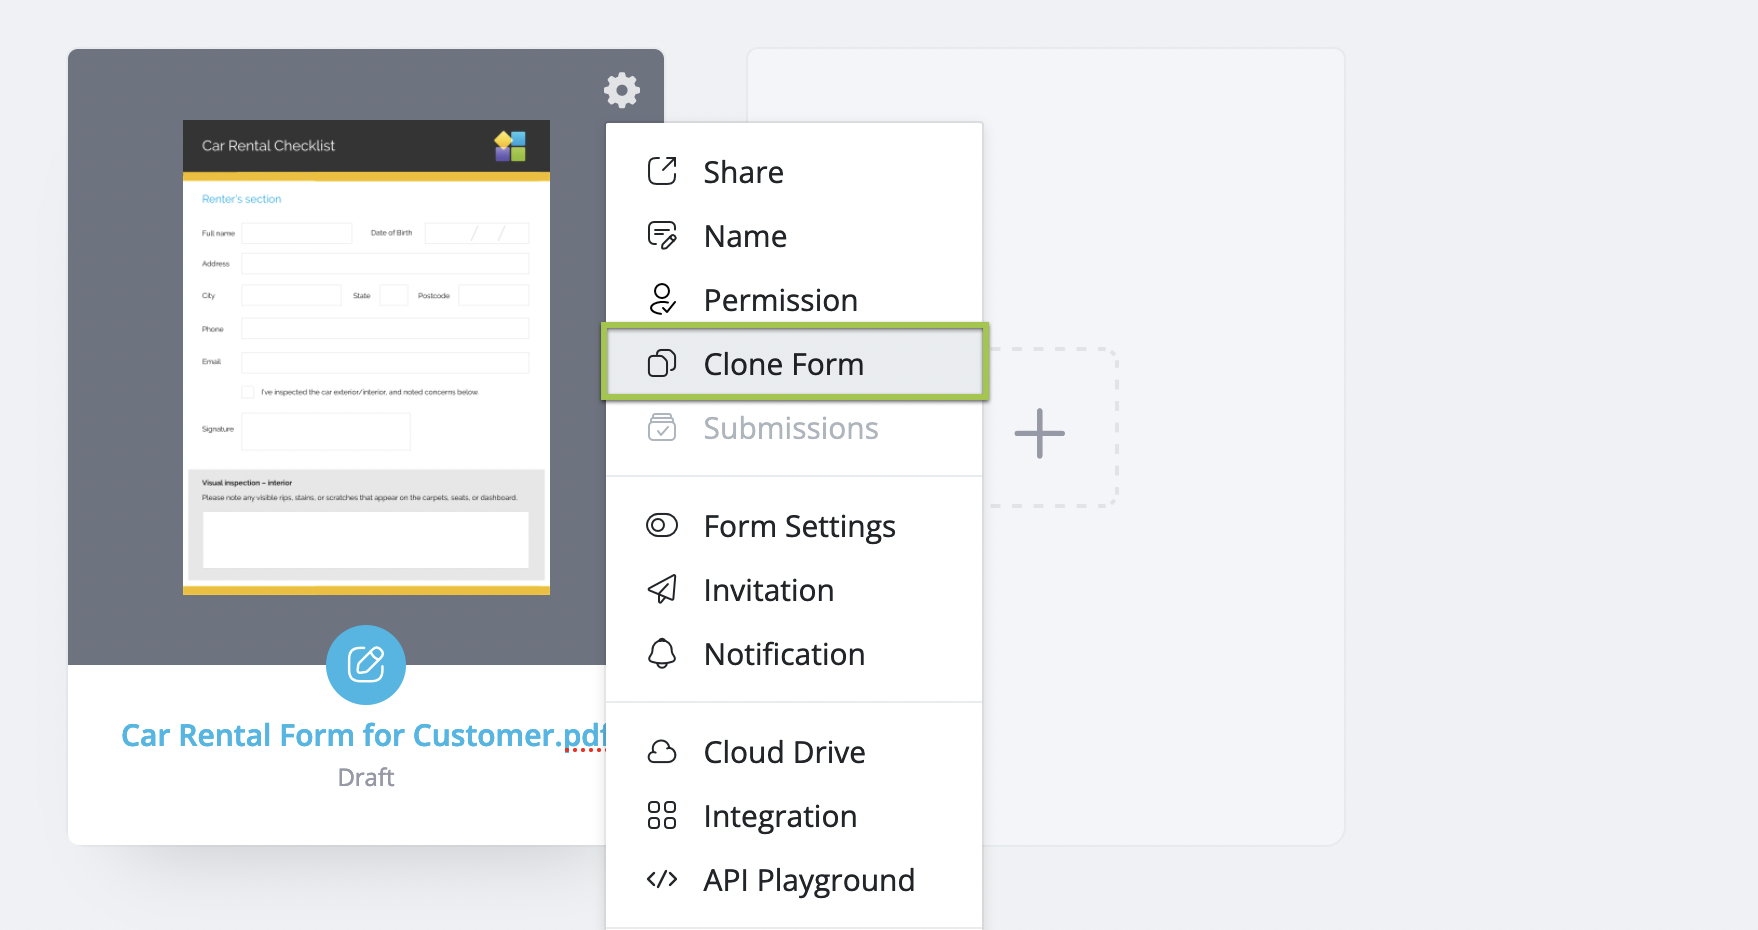
To save time, you can clone this form.
 Example
The cloned form is for the sales manager. By cloning, you copy the existing form, keeping its structure and settings the same, so you don’t have to start from scratch.
-
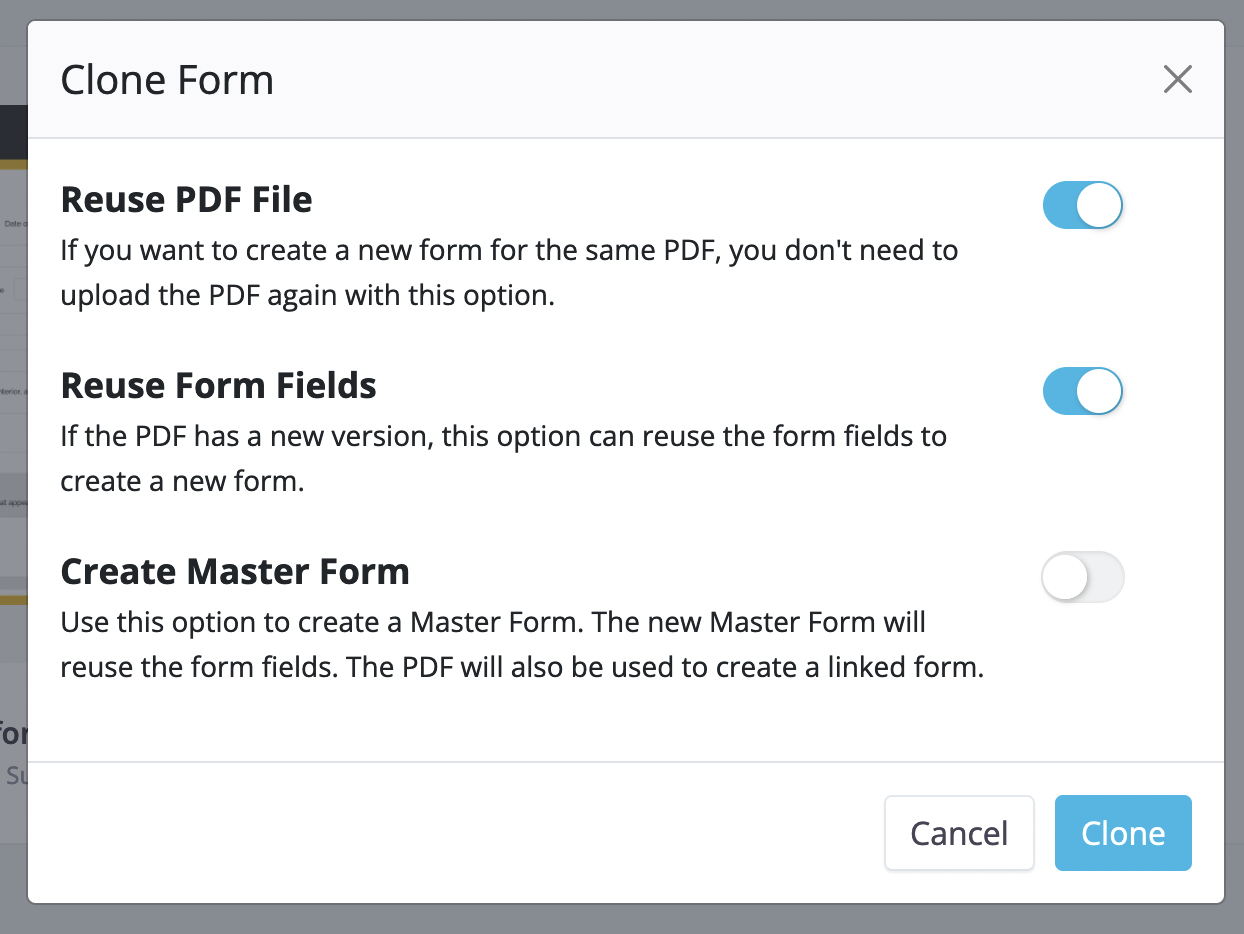
On the Clone Form window:
-
For online PDF forms: Enable Reuse PDF File to avoid re-uploading the PDF. You can also enable Reuse Form Fields to use the same fields as in the original form.
-
For web PDF forms: If you enable Keep the original form’s URL, the new form uses the URL of the original form, while the original form is given a new URL.

NoteFor more details on cloning options, see Clone forms.
-
-
Click Clone.
-
Configure relevant fields based on specific roles within each form.
Example- The initial form gathers customer details such as “Name,” “Address,” and “Telephone”.
- The second form is solely for the manager’s “Signature”.
-
Publish the forms once you have finished editing.
Add steps in the Workflow
-
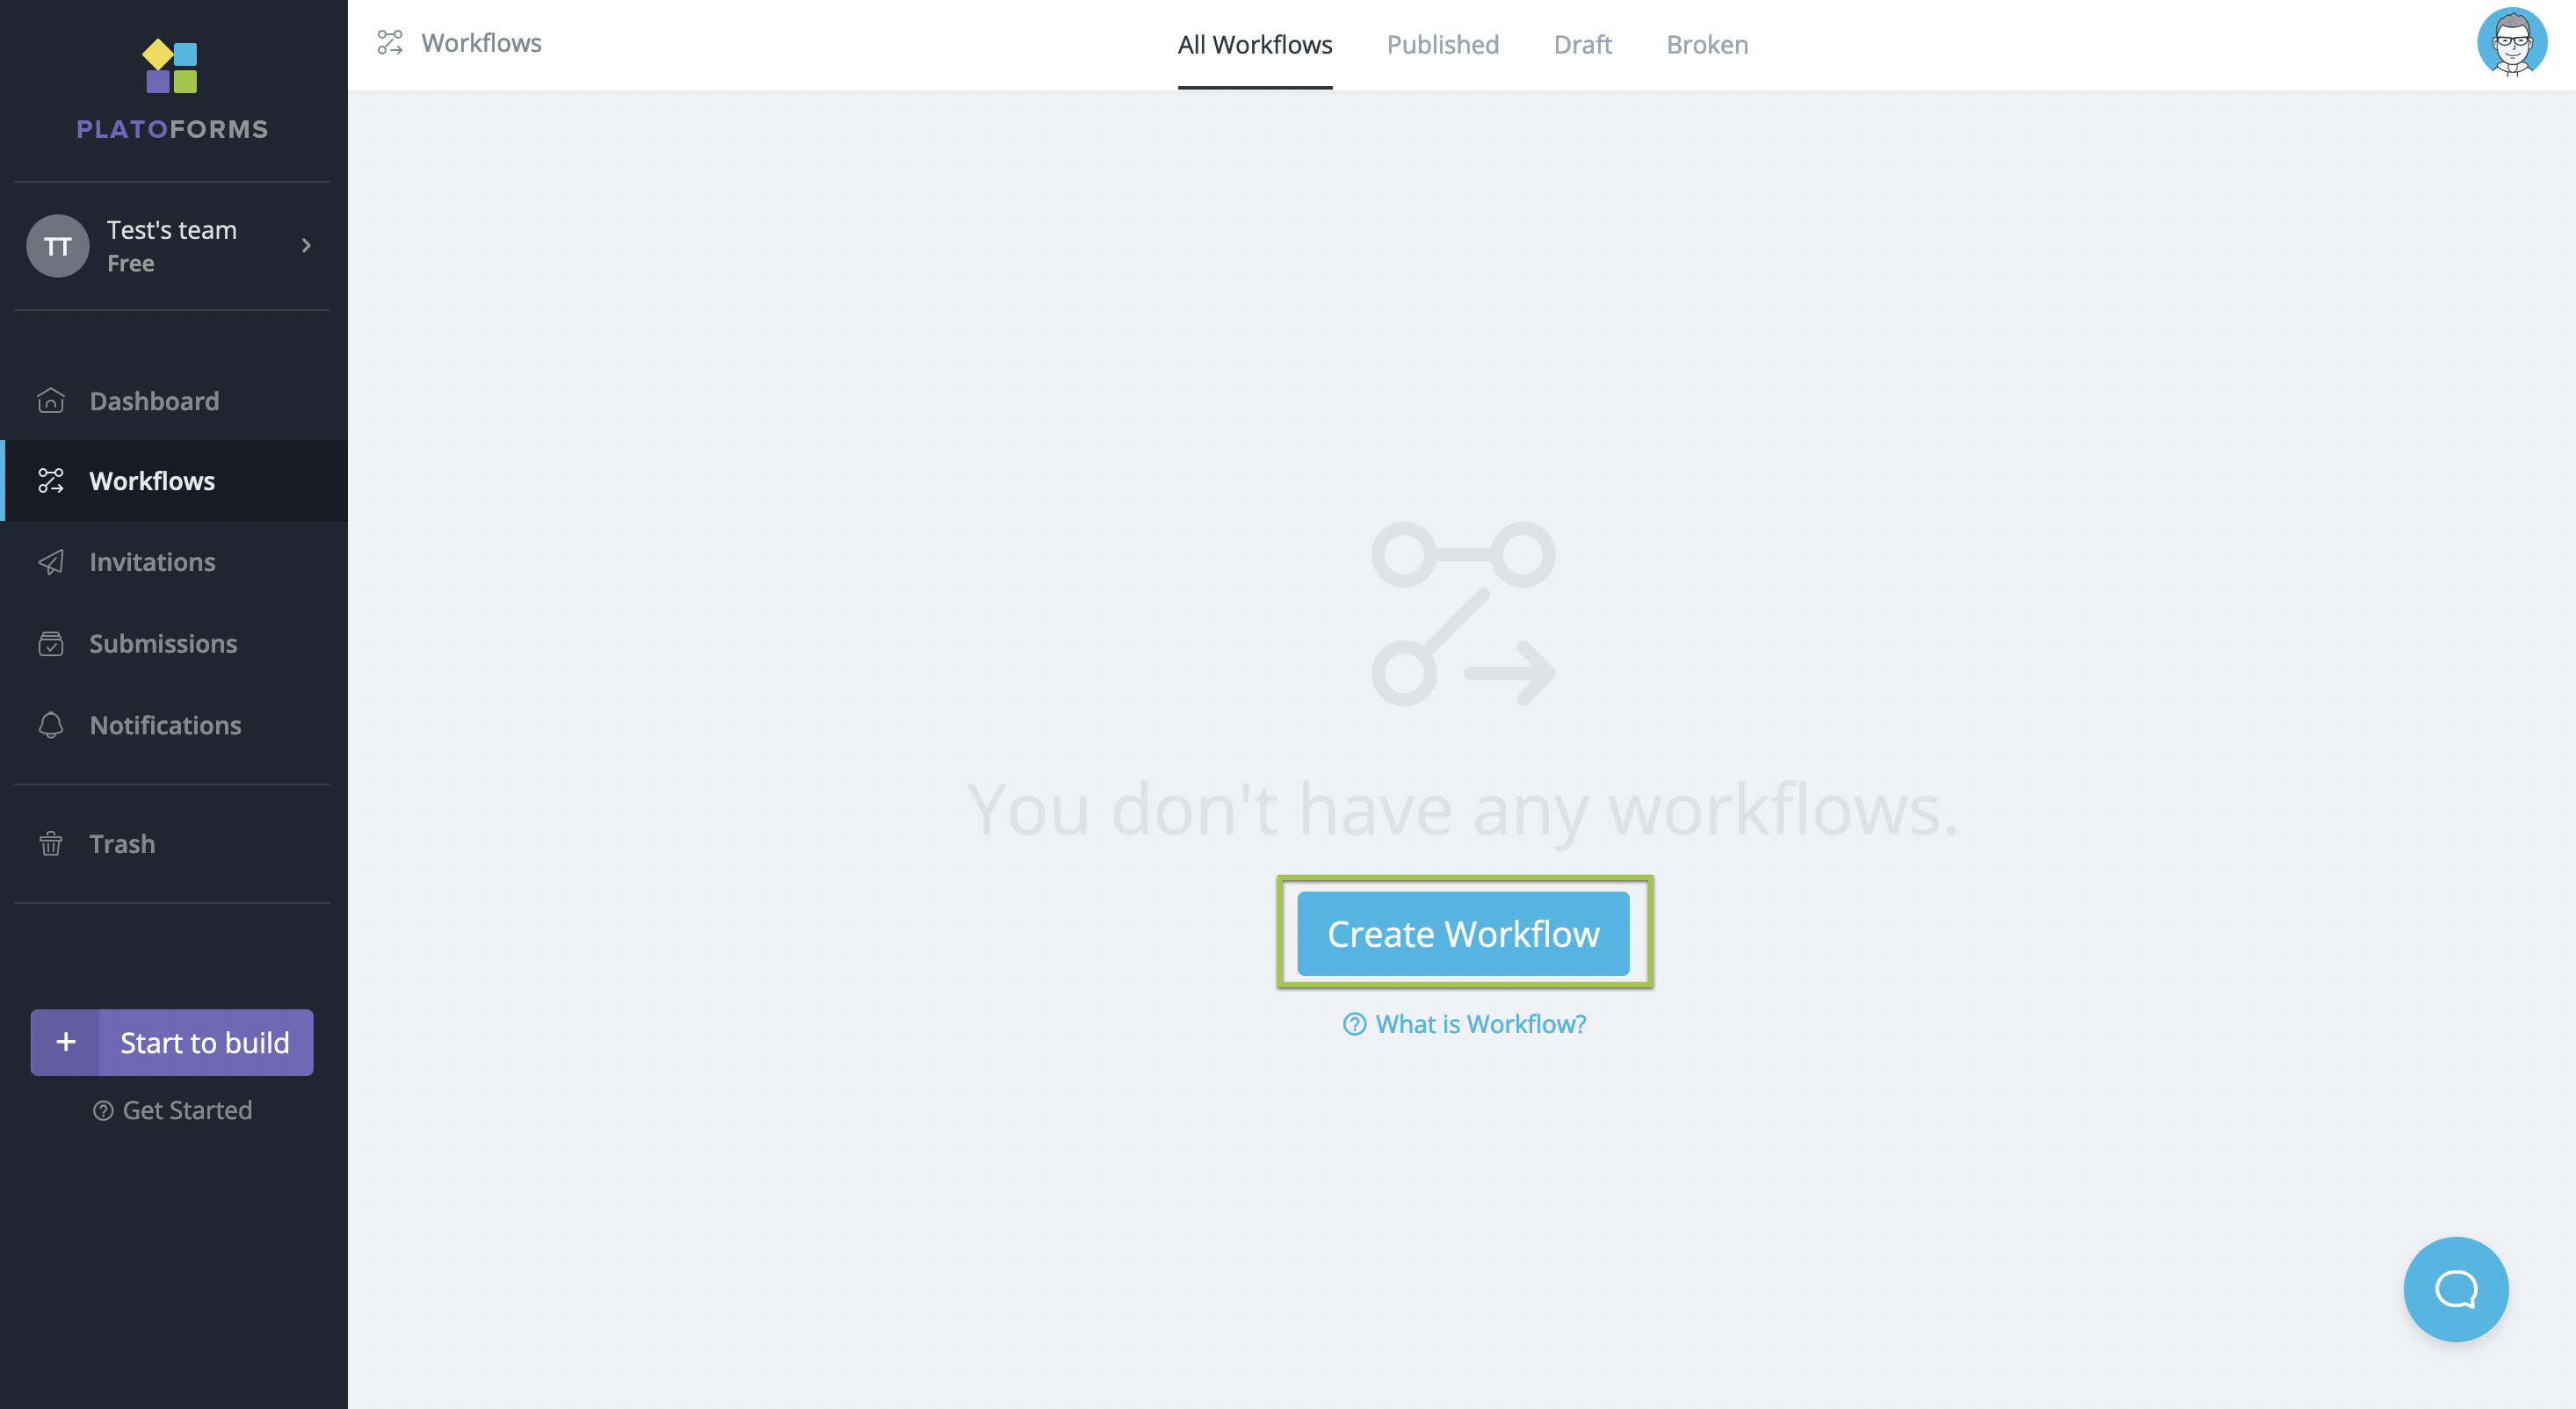
After you have created forms for different roles, on the left navigation, click Worklows.
-
On the Workflows page, click Create Workflow.
-
In the Create a Worklow window, choose the form to fill for the first step.
ExampleSelect the customer’s form for the first step.

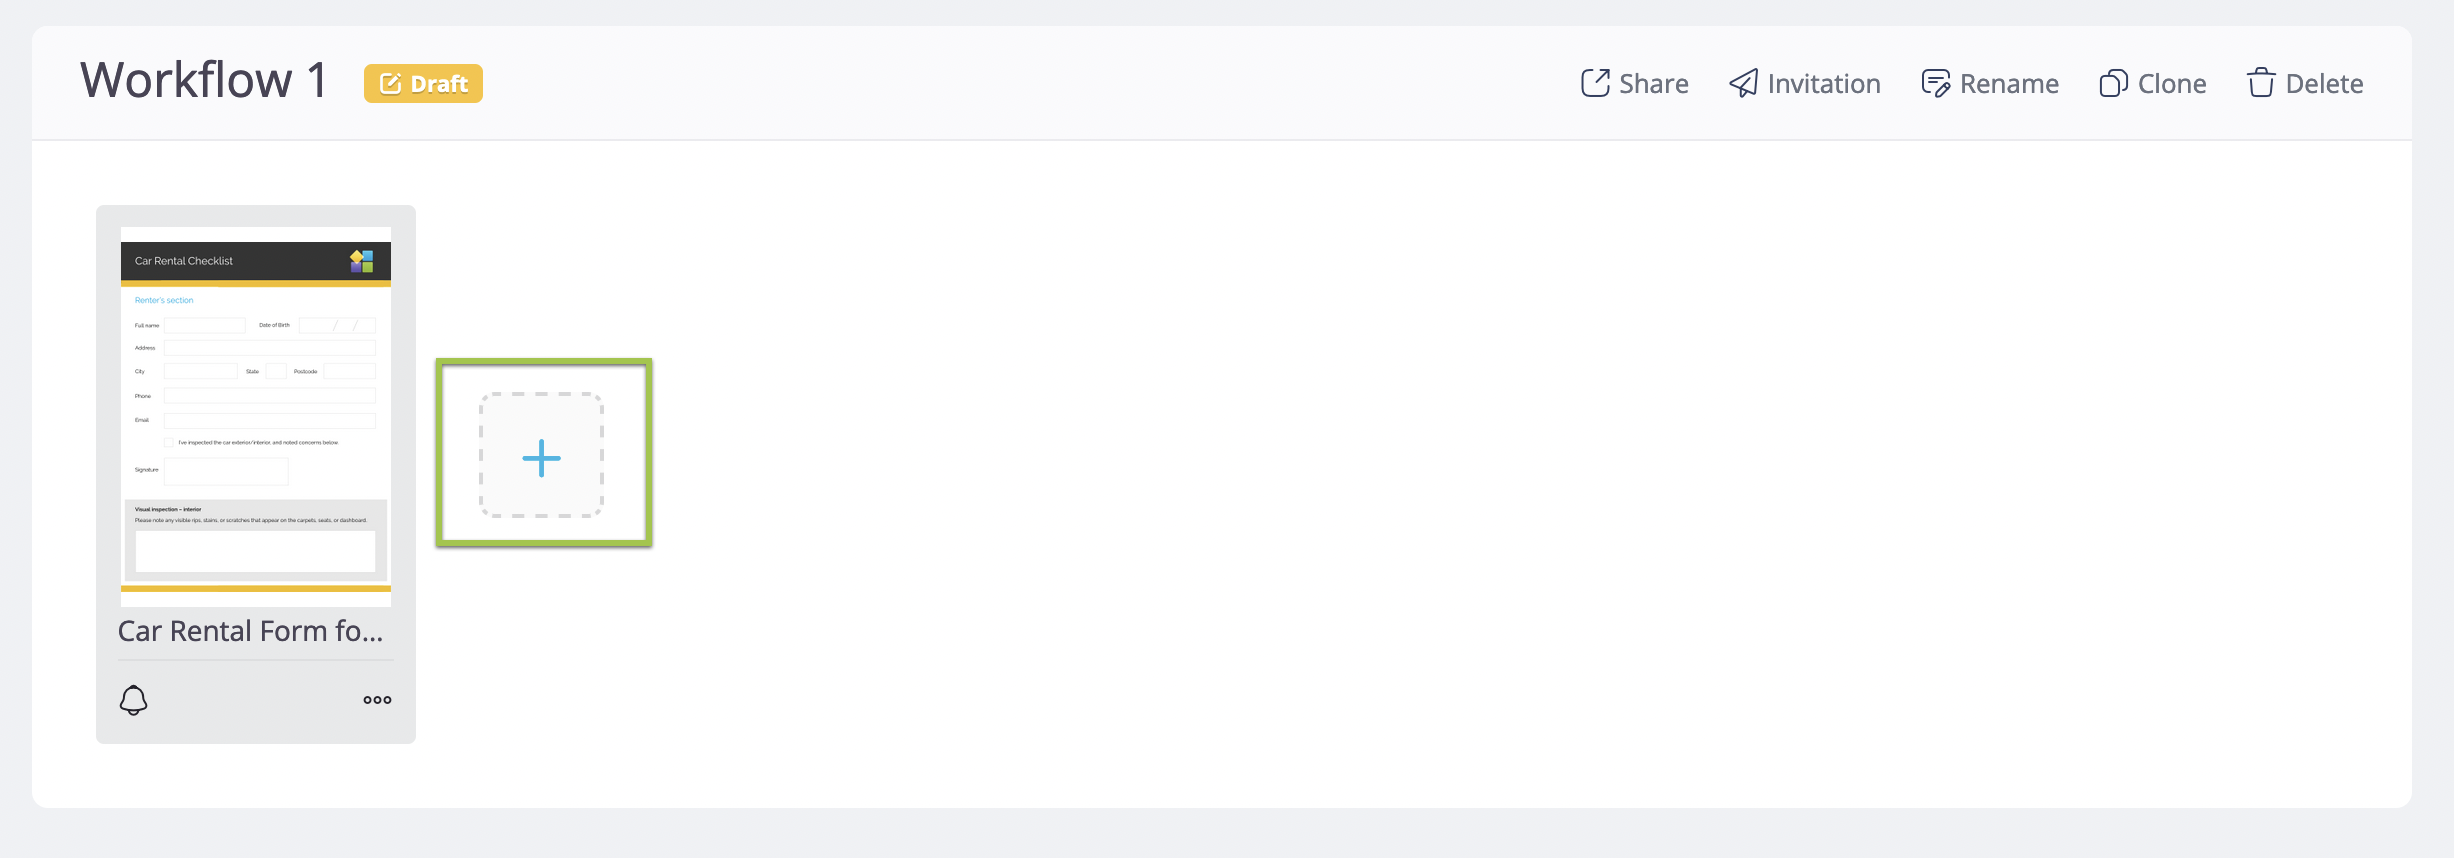
The form will be added to the Workflow as the first step. -
Within the Workflow, click the + icon to add the next step(s) in order.
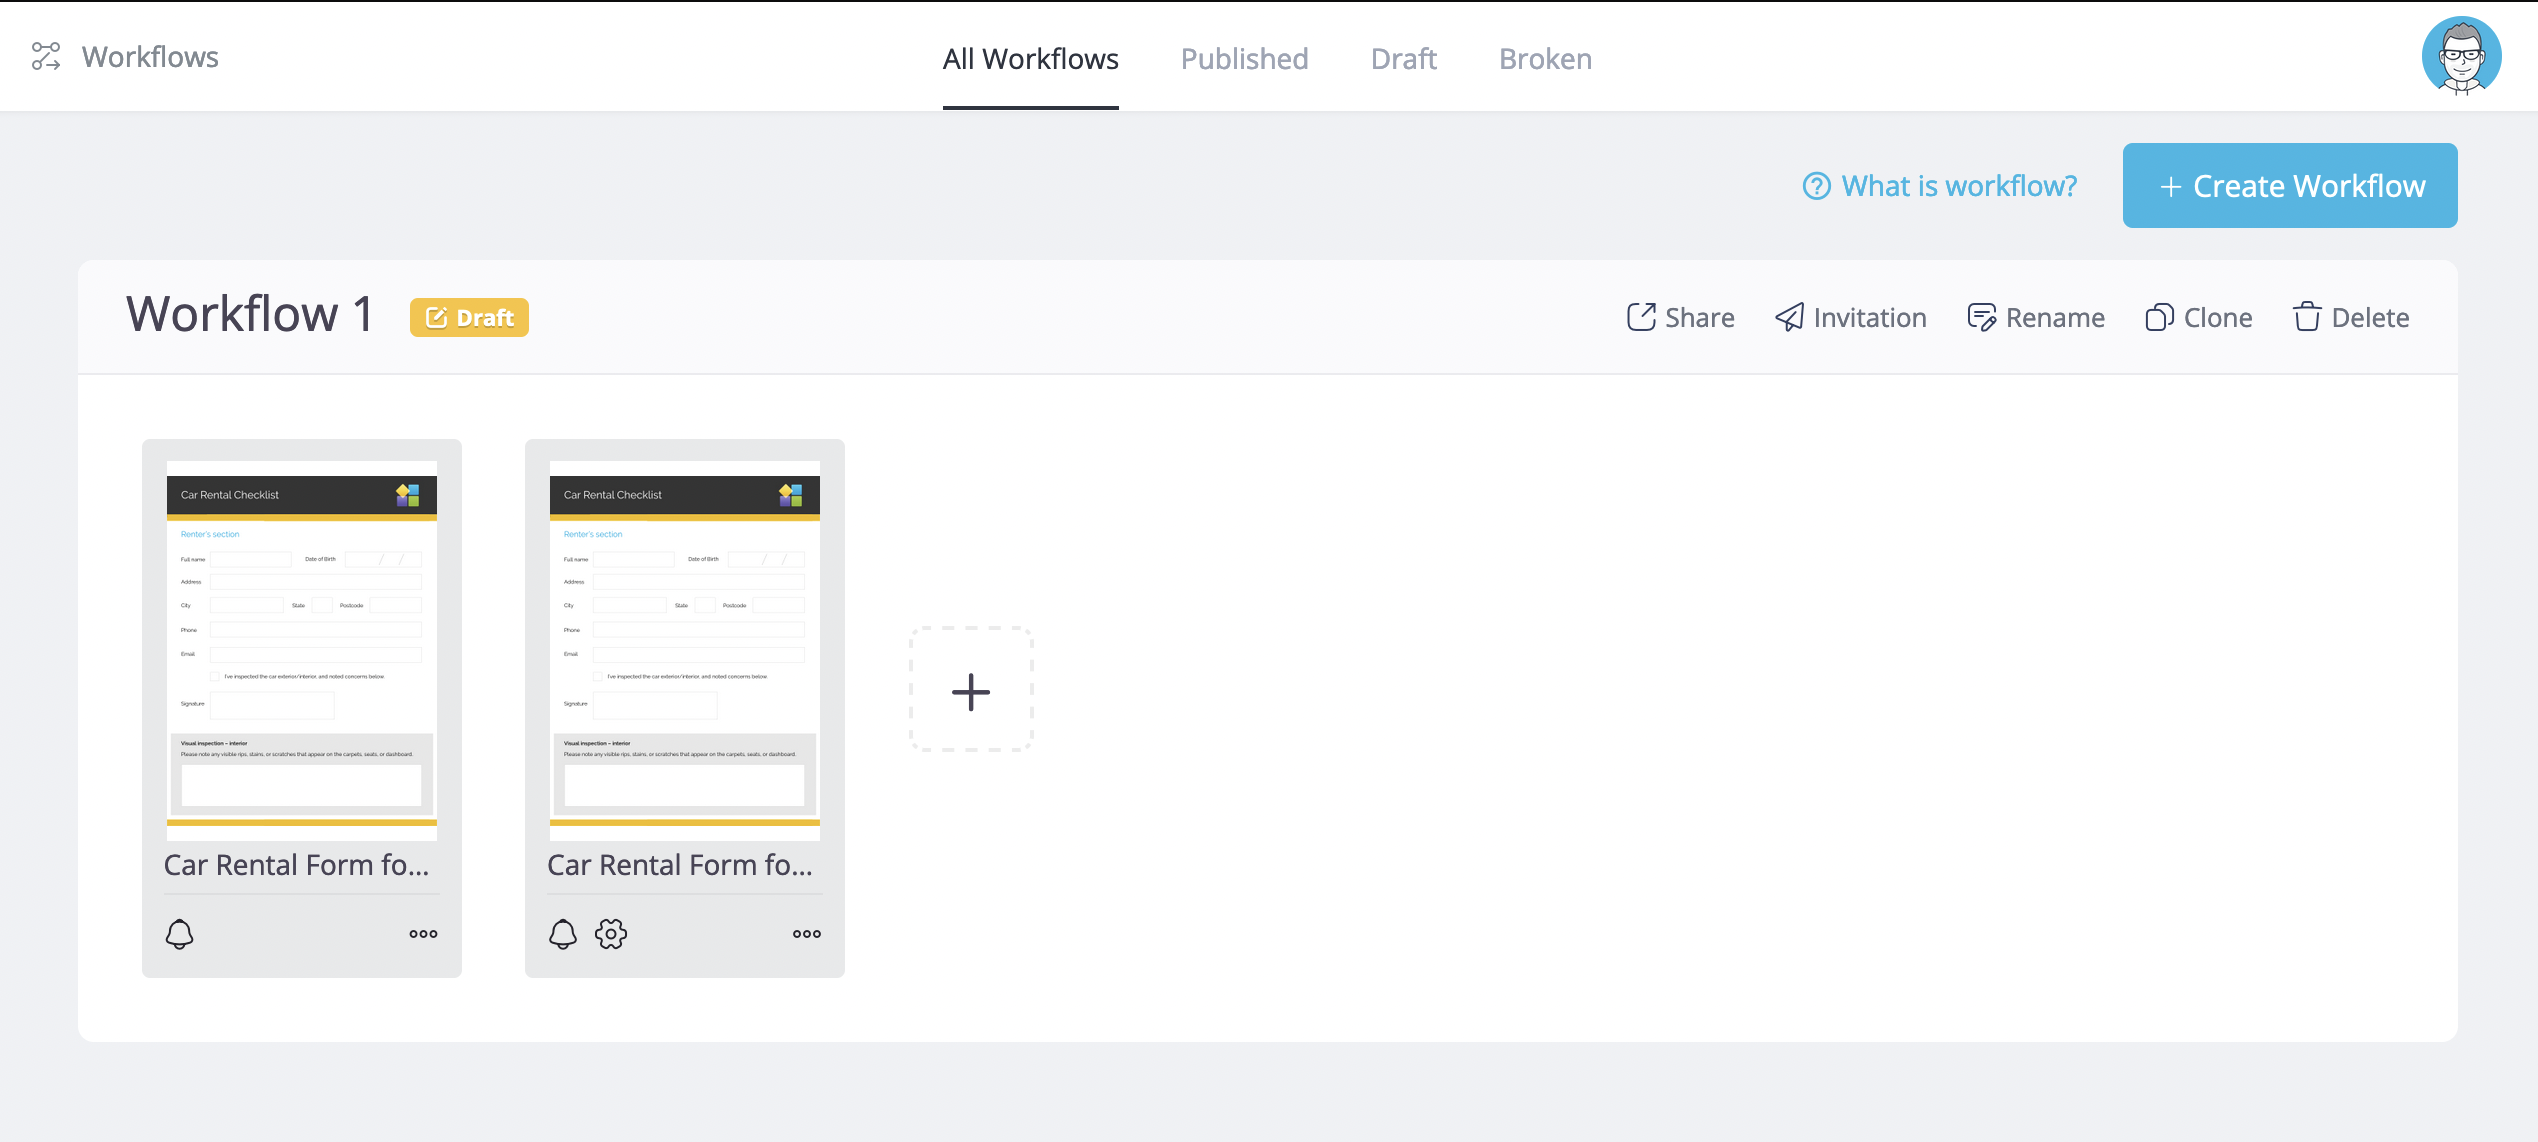
Explore the Workflows page
After adding a Workflow to the blank Workflows page, you’ll see the following interface:
Configure each step
After you’ve included steps in the Workflow, for each step, you can:
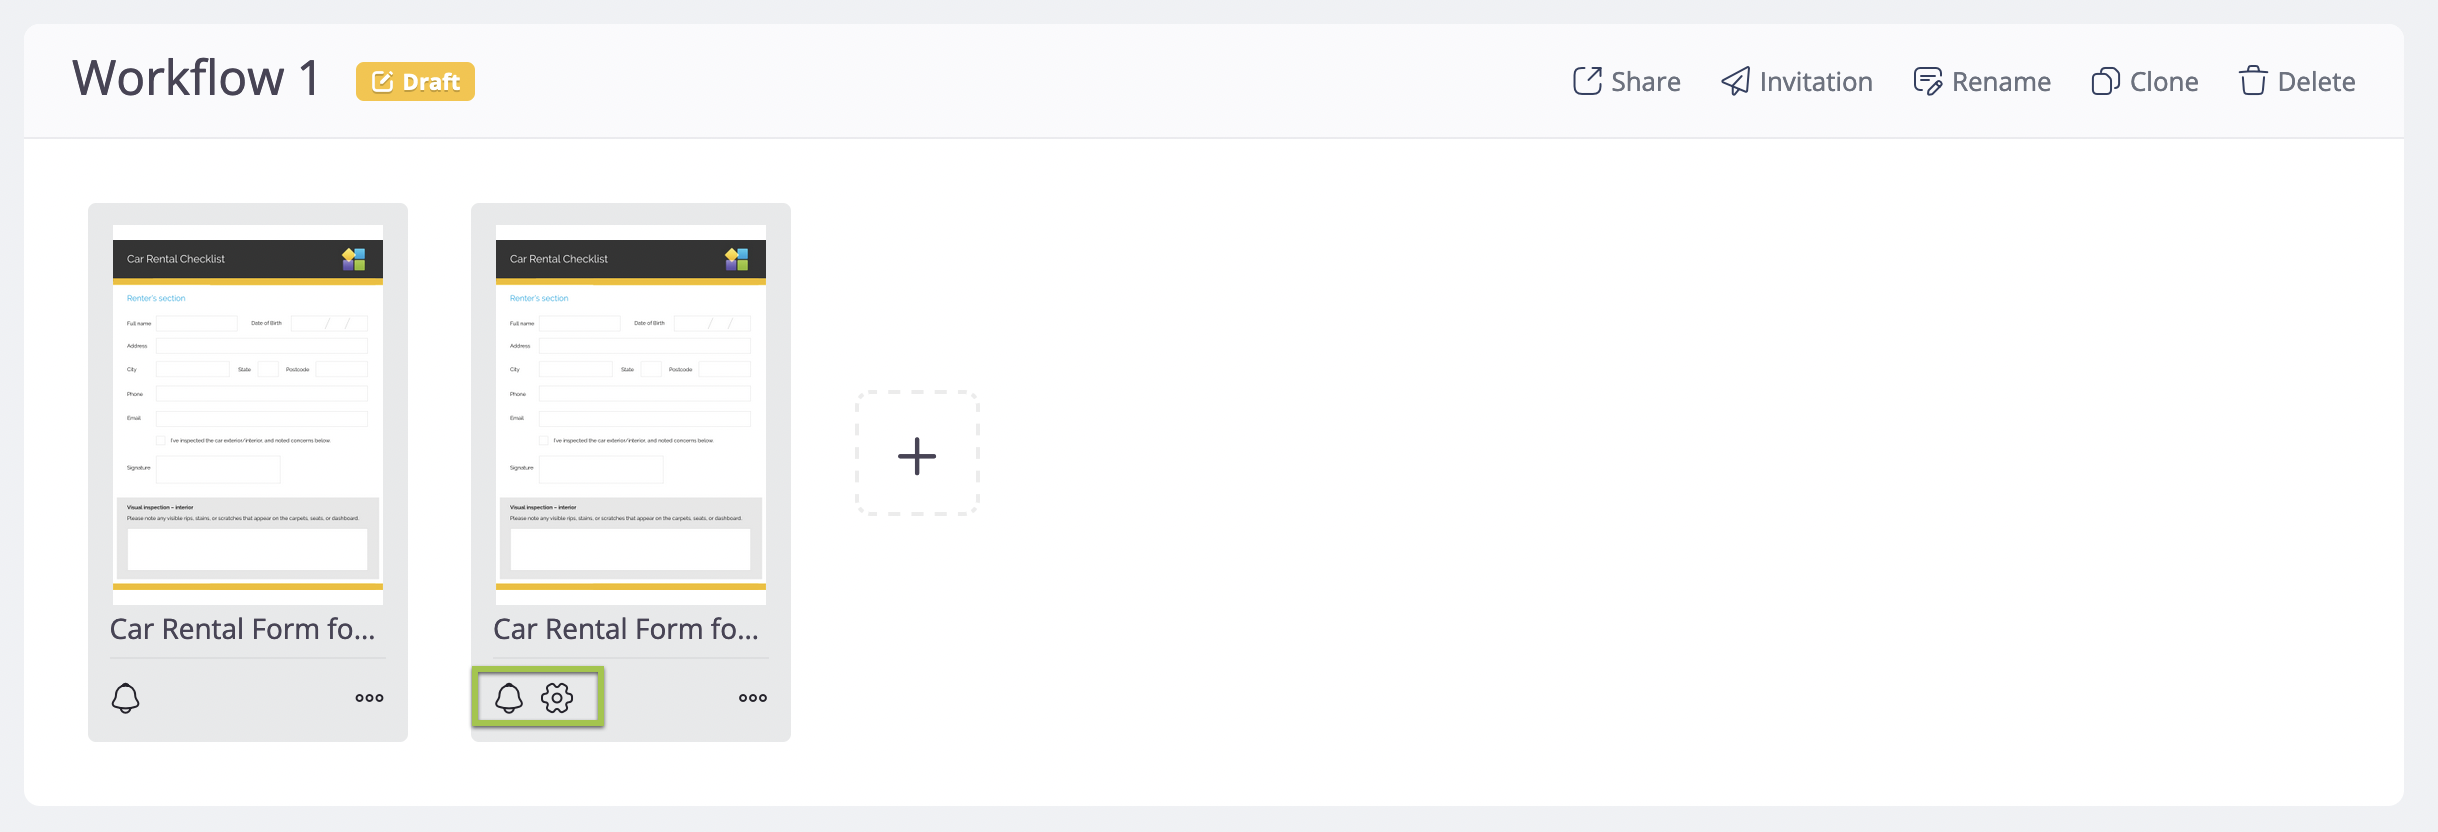
- Click the Notification (bell) button to configure notifications specific to that step.
- Click the Settings (gear) button to configure settings for steps after the initial step.
Here’s how Notifications and Invitations differ:
-
Notifications: PlatoForms sends email notifications to your team members after someone submits a form and a PDF is generated. These notifications can be customized.
-
Invitations: Share your PlatoForms creations through personalized emails. Recipients receive a link to easily complete specific forms and provide feedback.
Workflow actions
In the top right corner of the Workflow, you’ll find these buttons:
- Share: Publish the Workflow once settings are confirmed. Once published, settings can’t be edited. Learn more in Share your Workflow.
- Invitation: Share the Workflow using invitations. Clicking the link opens the first step’s form.
- Rename: Change the Workflow name for better recognition.
- Clone: Make a copy of the workflow. Useful for modifying a published workflow.
- Delete: Remove the workflow (submissions stay unaffected).