Create your first online form
Tabs
Create your first form. See exactly what to click from dashboard to shareable link. Perfect for beginners.
This guide walks through the PDF Fillable Form path. Building a form from scratch instead? See Generate forms with AI or Conversational forms. Designing a print-ready document? See PDF Document Creator.
Access the Dashboard
-
Log in to PlatoForms after setting up your account.
-
Your dashboard has three main areas:
- Left sidebar: Click to access Workflows, Invitations, Submissions, and other tools.
- Top tabs: Switch between your forms and sort by date or name
- Main area: View your forms and create folders to organize them
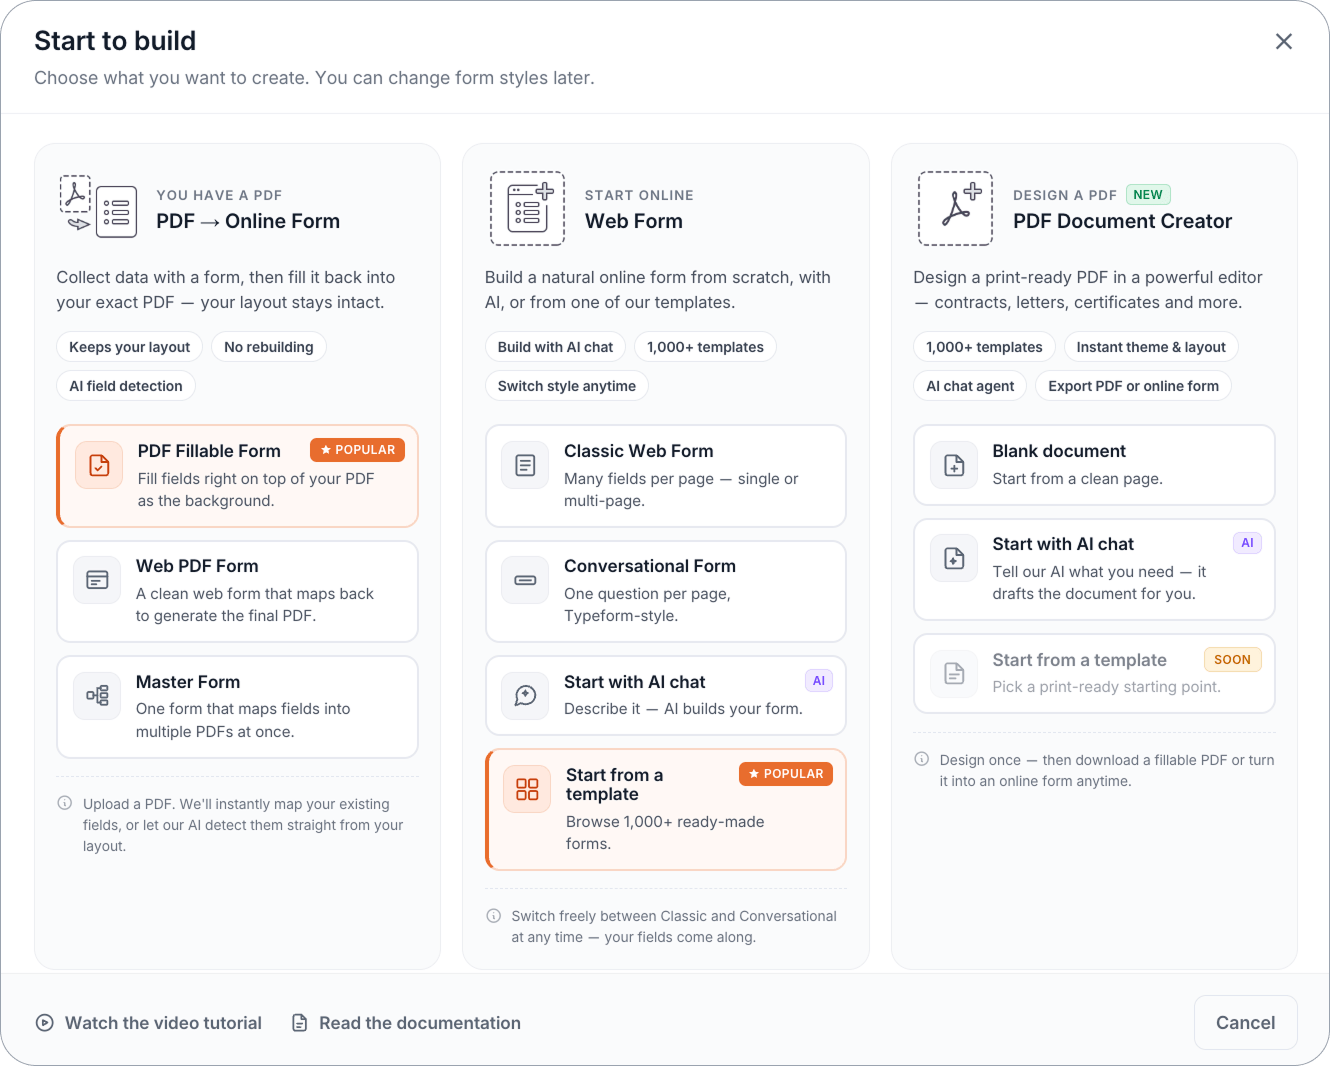
Create form
-
Look for the blue Start to build button in the bottom left corner.

-
Select PDF → Online Form.
-
Select PDF Fillable Form.
Upload PDF
You’ll be asked to upload the PDF you want to convert.

Automatic PDF Compression
You can upload any size file. Automatic PDF compression is set to default so that files over 10 MB are automatically compressed to stay under our email limit, preserving all formatting and styles.
If compressed elements appear broken, disable Automatic PDF Compression and re-upload your file.
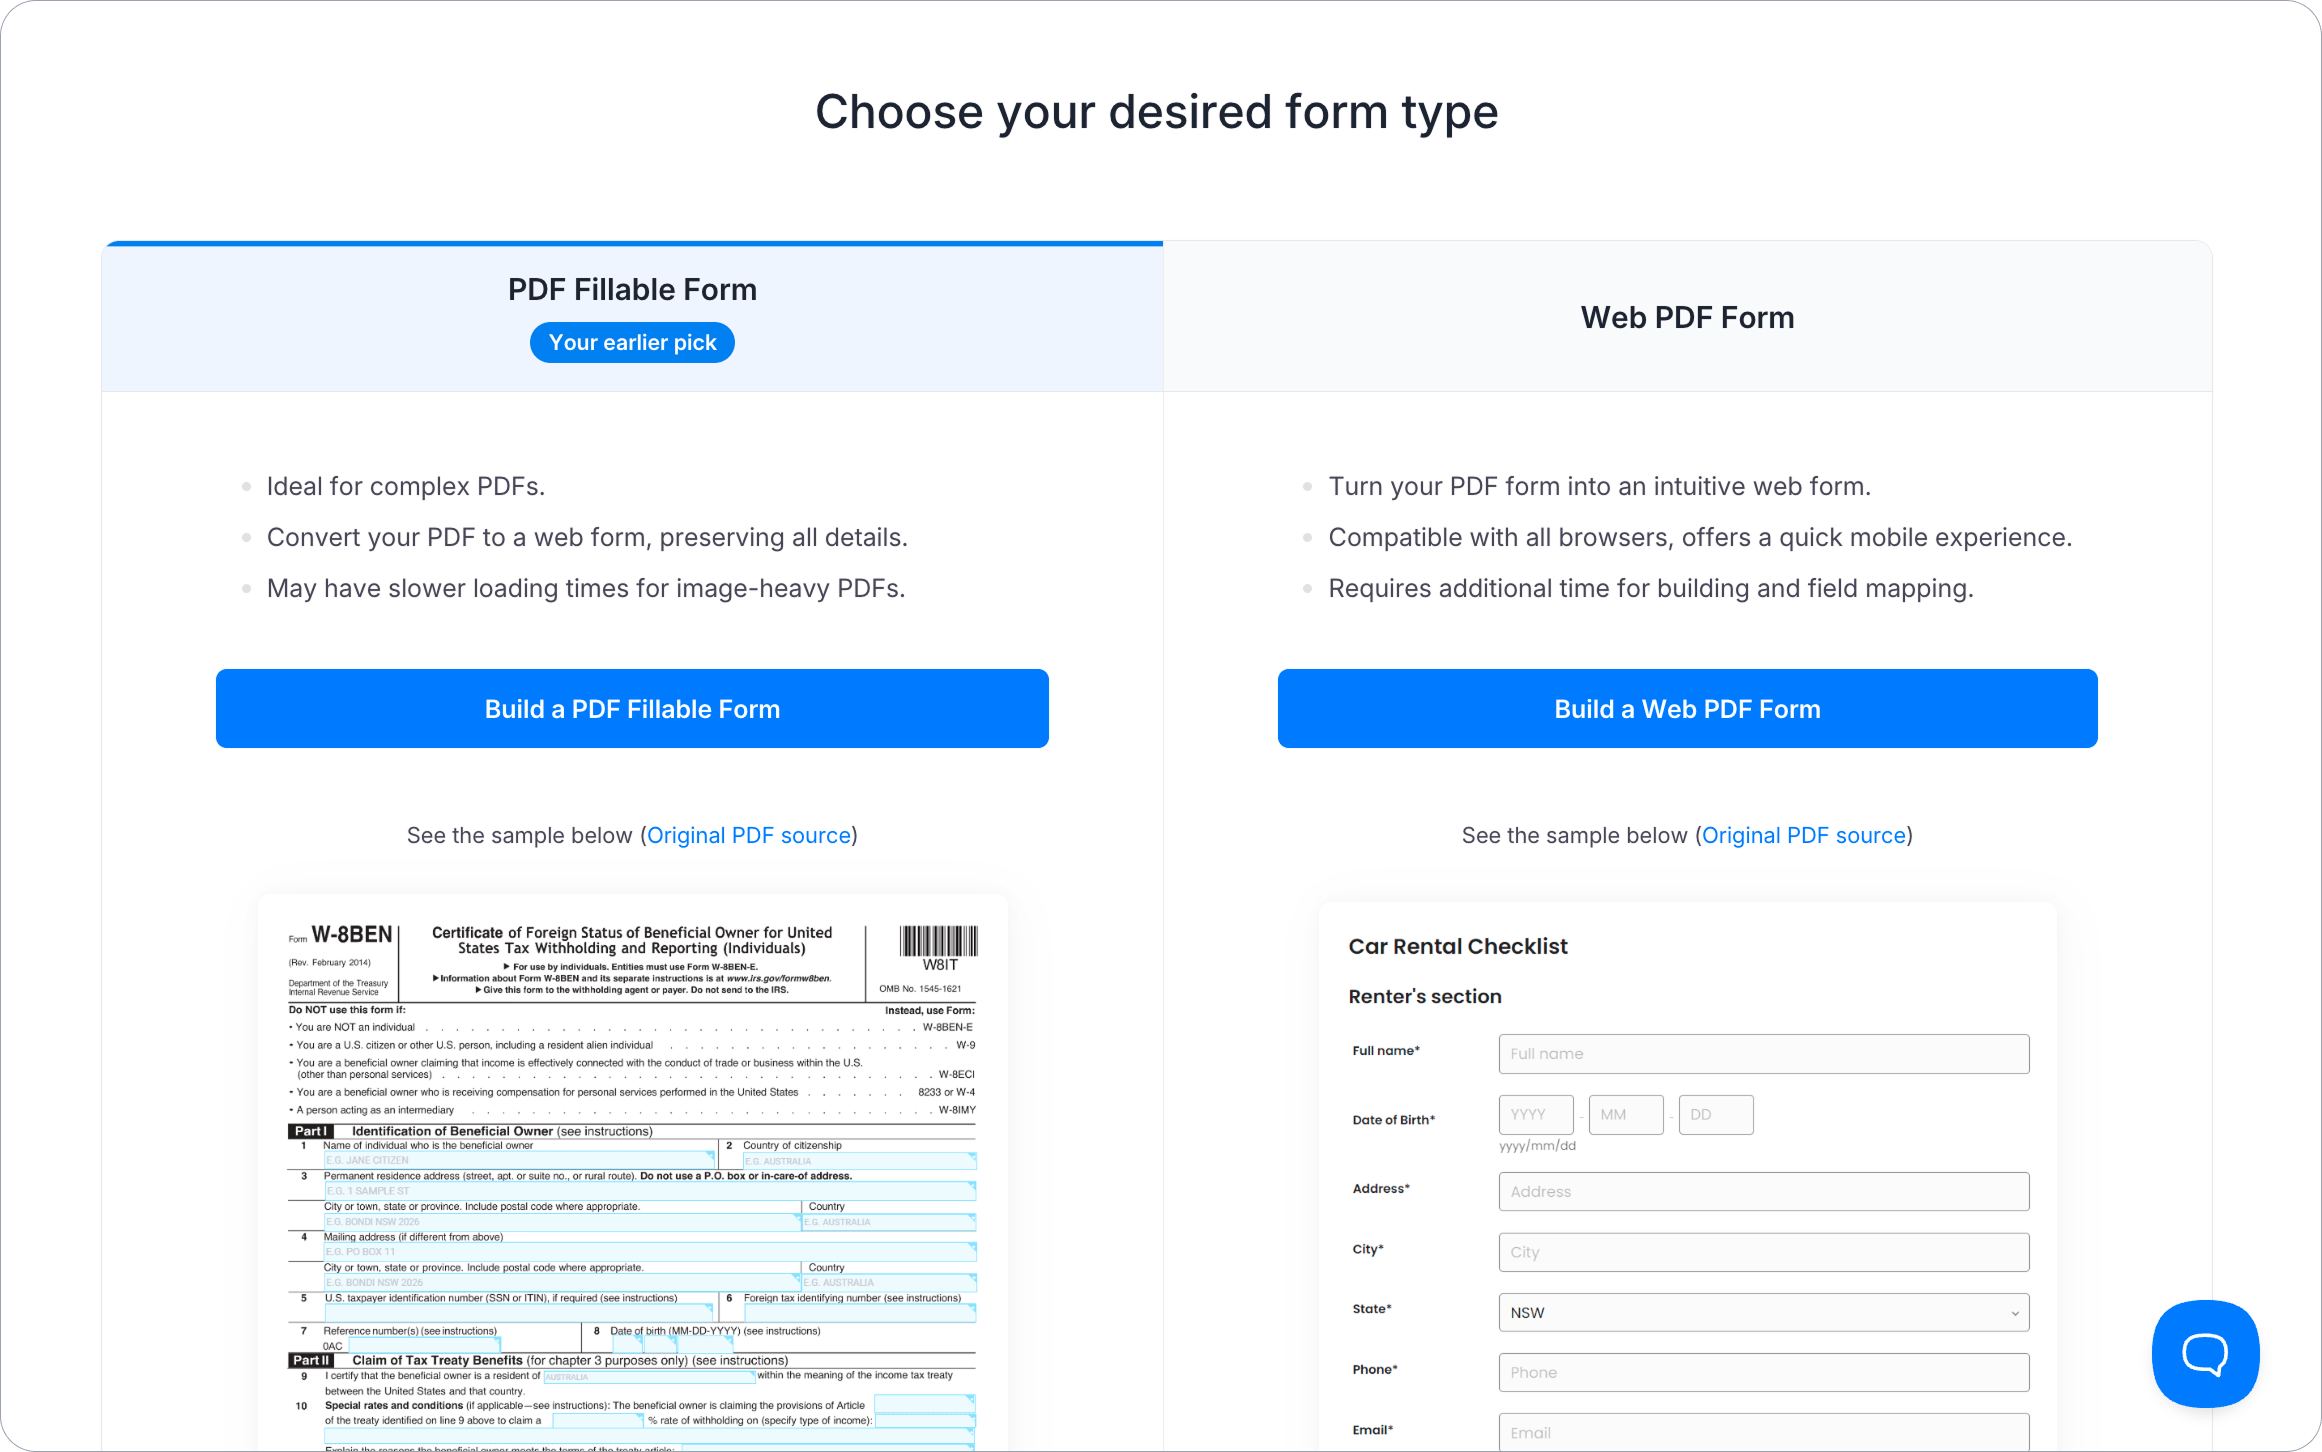
Confirm your form type
After your PDF uploads, you’ll land on the Choose your desired form type page, showing PDF Fillable Form marked with a Your earlier pick badge. Click Build a PDF Fillable Form to continue.
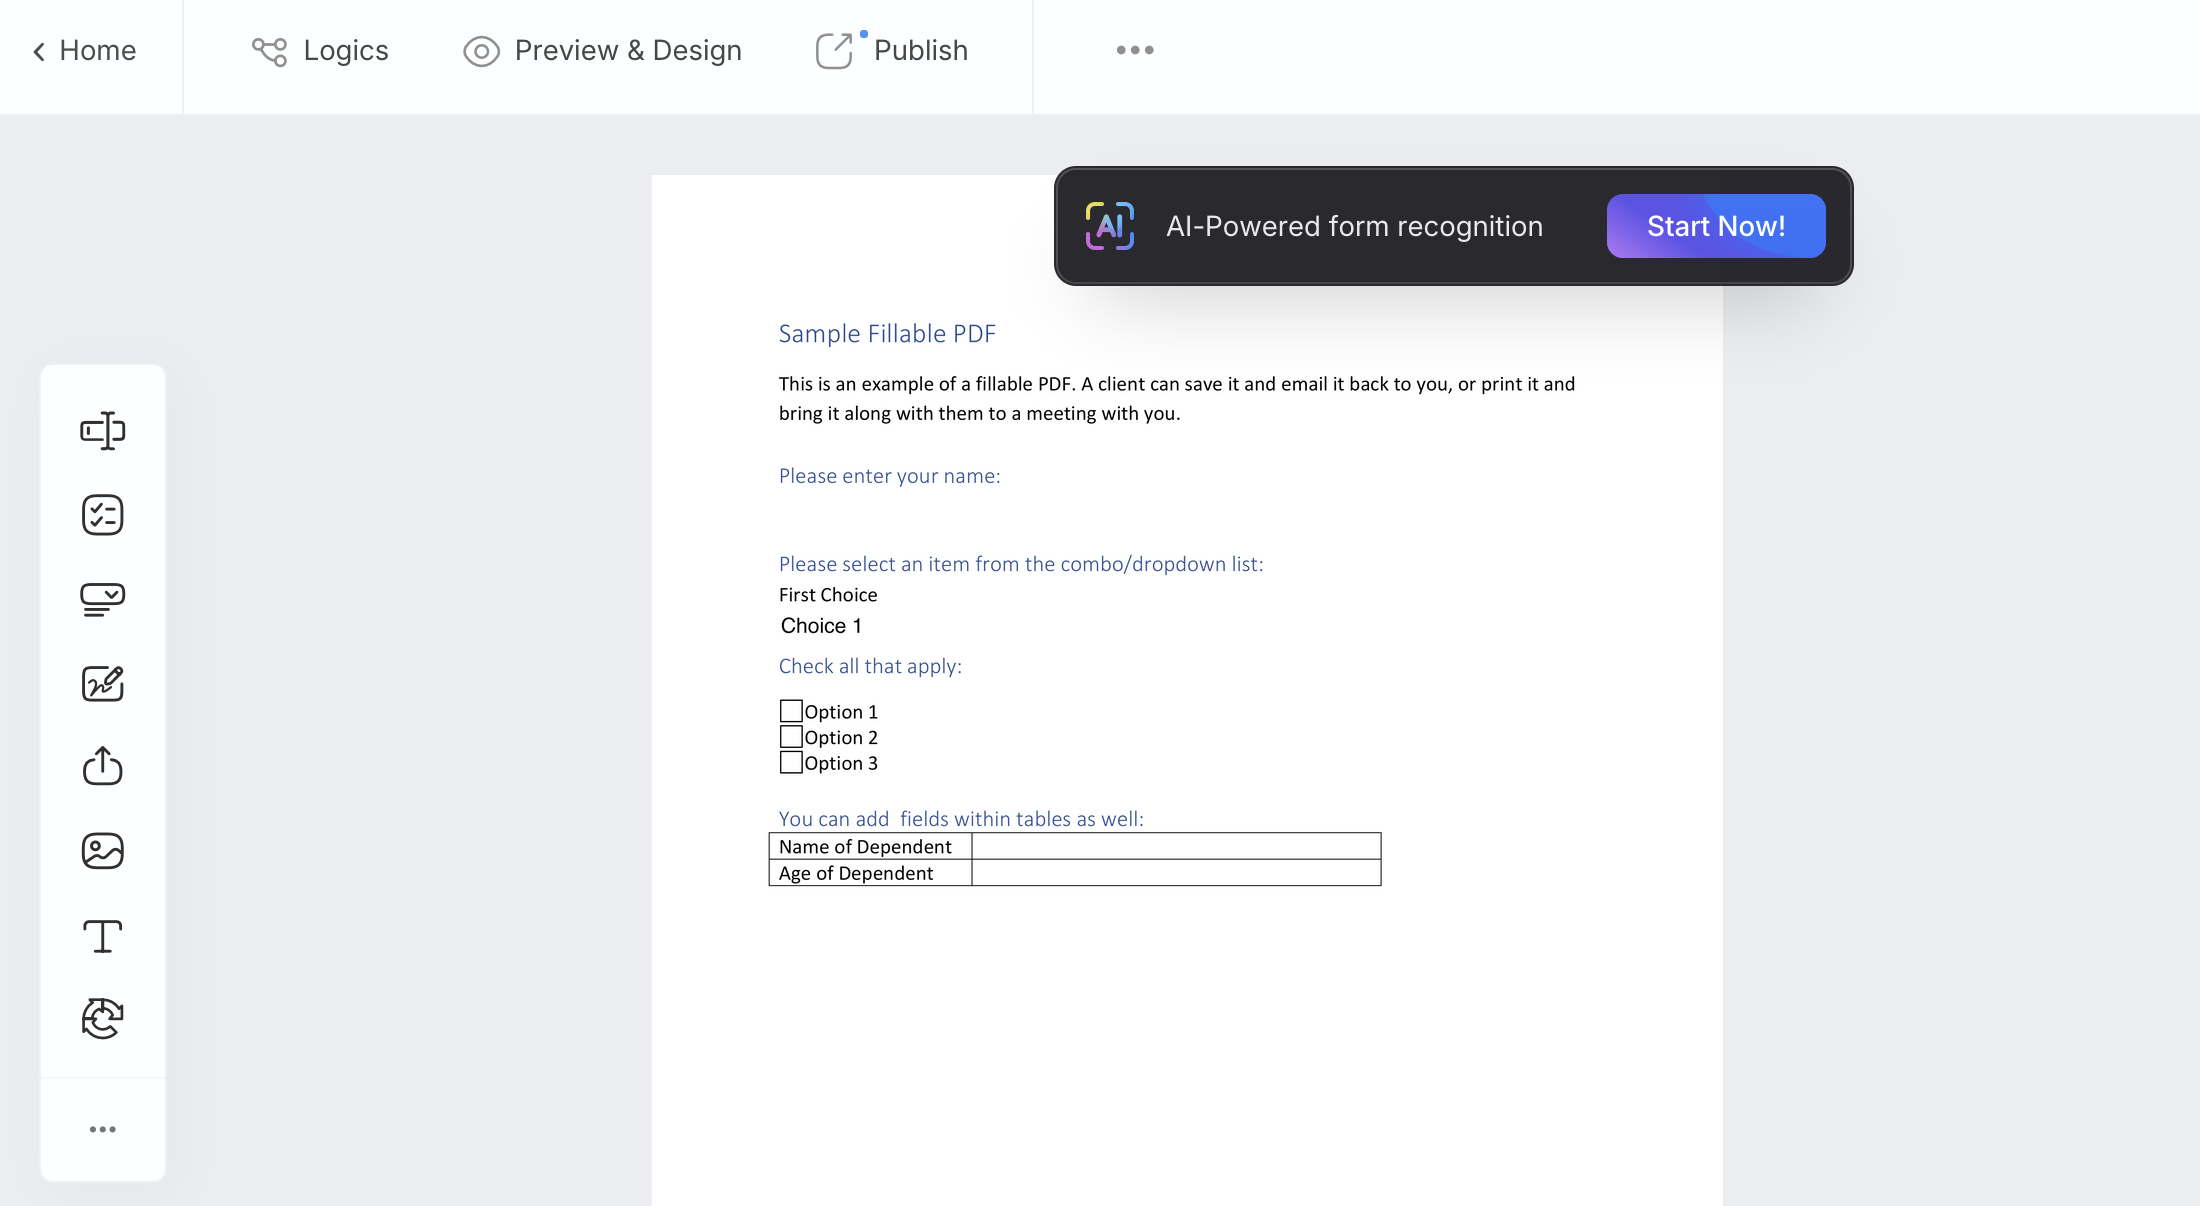
(Optional) Use AI to recognize fields
After confirming your form type, you’ll see the AI-Powered form recognition bar in the form builder.
-
Click Start Now to begin AI recognition. Alternatively, find the AI Recognition Form option in the ••• menu.
-
After your AI-powered form is ready, click Load Form.
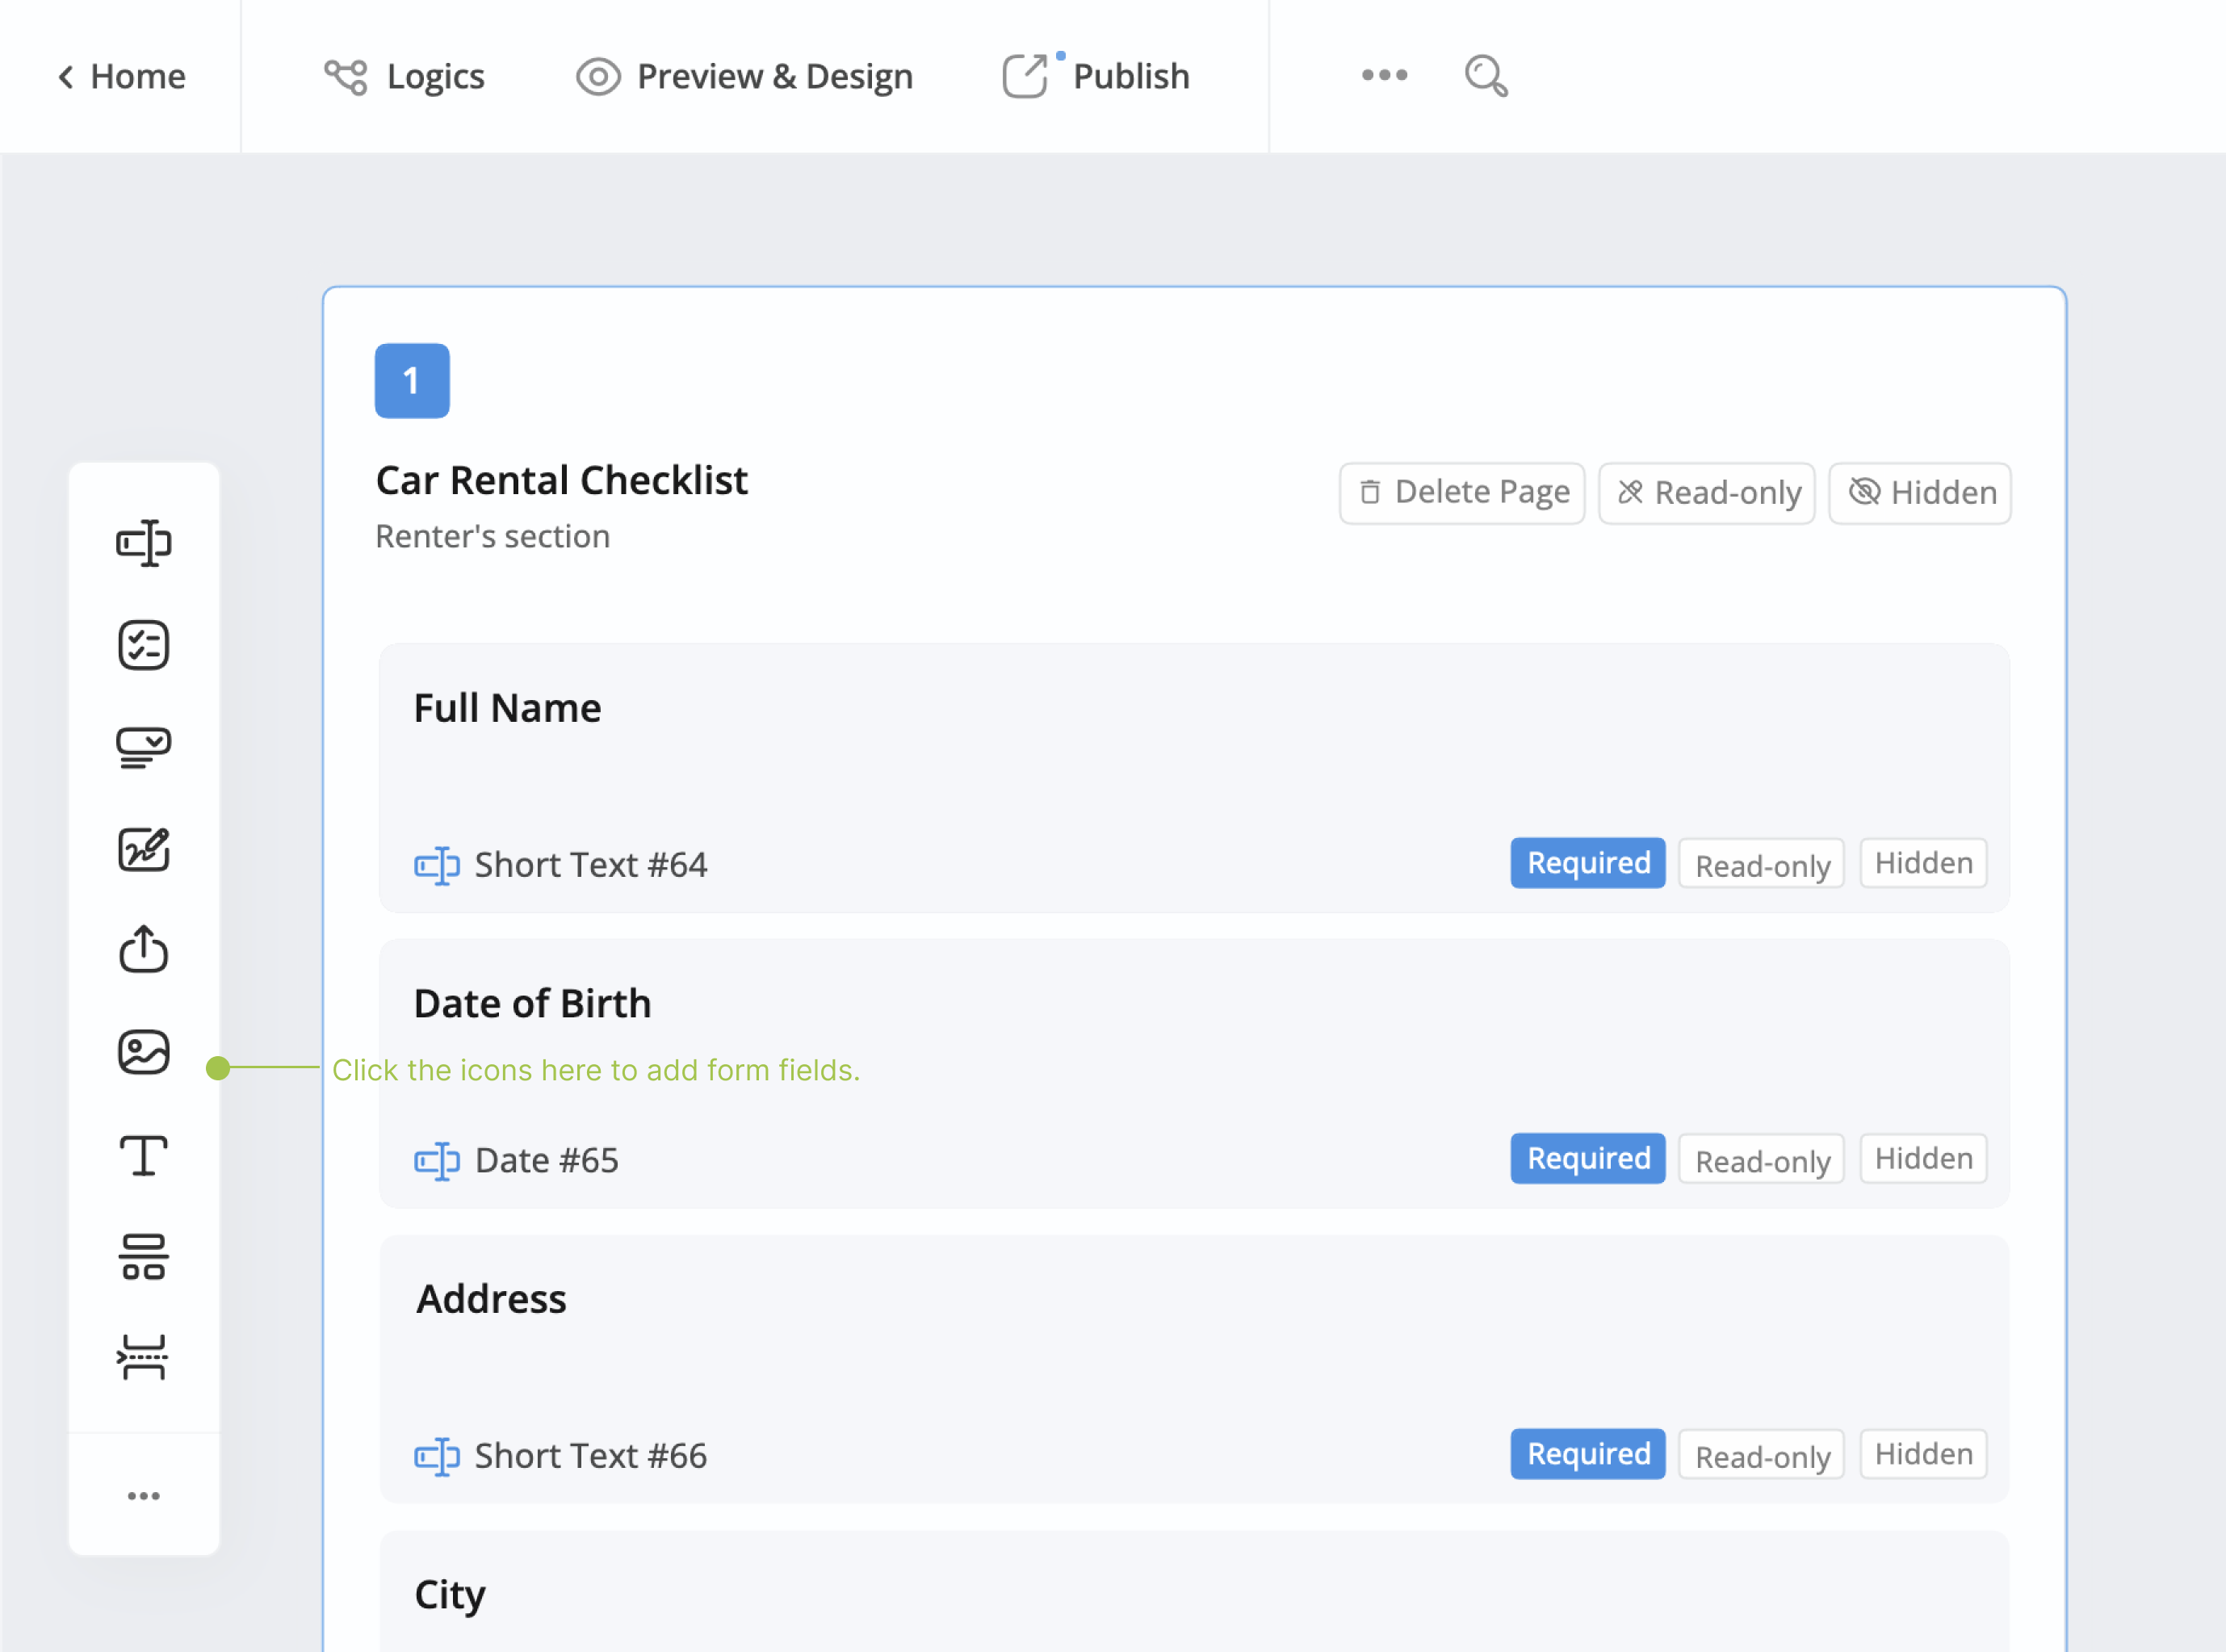
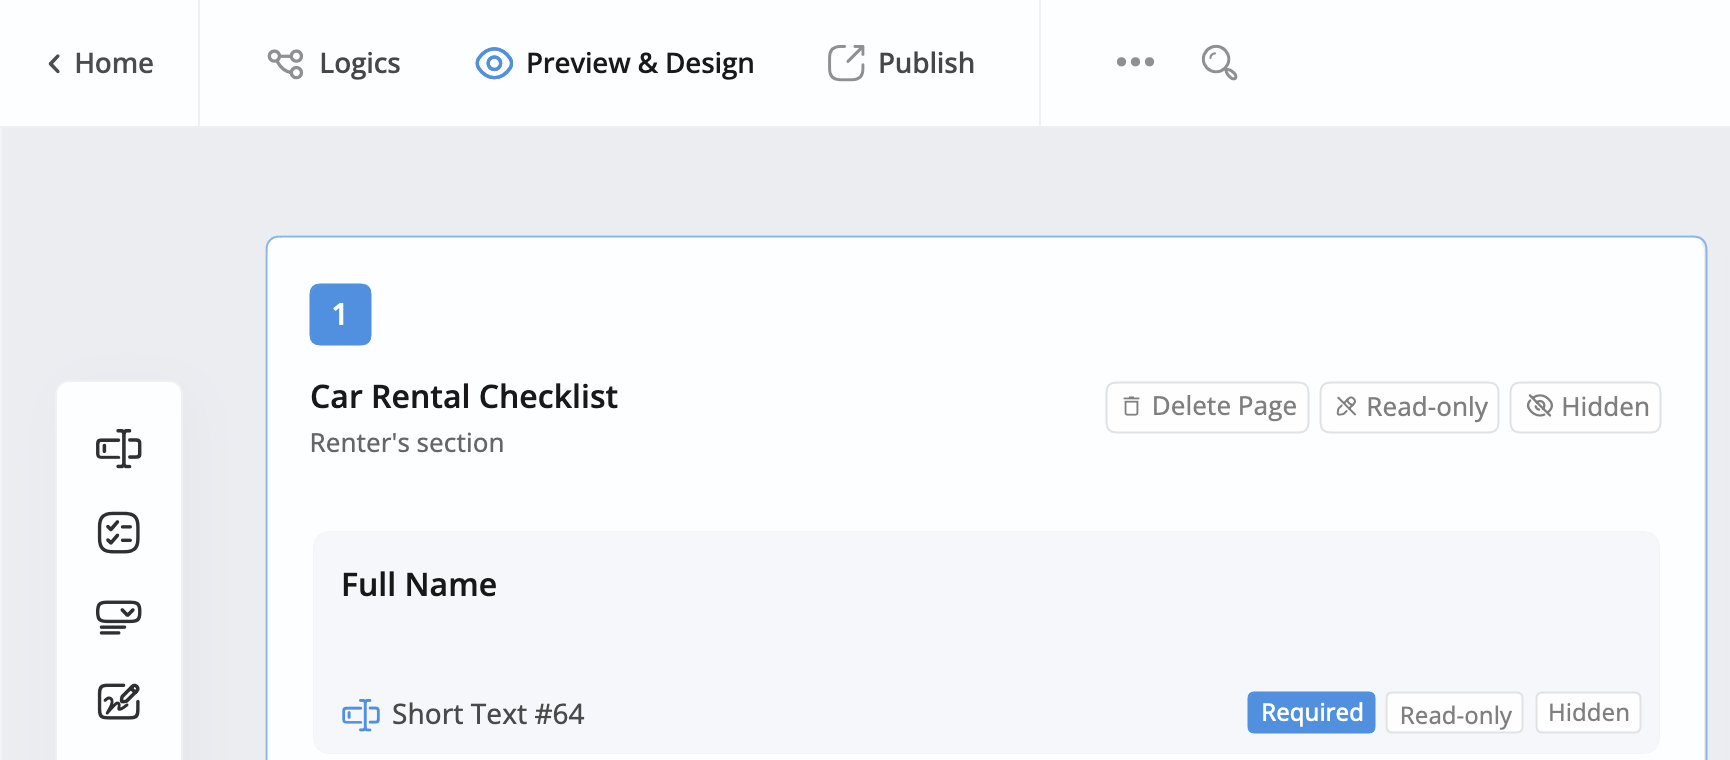
Add form fields
After creating an online form, you’ll go to the form builder to add form fields. These are spaces on the form where people can type or choose information, like names, emails, or other details.
Your work saves automatically. You can also save a partially filled form to continue later — see Auto-save and save for later.
-
Click the icons in the Toolbar to add form fields. See Add fields — Online PDF Form for details.
-
Customize fields as needed.
NoteFor more details about fields, refer to the Form fields section.
Customize form design
After finishing your form fields, you can go to the preview and design page to customize the appearance.
-
In the top left of the form builder, click Preview & Design.
-
Customize the form look on the preview page.
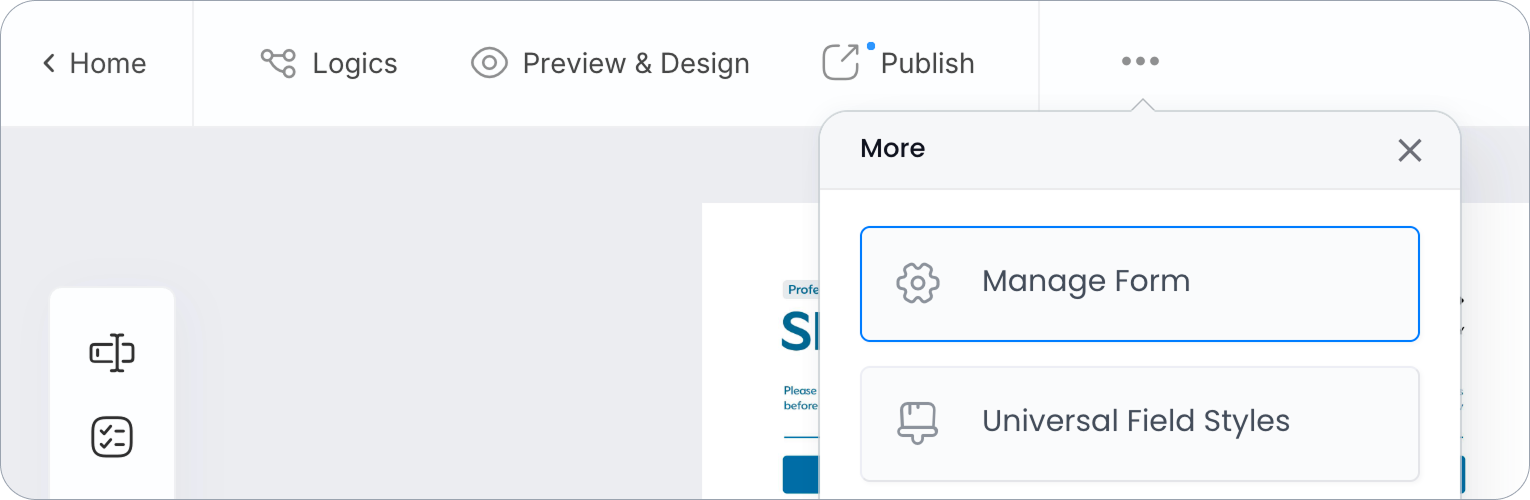
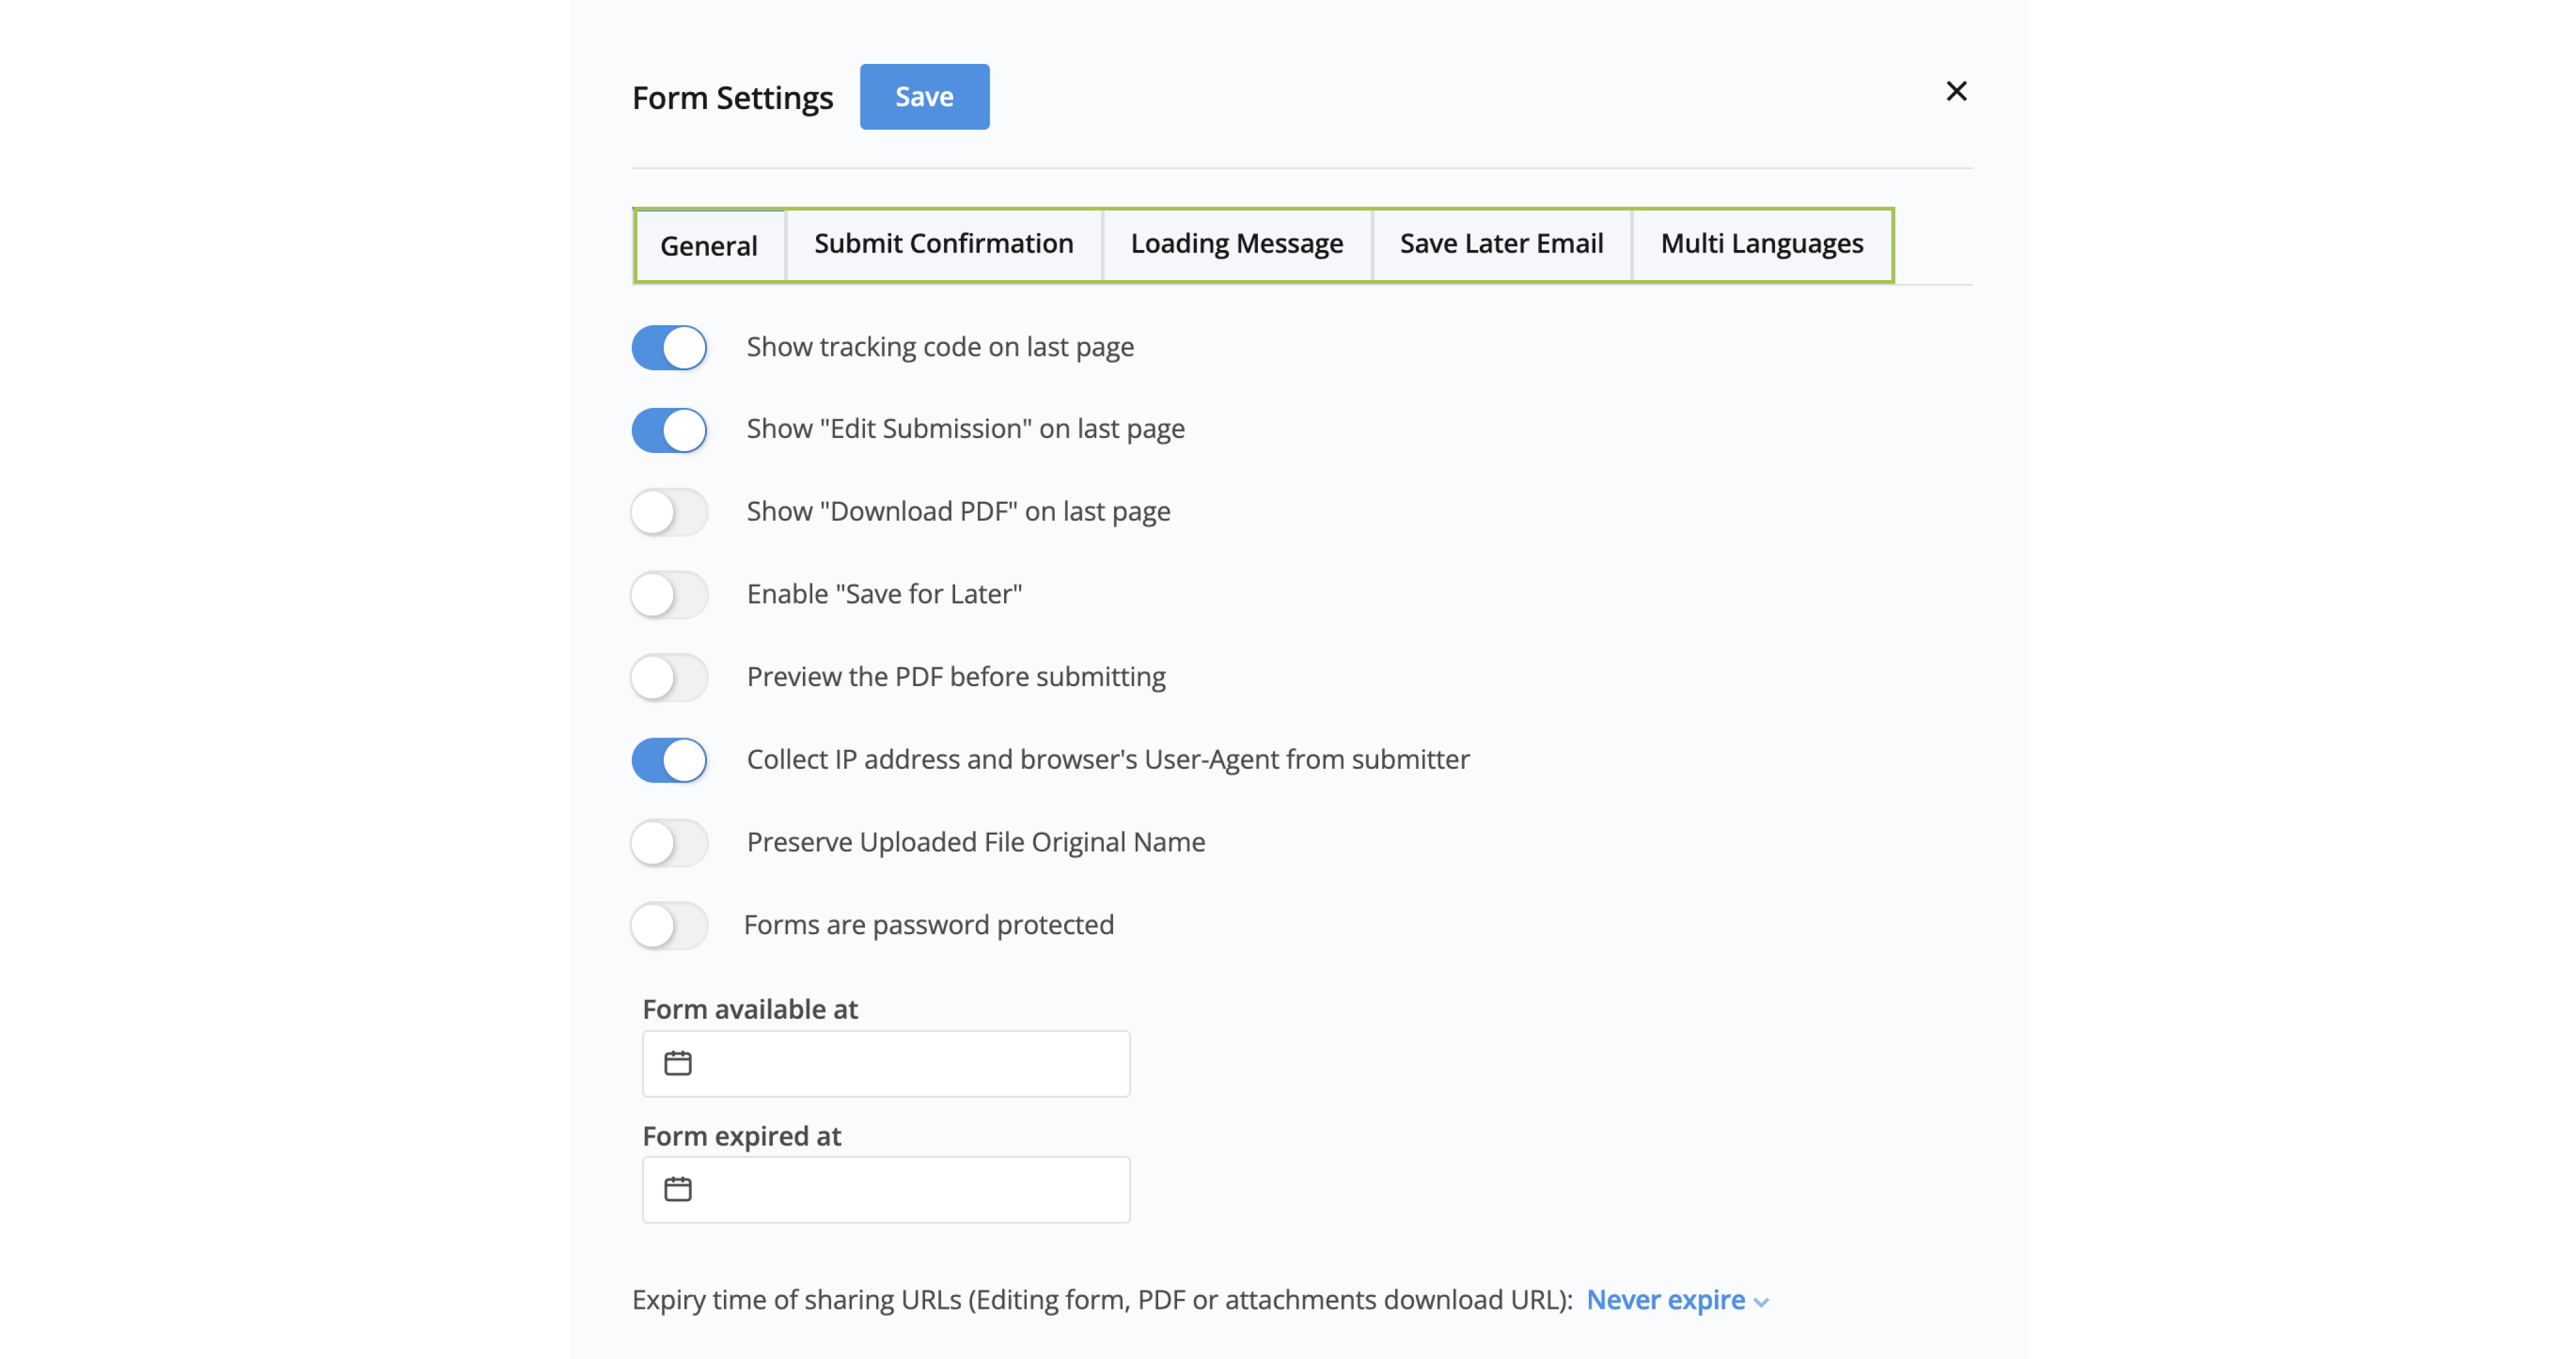
Adjust form settings
Before sharing your form with form fillers, customize settings like notifications and multi-languages for a personalized experience.
-
In the top left of the form builder, click the ••• icon button and then click Manage Form.
-
Switch between tabs to customize your form settings.
-
Click Save to confirm your settings.
NoteFor more details, refer to the Manage form settings section.
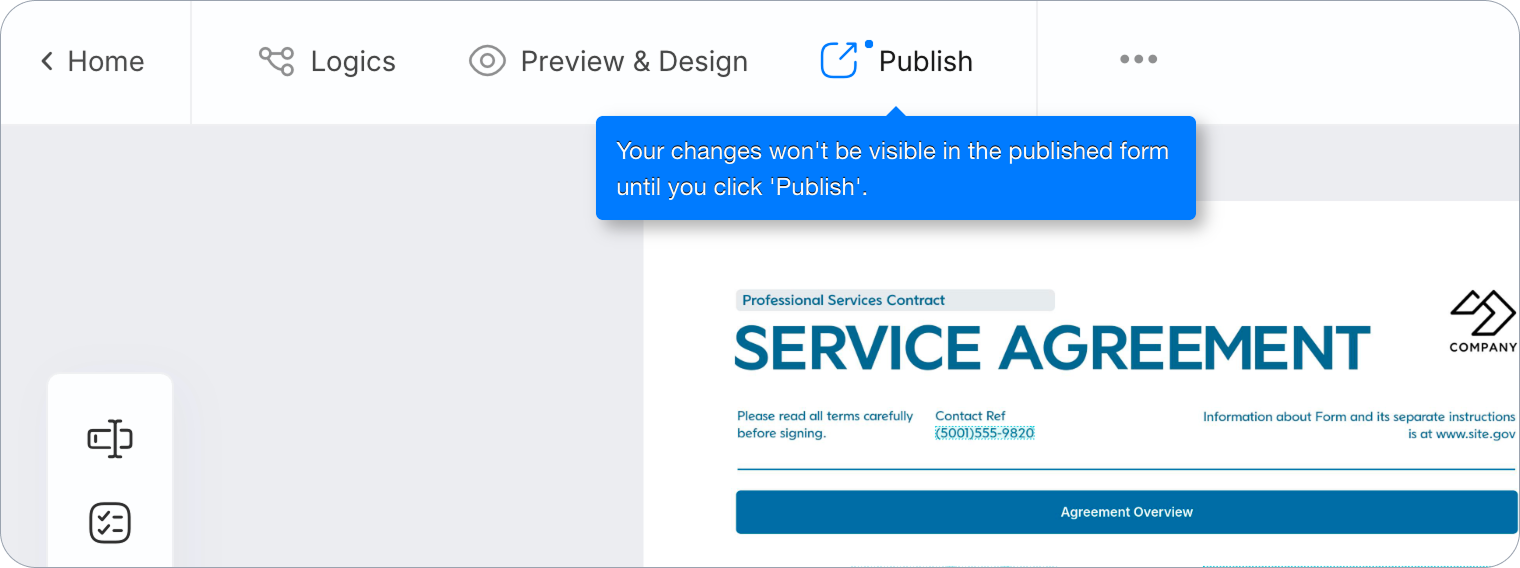
Publish your form
Once your online form is complete, return to the form builder and click the Publish button at the top left.
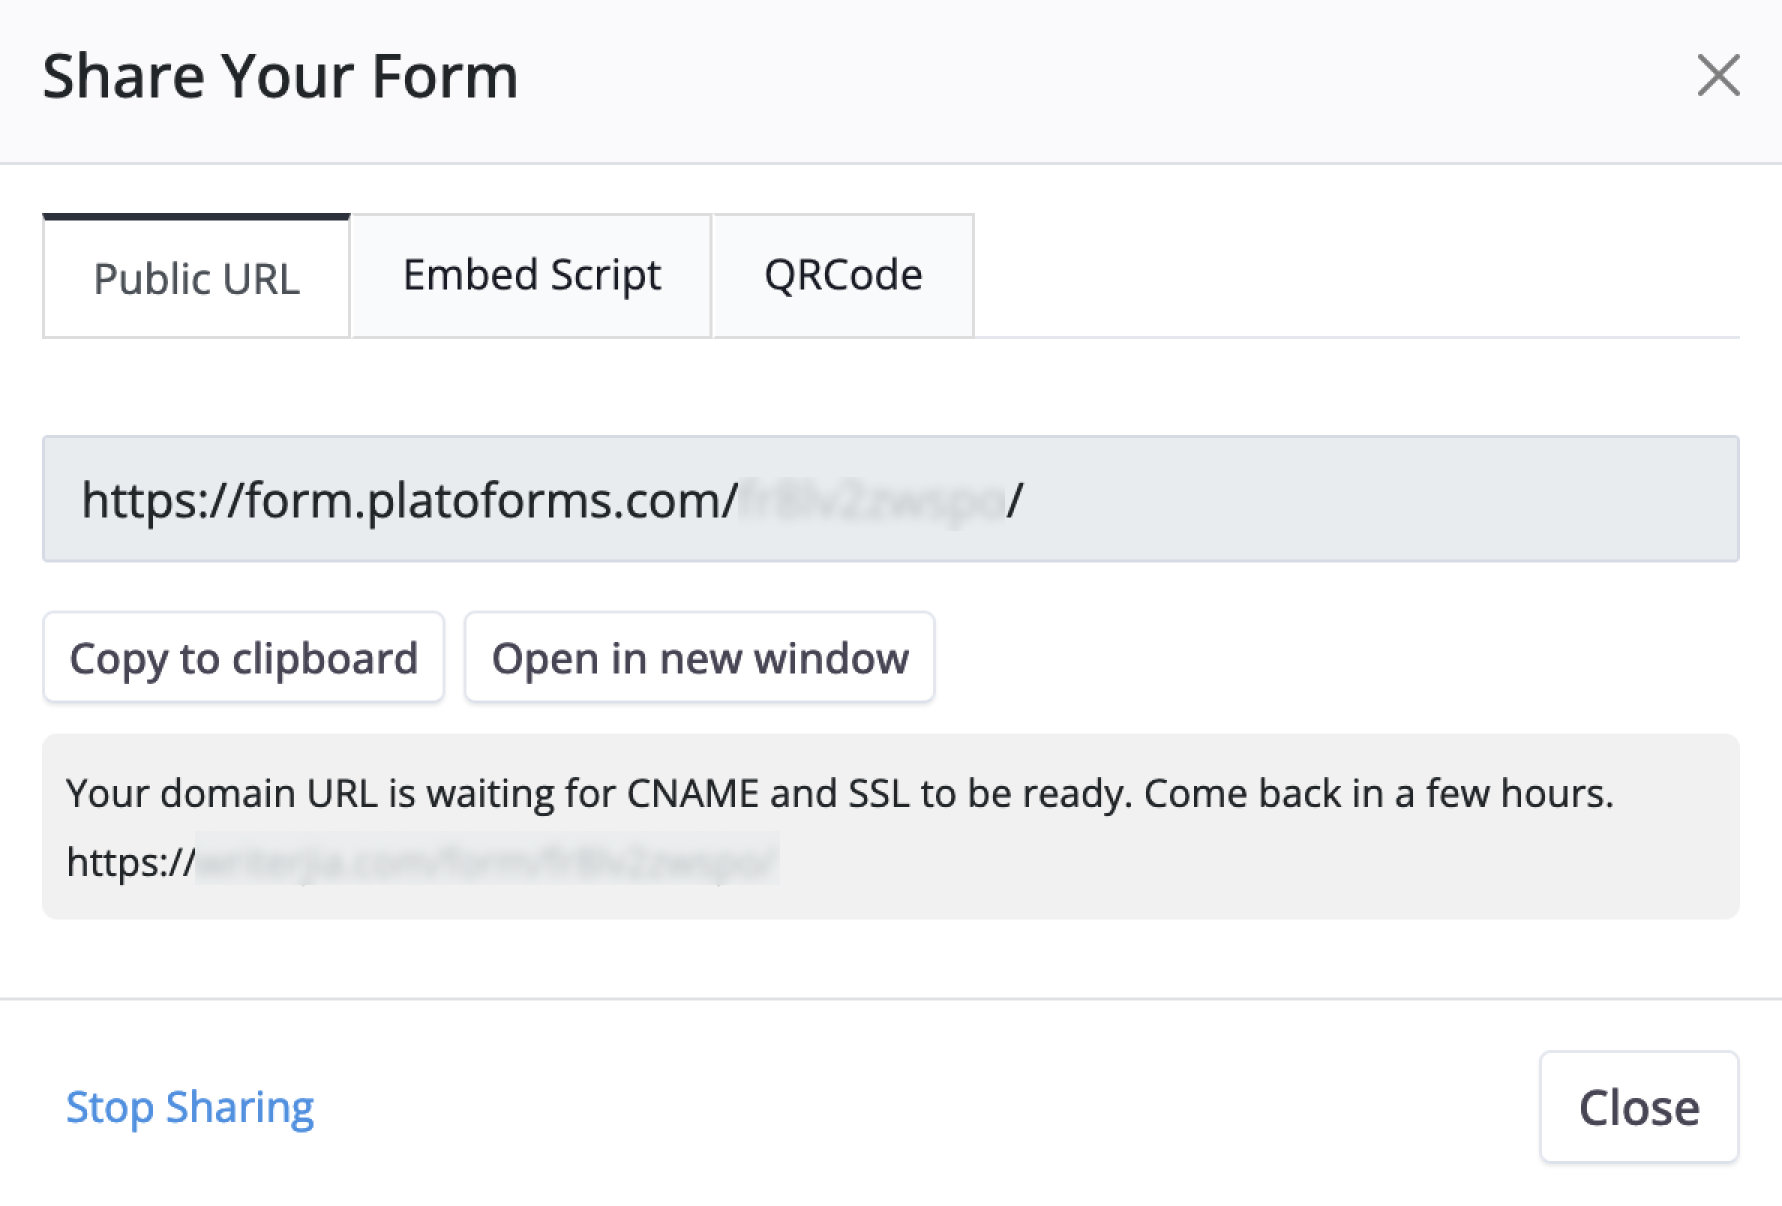
Once published, you’ll receive a Public URL, Embed Script, or QRCode for sharing with others:
-
Public URL: A direct link to your published form. Share it with others, and they can open and fill it in any web browser.
-
Embed Script: Code snippet that displays your form directly on your website or web application. Users can fill out the form without leaving your page. Choose from four embed options - standard, modal popup, floating button, or full-page display.
-
QRCode: Display on your website or printed materials. Users scan it with their mobile device to open and fill out the form.