Send email with custom domain
Tabs
With a premium plan, you can send form invitations and notifications using your company email. These ensure that your sent emails are trustworthy and genuine.
To use this feature, you can choose to either verfiy your Email Address or your Email Domain. See the difference below:
| Verification option | Description |
|---|---|
| Email Address | When you verify an individual email address like “myform@mydomain.com”, only that exact address is allowed for sending emails. Other addresses under the same domain need separate verification. Even if “myform@mydomain.com” is verified, strict recipient servers might still mark it as spam. |
| Email Domain | Verifying the whole domain (mydomain.com) lets you use any email address under it, like “myform@mydomain.com” or “mailer@mydomain.com”. It’s like authorizing the domain itself to send emails, which lowers the chance of rejection by recipient servers. |
Email address verification
-
Verify a specific address for sending form invitations, check the Configure email address section.
-
Verify a specific address for form notification, check the Configure form notifications section.
Email domain verification
Before you begin
Before you start setting up a custom email domain for your forms, make sure you have the following:
-
A domain name: Get your domain name through a domain registrar, such as GoDaddy, Namecheap, Google Domains, and more.
-
Access to your domain’s DNS records: This is essential for making necessary changes and linking your custom domain to your forms. Follow the steps below to complete these actions.
Verify email domain
-
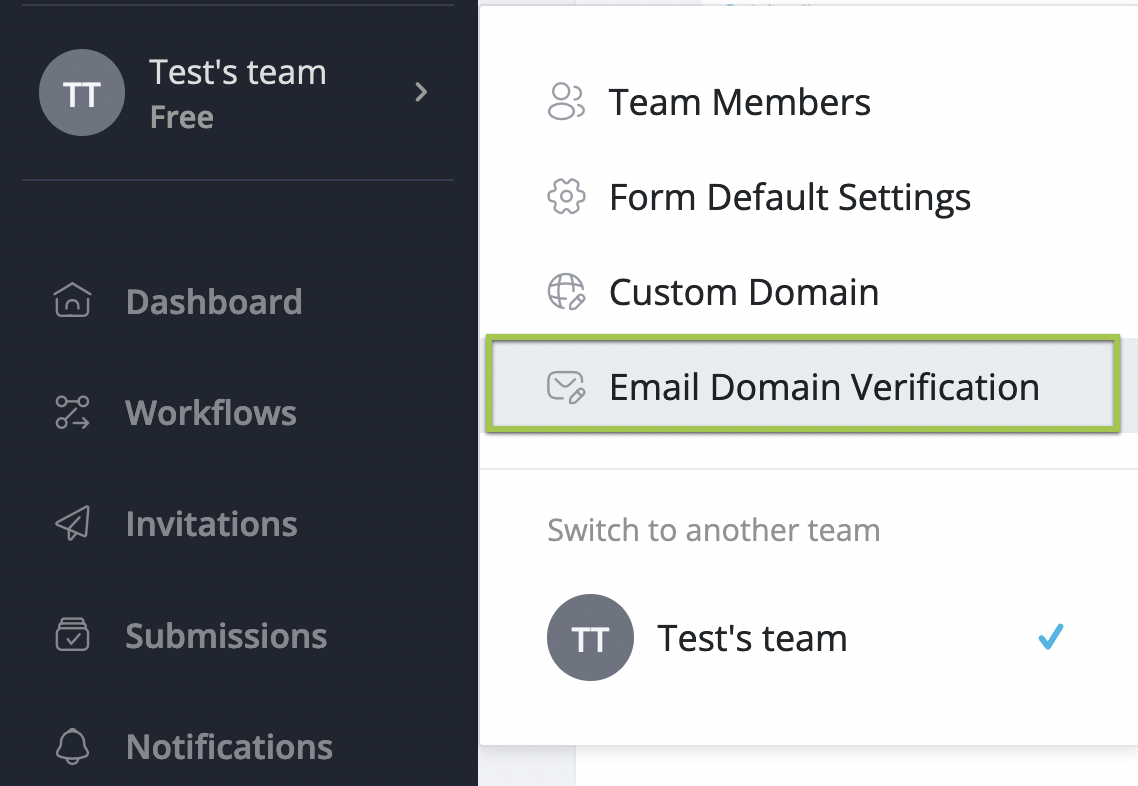
On the Dashboard, click your Team Name at the top of the left navigation.
-
In the expanded menu, select Email Domain Verification.
-
Enter the desired domain name and click Verify Domain.

-
On the Outgoing Email Domain page:
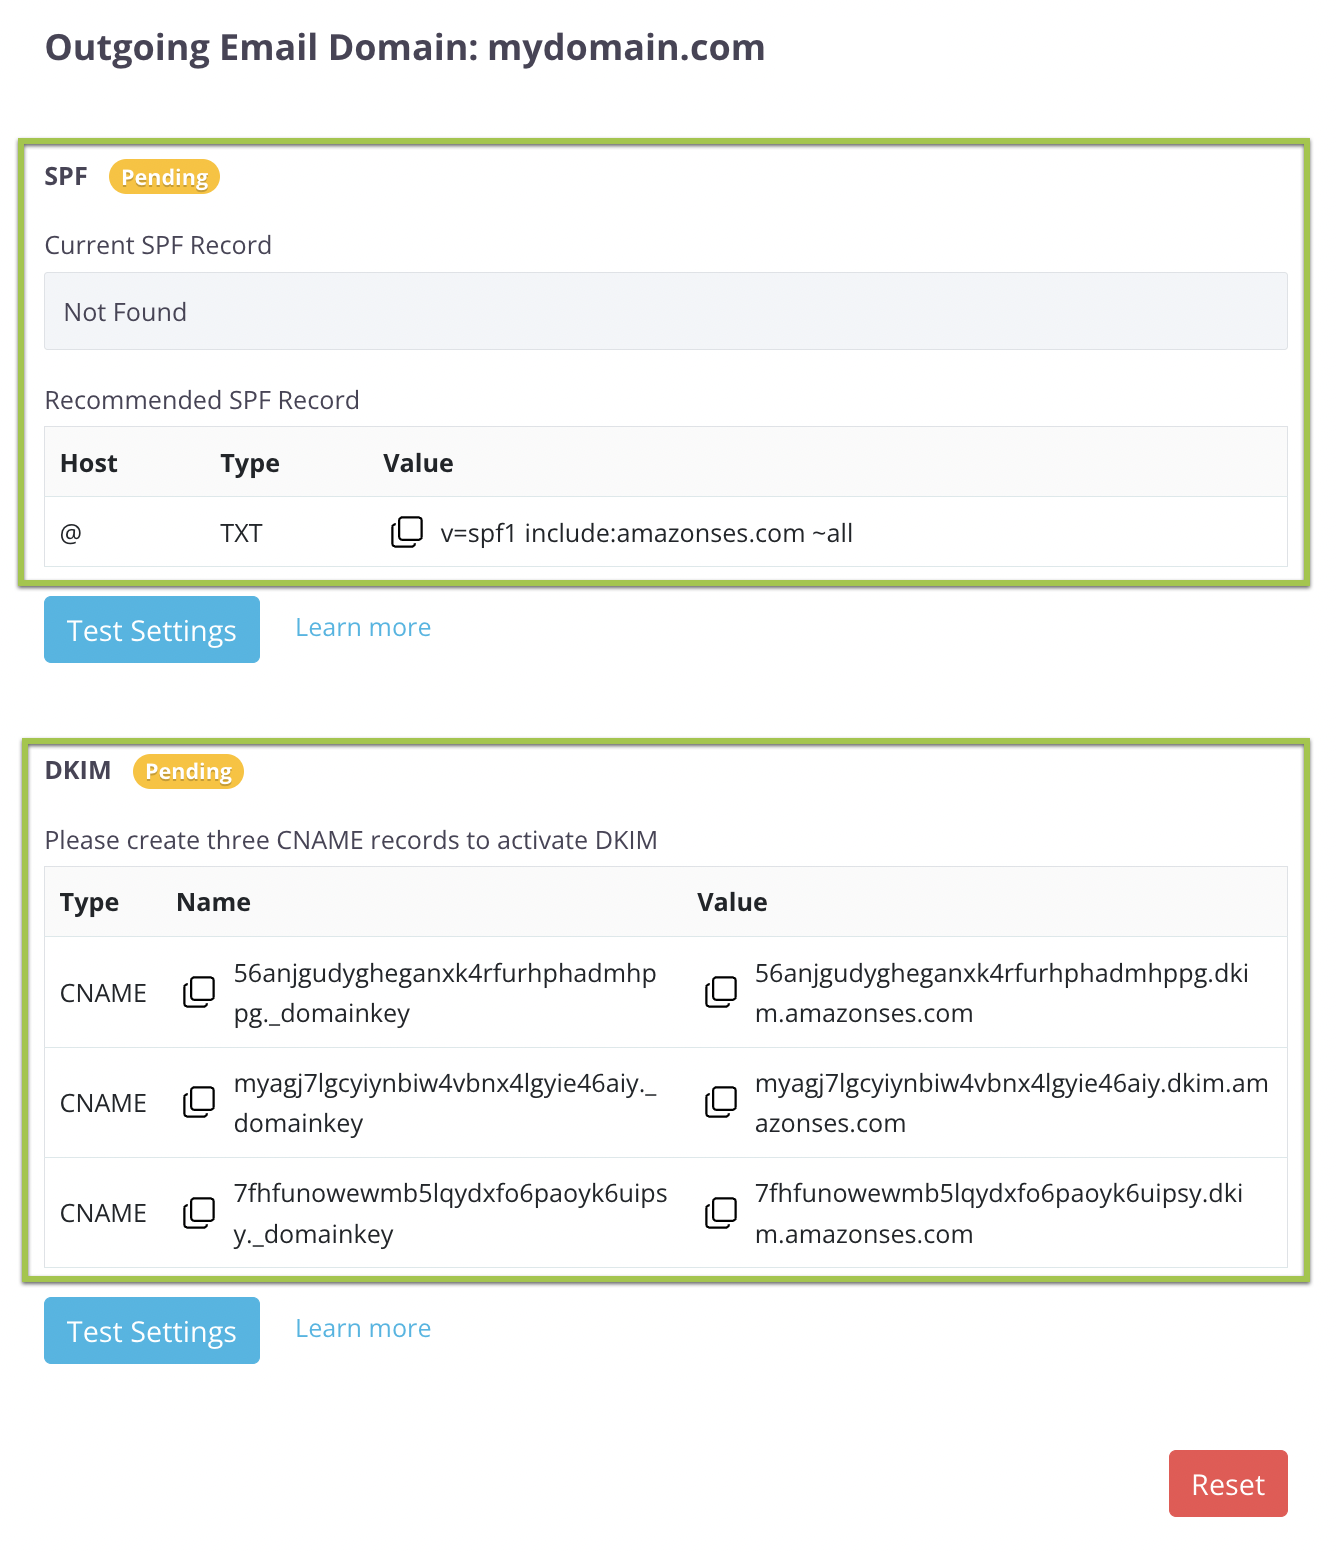
- Copy the SPF name and value to your domain DNS Records.
- Copy the three DKIM name and value to your domain DNS Records.
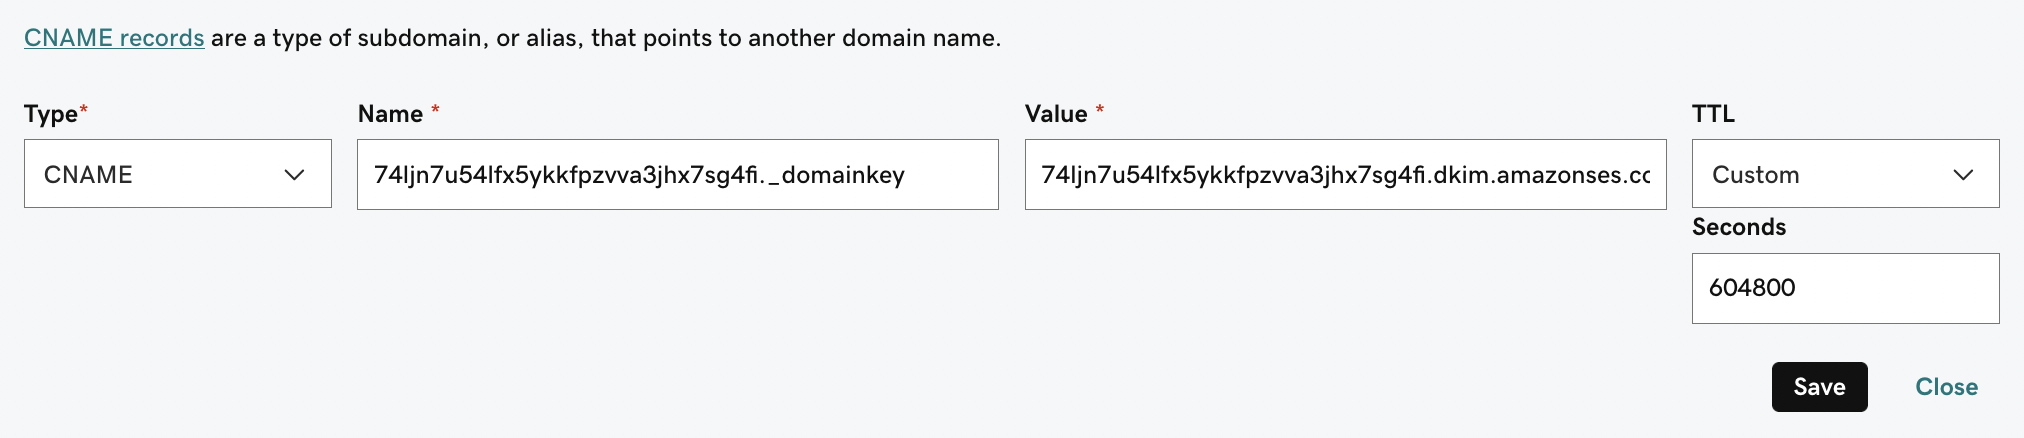
NoteTo copy the SPF and DKIM names and values:
- Log in to your domain account.
- Look for DNS settings or domain management.
Ask the registrar’s support team for help if needed.
-
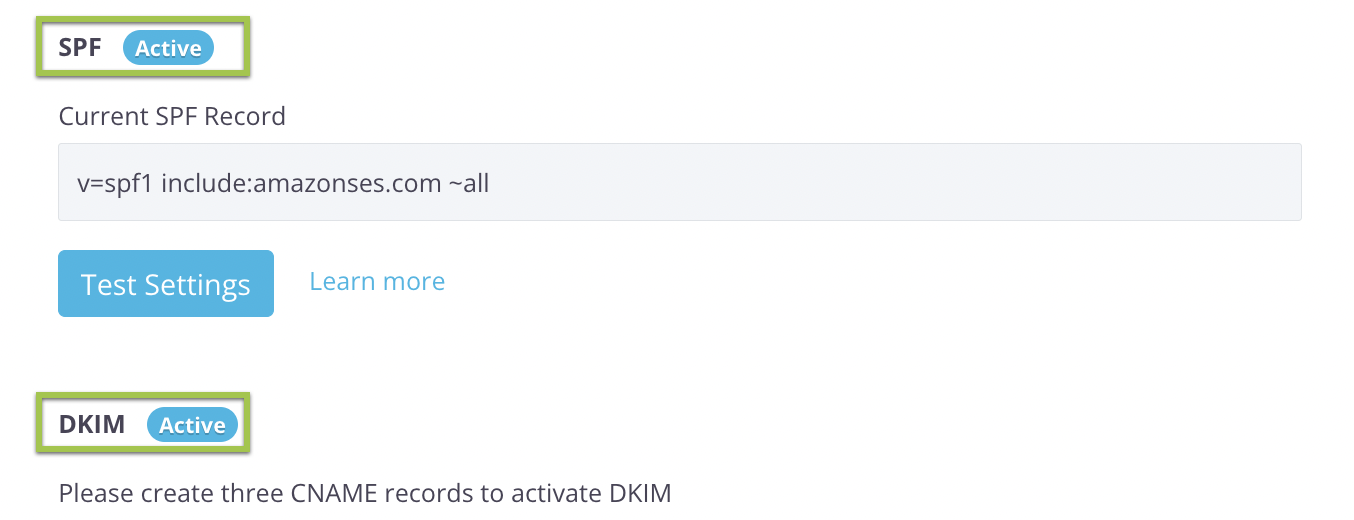
After setting up your new SPF and CNAME records correctly, PlatoForms will check and verify your settings. You can click on Test Settings to see the verification results.
NoteThe verification process may take a few minutes to a few hours.
Once your SPF and CNAME records are successfully verified, their status will change from “Pending” to “Active.”
Set up verified domain
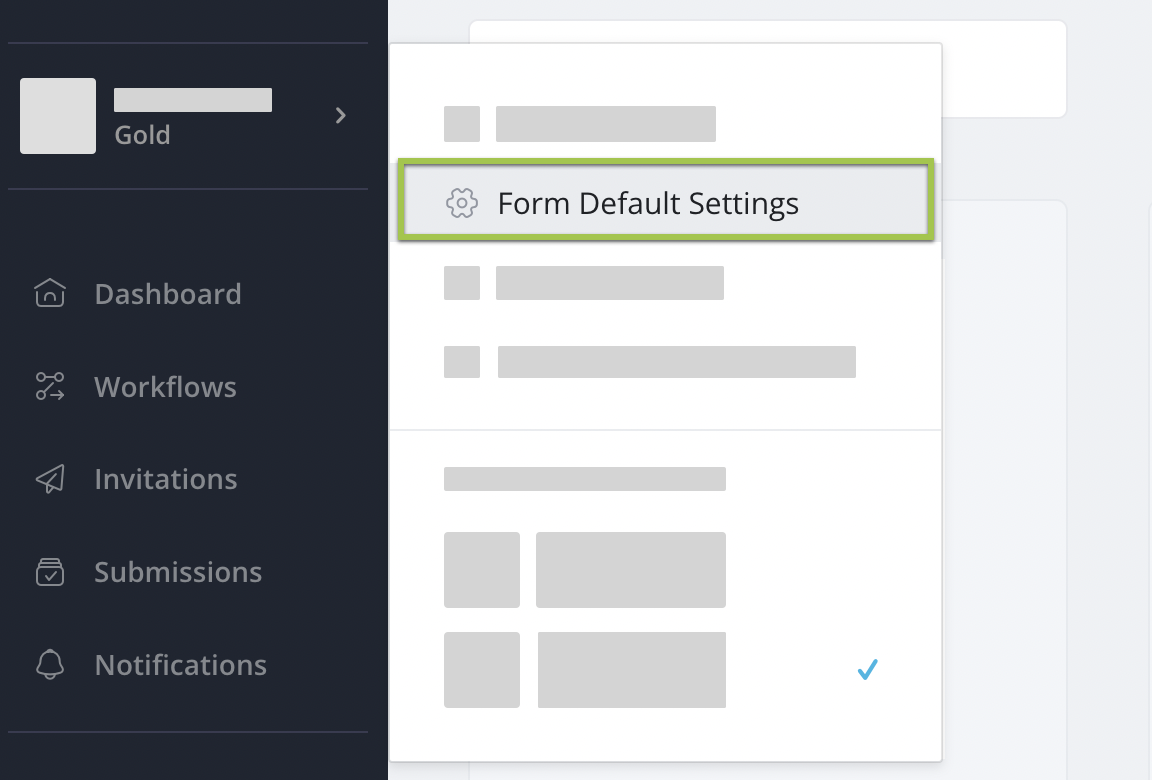
Once your email domain is verified, follow these steps:
-
On the Dashboard, click your Team Name at the top of the left navigation.
-
In the expanded menu, select Form Default Settings.
-
Switch to the Invitation Settings tab, enter a desired sender name and email for your verified domain, and click Save.
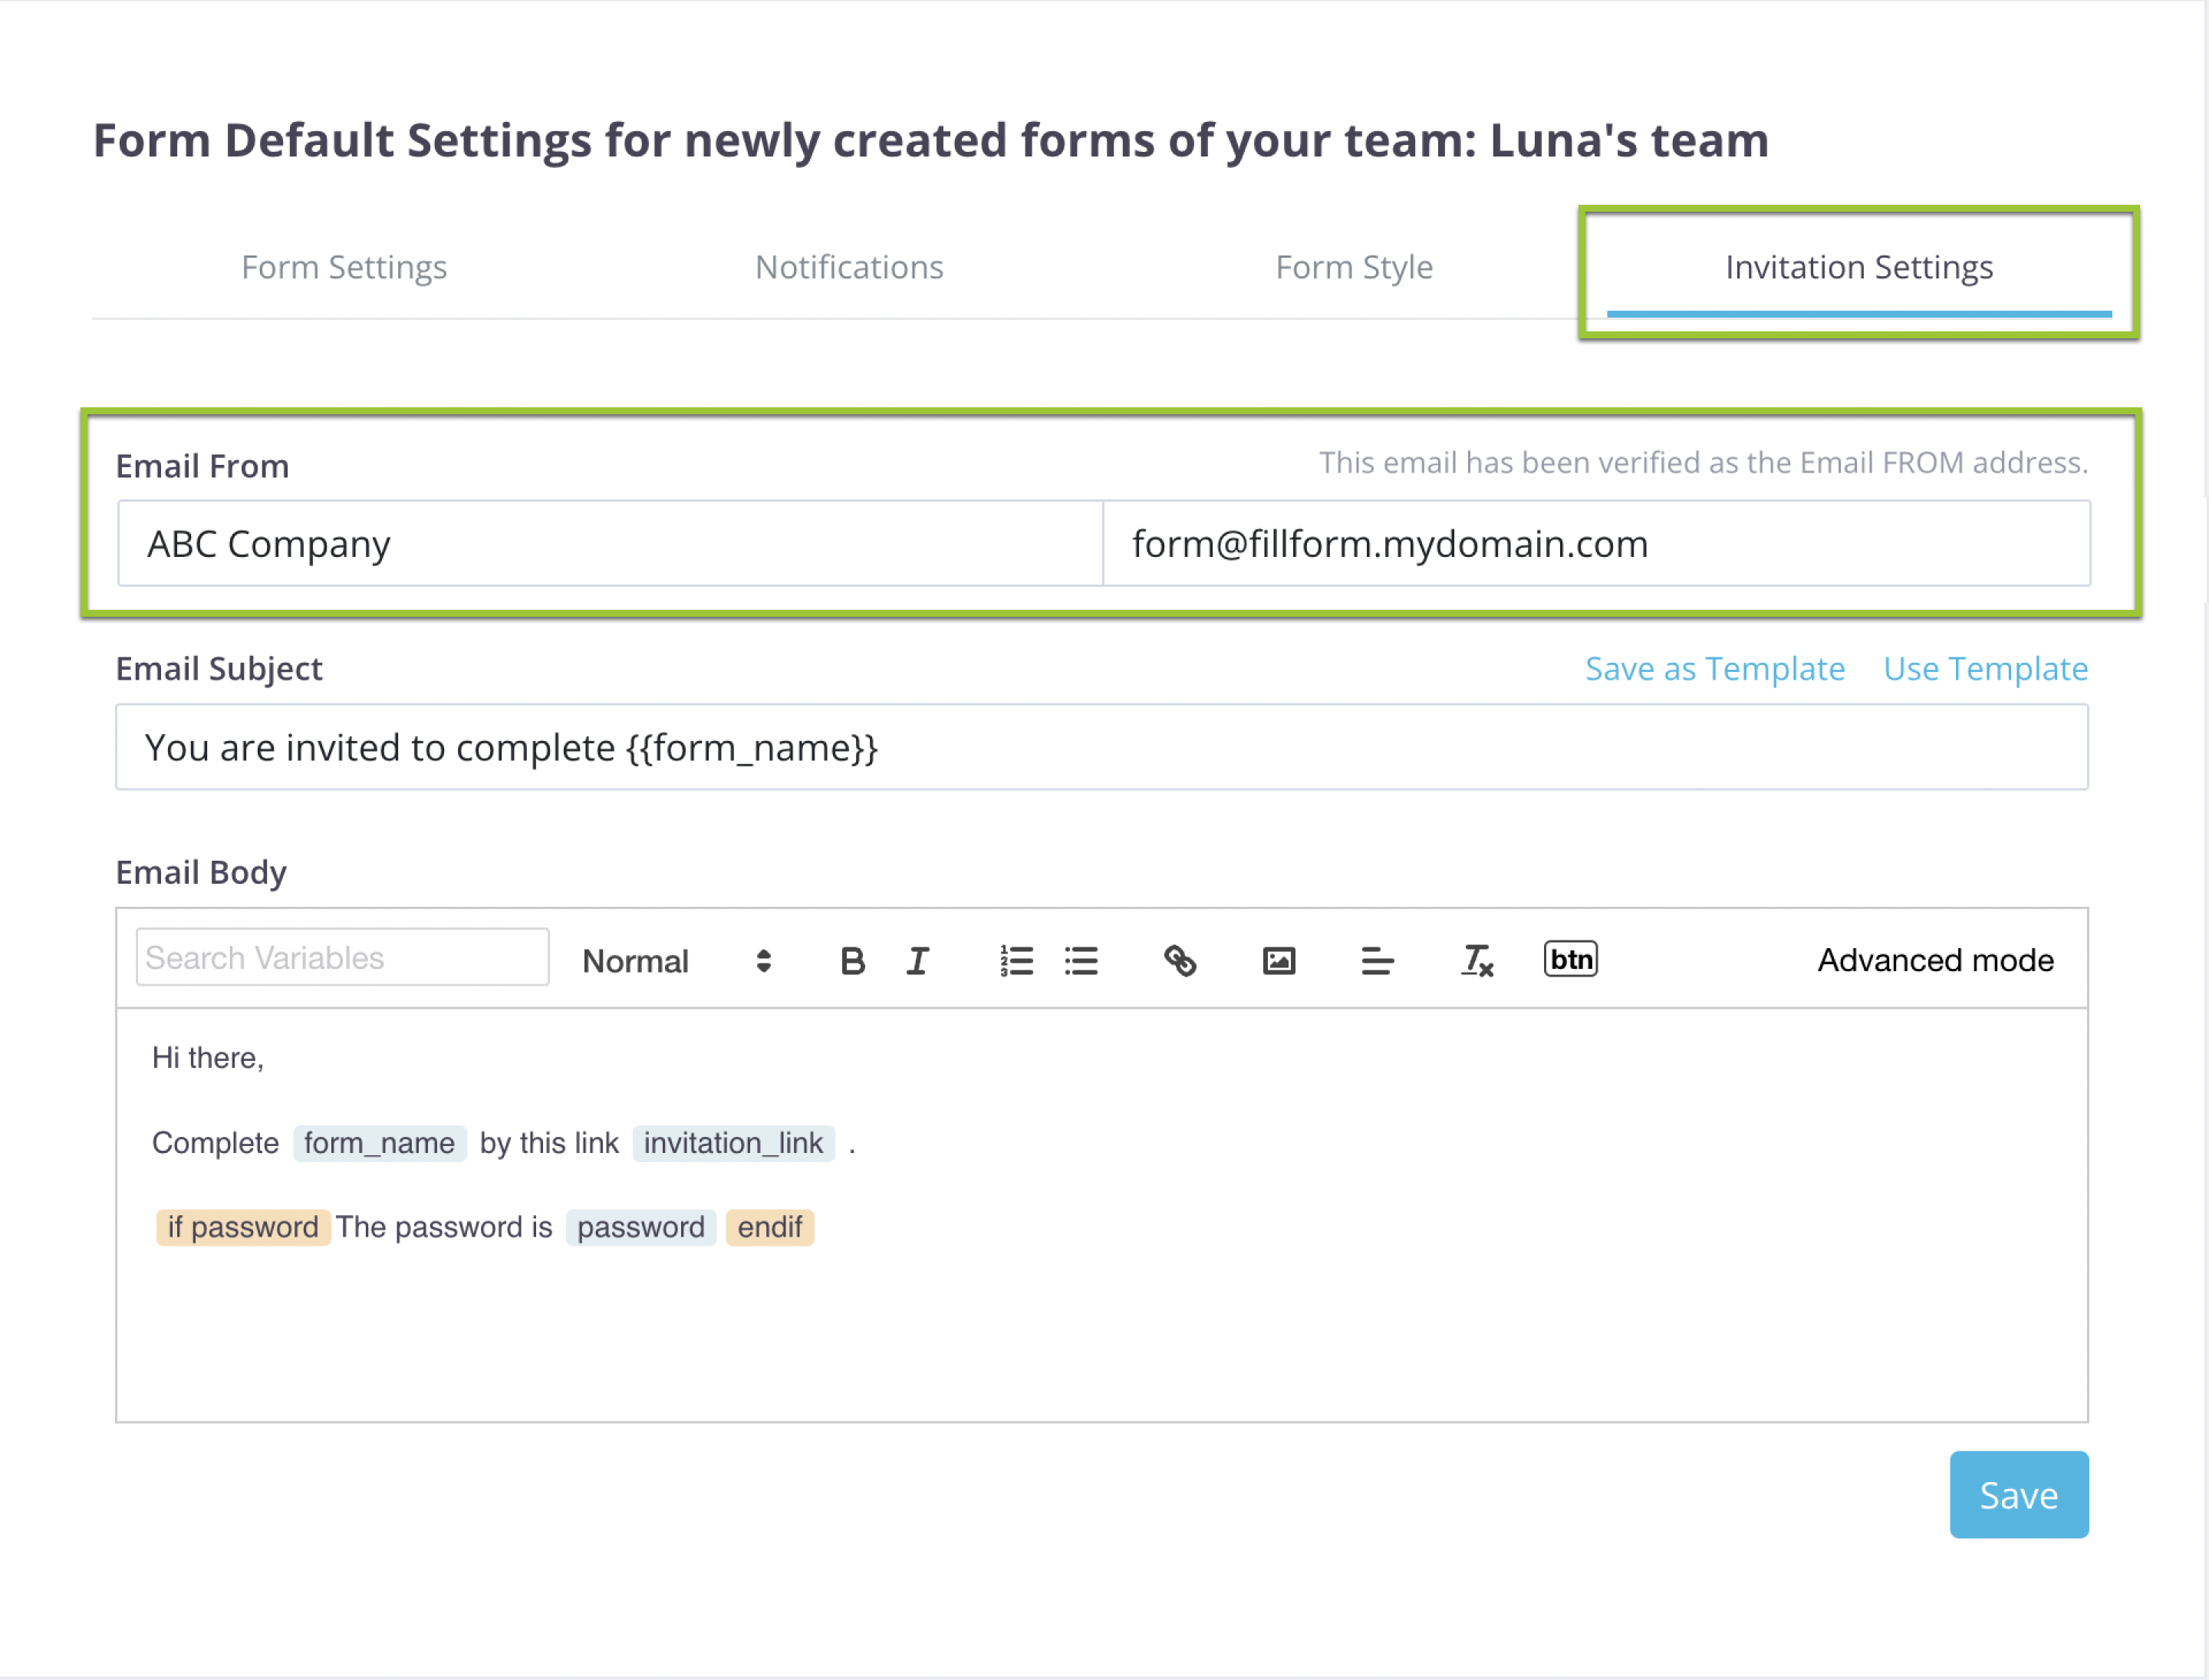
The sender name and email address will auto-fill in the Invitation panel. This setting applies to all team members.
Video tutorial
Skip the text, and let’s dive into this step-by-step video tutorial, which involves what we mentioned above!