
Contacts
Tabs
When sending invitations, you can include up to 5 email addresses per invitation. To send to more recipients, upload a contact list to the Contacts page and select contact groups when sending.
Access the Contacts page
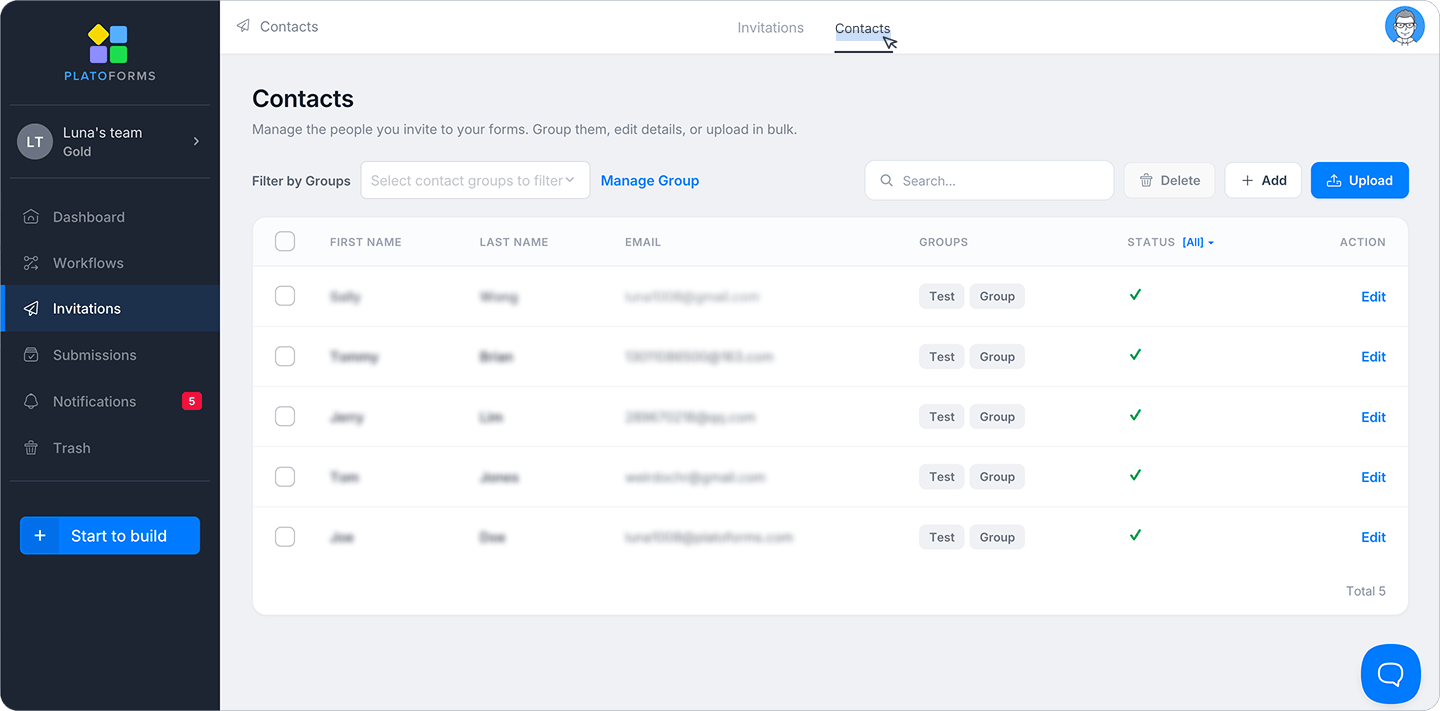
In the left navigation, click Invitations, then click the Contacts tab at the top of the page.
Upload contacts
-
On the Contacts page, click Upload in the top right.
-
You’ll land on the Upload Contacts page. If you don’t have a contact file yet, scroll to the bottom and click Download Contact CSV Template to get the template.
-
Fill in the template with contact details: First Name, Last Name, and Email. Save it as a CSV file.
CautionOnly First Name, Last Name, and Email columns are imported. Any other columns will be ignored.
-
In the Group field at the top of the page, select a group to assign these contacts to. You must set a group before uploading — the upload box won’t accept files until a group is selected.
- Select an existing group: Click the field and pick from the dropdown.
- Create a new group: Type the new group name — it will appear highlighted in blue at the bottom of the dropdown. Click it to select it.
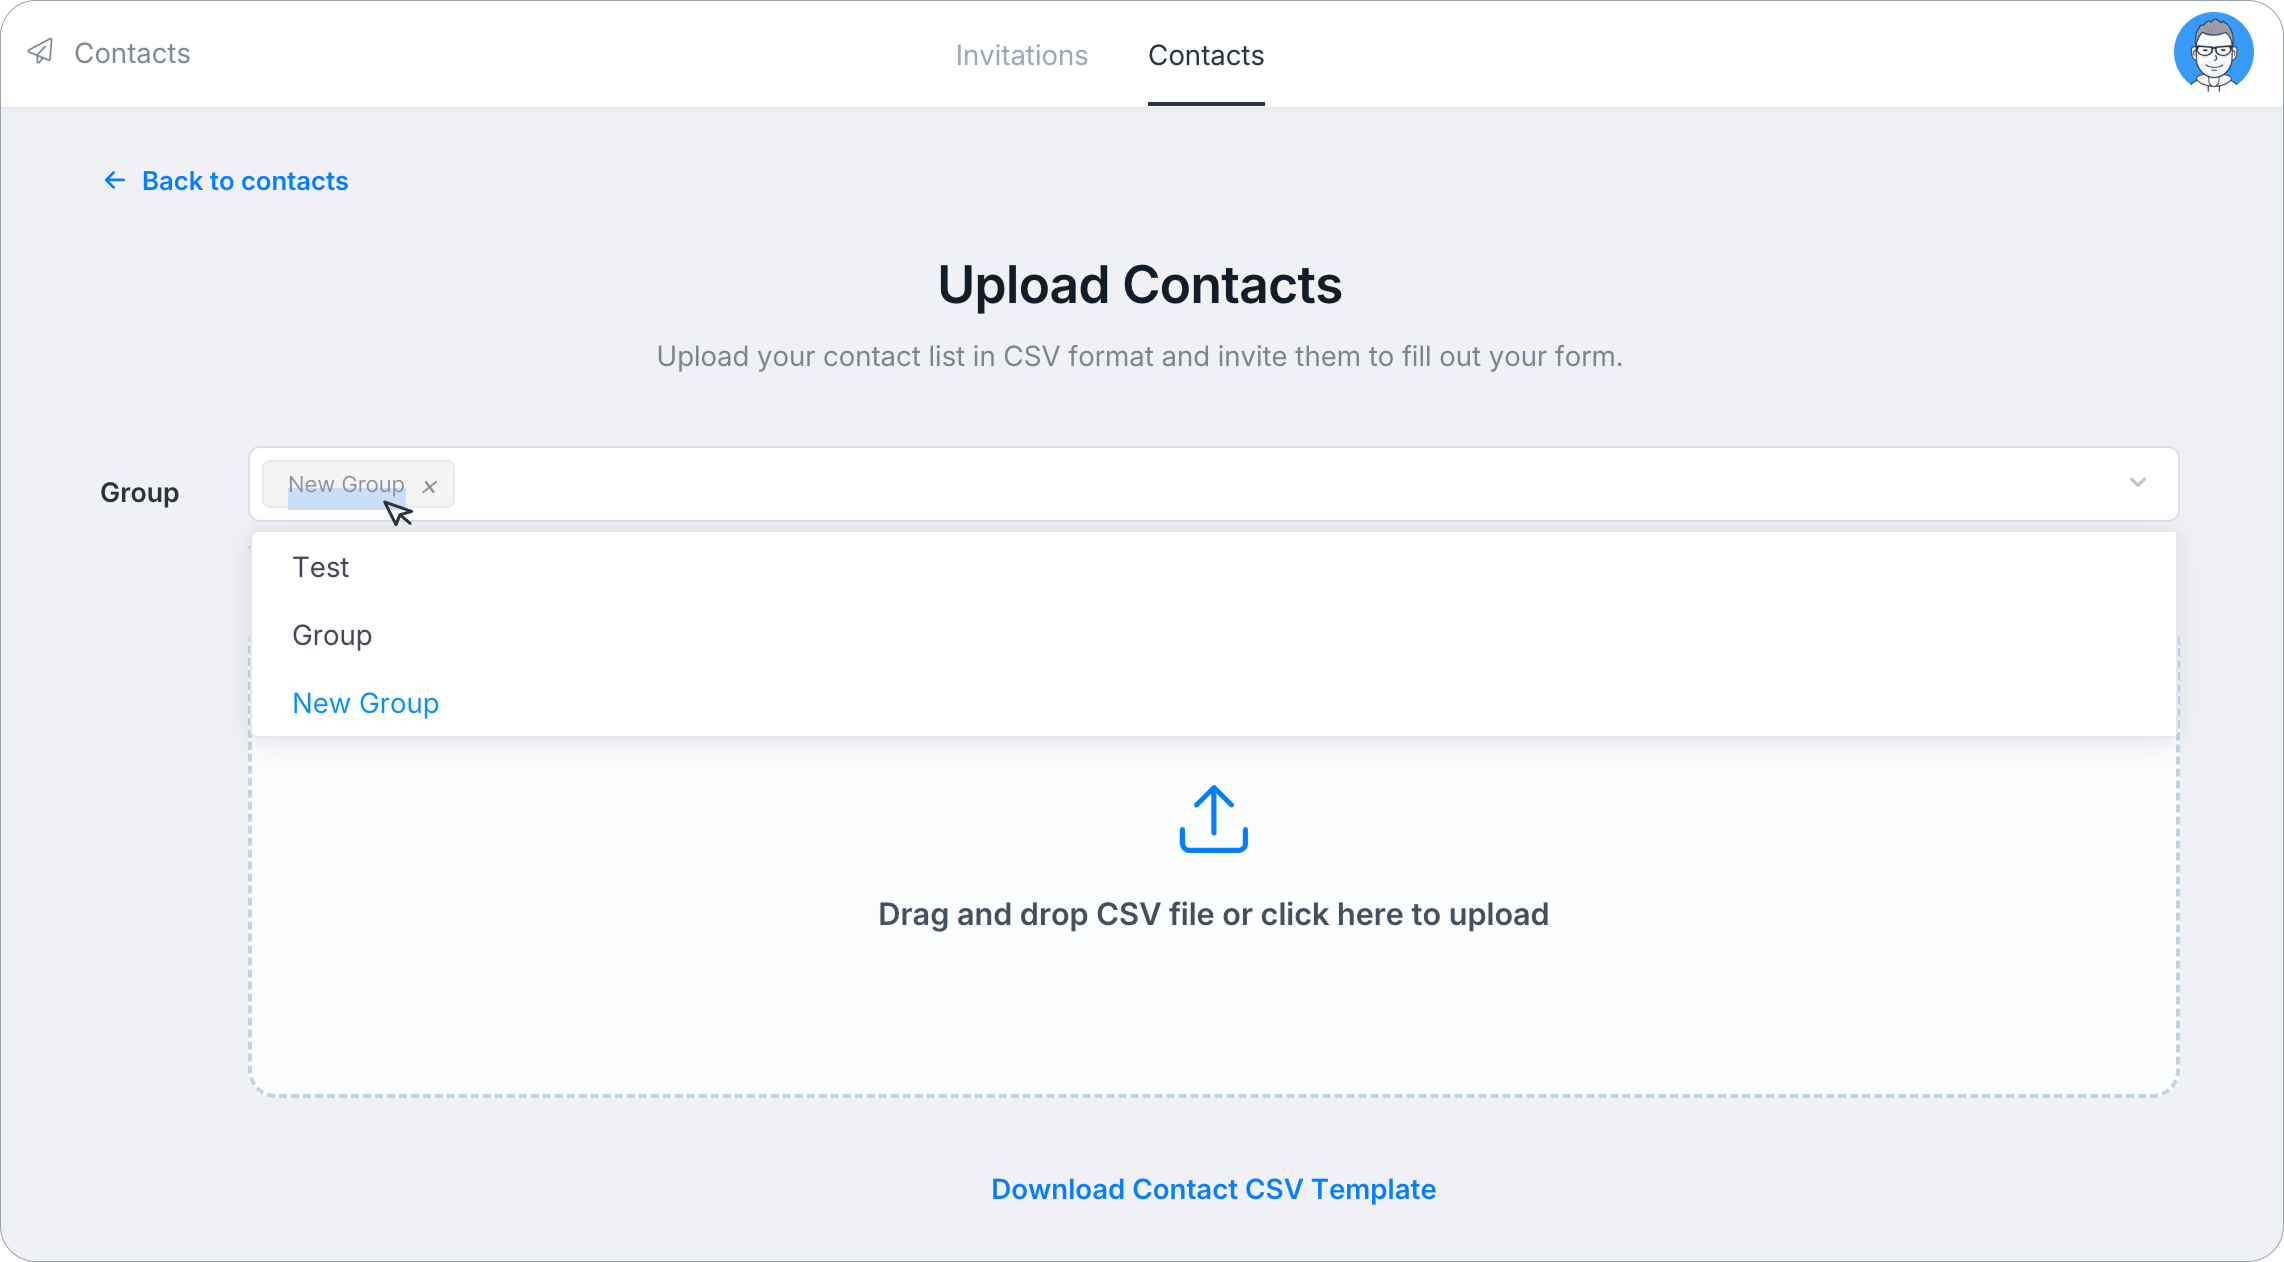
You can assign contacts to multiple groups at once.
NoteA new group name is only saved after you complete the upload and click Confirm Upload. If you close the page before confirming, the new group will not be created.
-
Drag and drop your CSV file into the upload box, or click the box to select it.
-
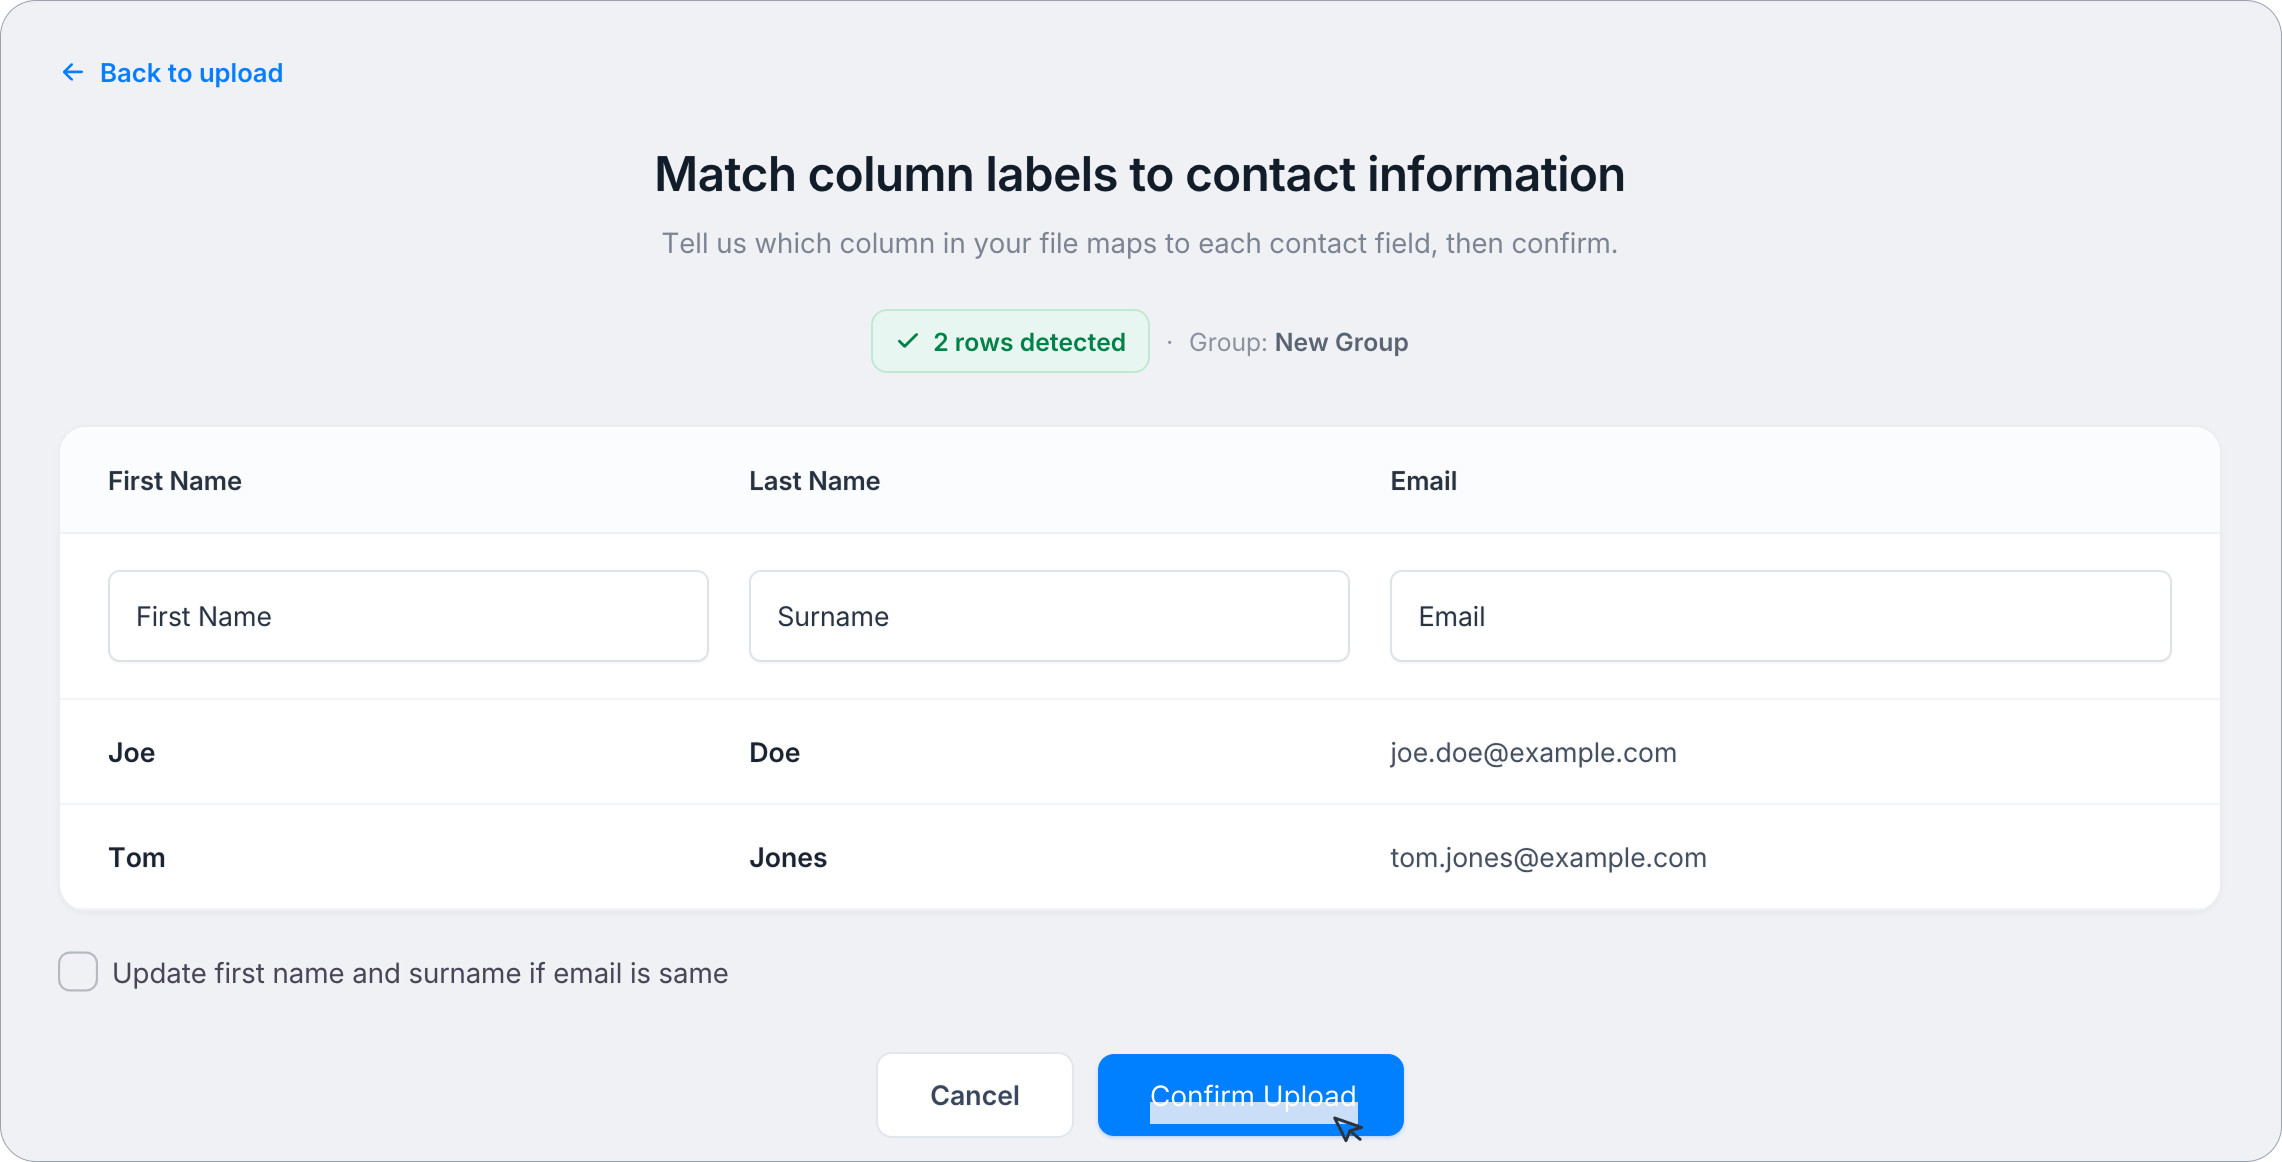
After uploading, verify that each column is mapped correctly. If the mapping is off, use the dropdown under each column to select the correct value.
(Optional) Check Update first name and surname if email is same to overwrite existing contact names if a matching email address is already in your contact list.
-
Click Confirm Upload.
Contact status
After uploading, contacts appear on the Contacts page with the following statuses:
- All: All contacts, regardless of status.
- Valid: Contacts with valid email addresses.
- Invalid: Contacts with invalid email addresses (incorrect format or domain). Invalid contacts are automatically removed 72 hours after upload.
- Pending: Email addresses are being verified — this may take a few minutes. Refresh the page to update the status.
- Out-of-Plan: Uploaded contacts exceed your plan’s limit and won’t receive emails. Consider upgrading your plan for more capacity.
Manage contacts
On the Contacts page:
-
To add a contact manually: Click + Add. A blank row appears at the top of the list — fill in the First Name, Last Name, Email, and Groups, then click Save.
-
To edit a contact: Click Edit in the Action column of that contact’s row. Update the fields and click Save.
-
To delete contacts: Check the box next to one or more contacts, click Delete in the top right, then confirm in the Confirm Deletion dialog that appears.
-
To manage groups: Click Manage Group at the top. A Group Manage dialog opens showing all existing groups — you can Edit or Delete each group from there.
CautionConsider removing contacts from a group first before deleting it, in case the group can’t be deleted while contacts are still assigned to it.
-
To filter by group: Use the Filter by Groups dropdown at the top left to display only contacts in a specific group.