
Text Input initial value
Tabs
This article explains how to set up initial value for your Text Input field.
What is an initial value?
An initial value for a Text field is a default value automatically inserted into your online forms. It’s useful for adding preset information — like today’s date, or the submission date — to the form. Respondents will see these values pre-filled in the Text field when accessing the form, and they’ll also appear in the PDF.
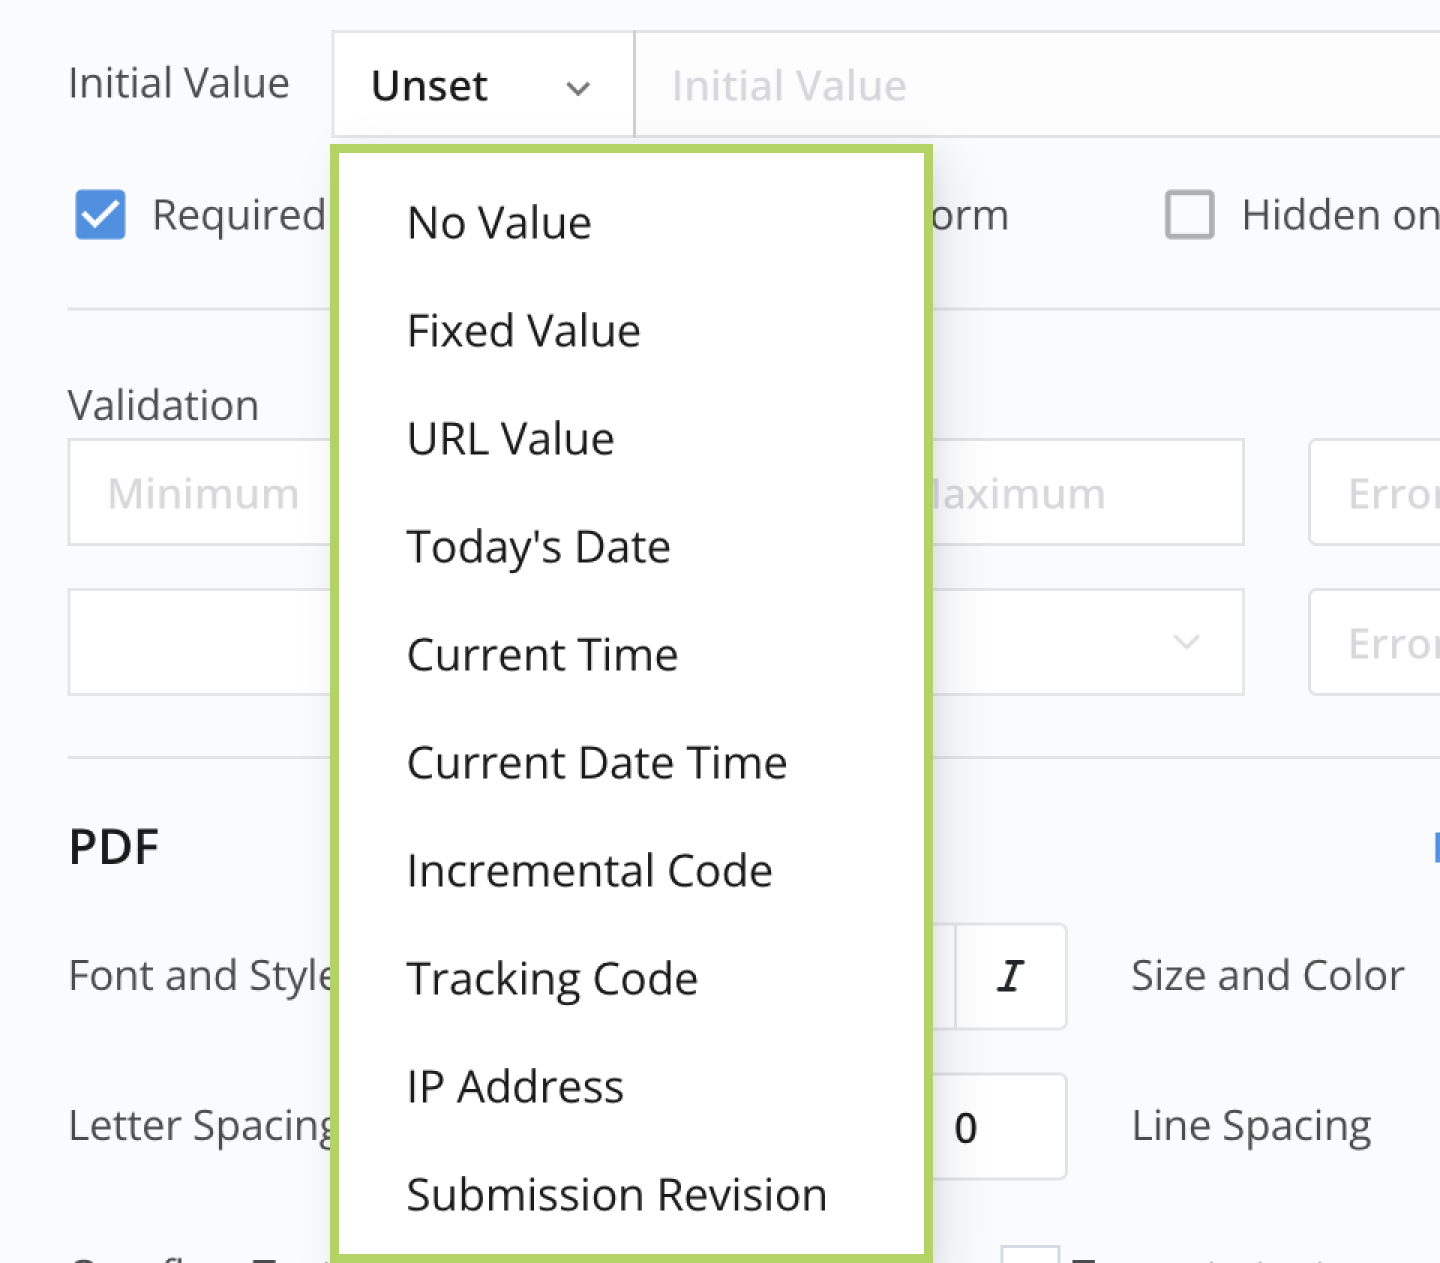
Initial value types
| Initial value | Types |
|---|---|
|
|
By default, the Text field with an initial value can be edited by the respondent, but in many cases, you may want to make it read-only and hide it in the form while still including it in the PDF.
Set initial value
-
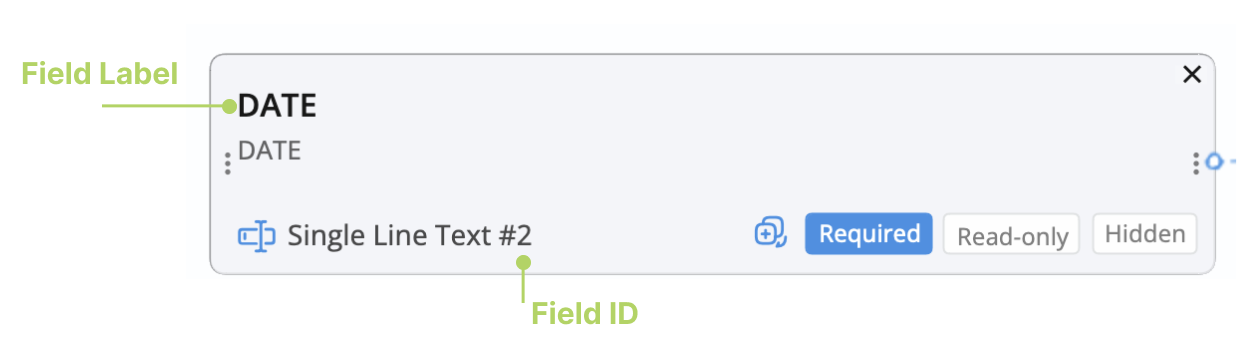
Click on the Field Label or Field ID of your desired Text Field to open its properties panel.
-
From the Initial Value dropdown, select your desired initial value.
For details about each initial value, refer to the Available initial values.
Available initial values
Fixed Value
Suppose you want to include a non-editable date in your forms, use Fixed Value as an Initial Value:
- Set the Initial Value for “Date” to Fixed Value.
- Enter your desired text in the input box.
- Set the field to Read-only.

URL Value
Use URL parameters to pre-fill form fields when you have respondent information like their name and email. This saves time, improves satisfaction, and works well for repetitive forms or maintaining data consistency.
For example:
-
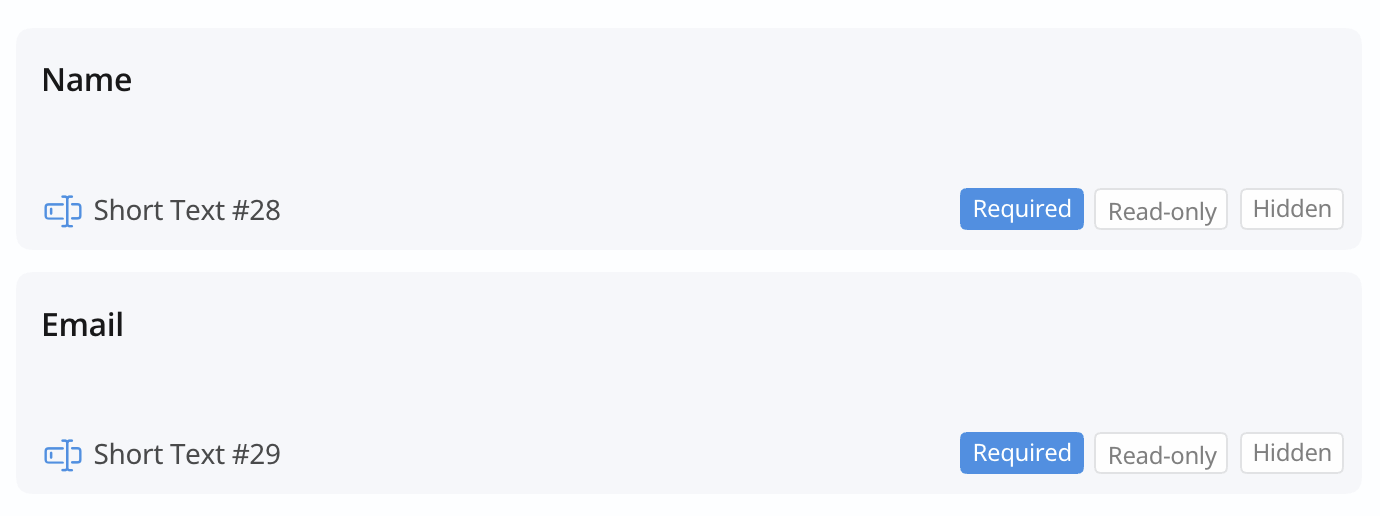
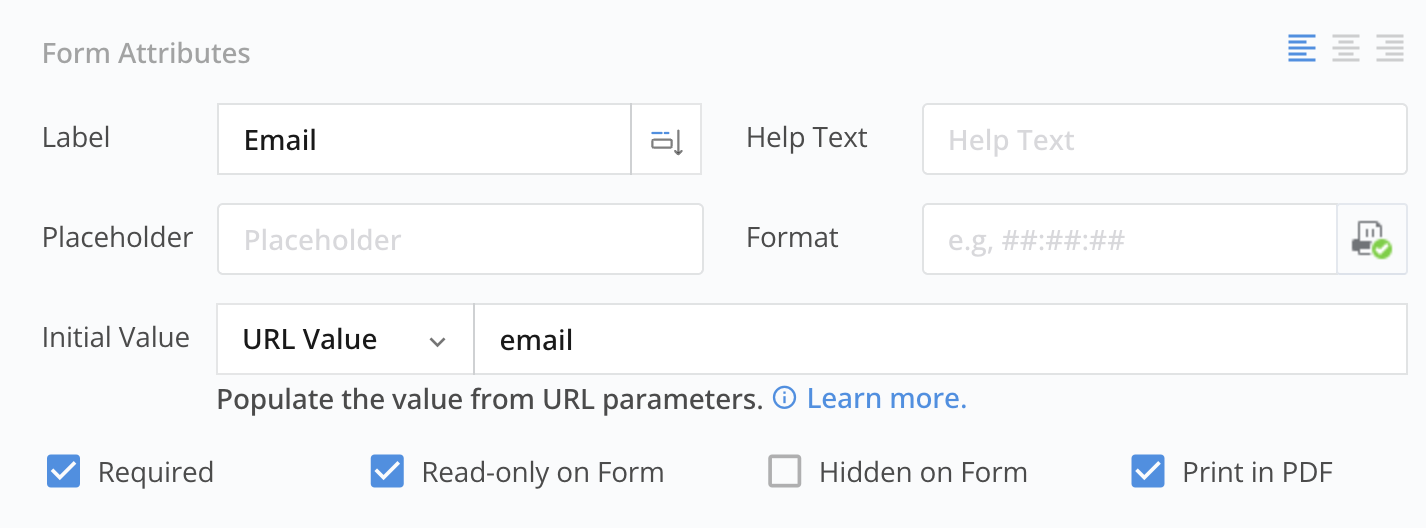
Suppose you have two Text Fields in your form: one for “Name” and another for “Email”.
-
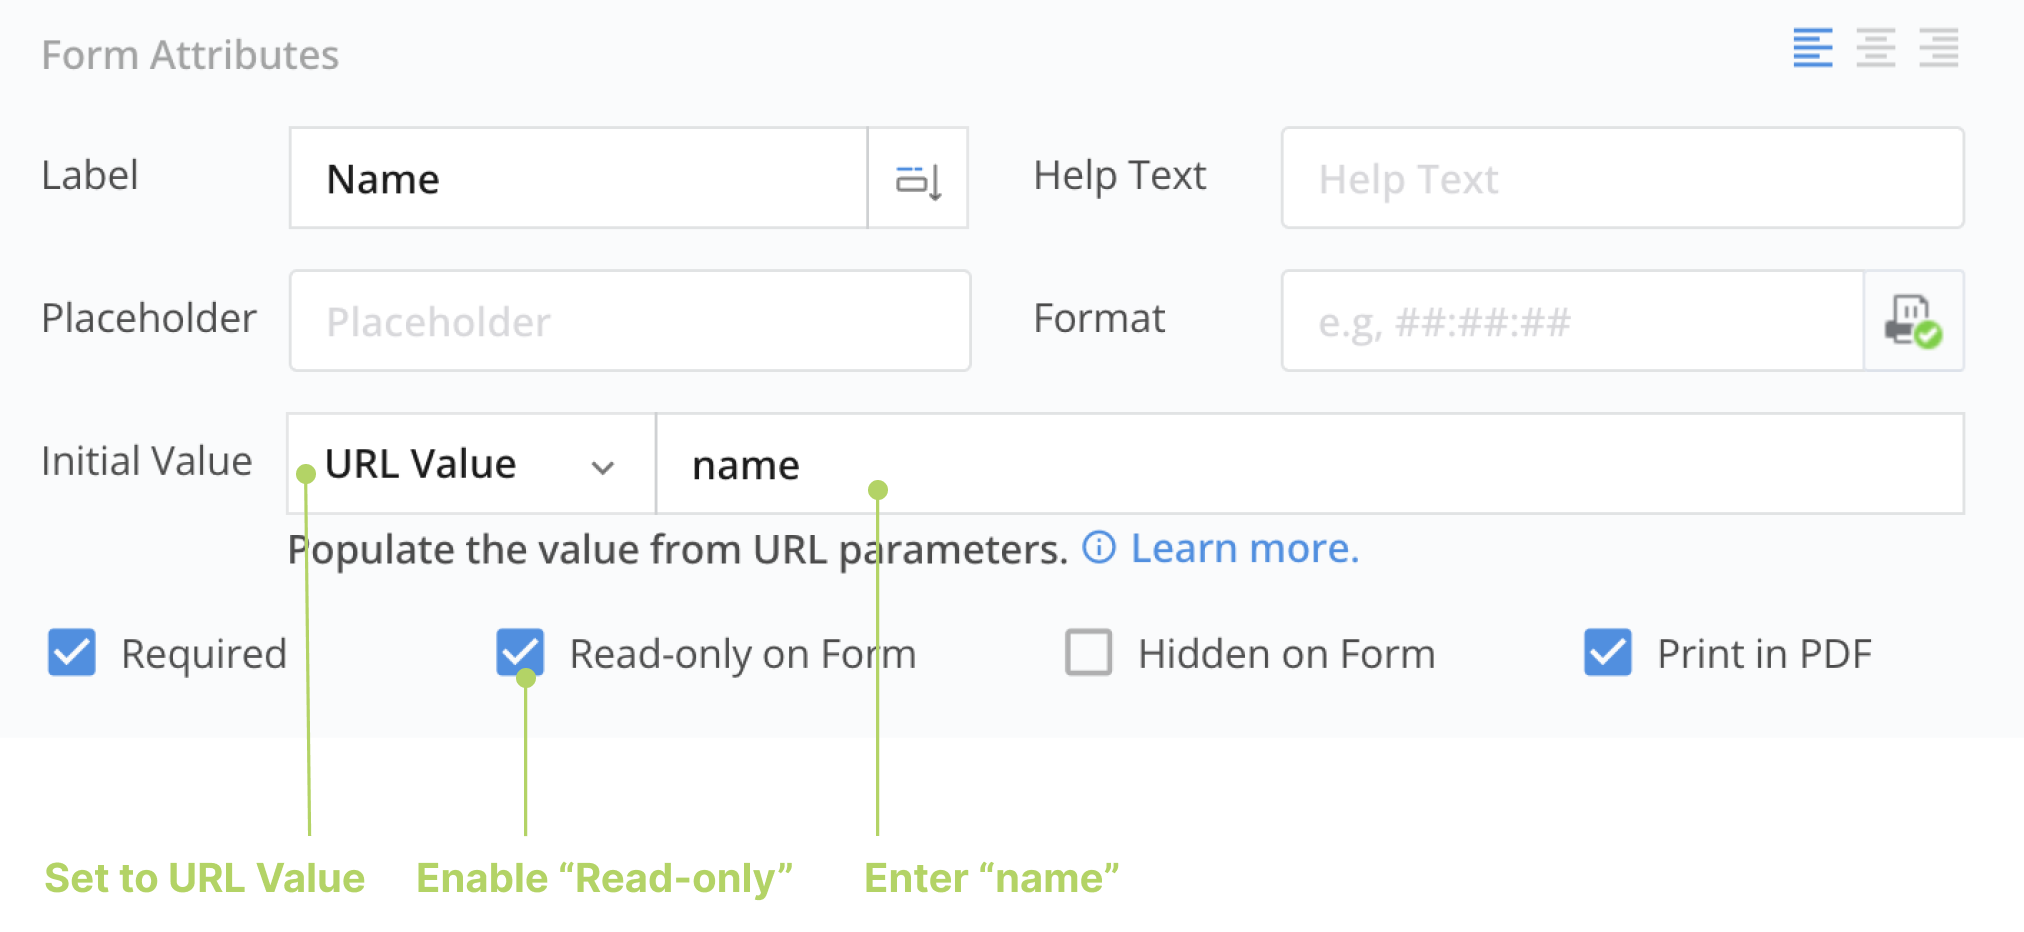
For the “Name” Text Field:
- Set the Initial Value to
URL Value. - Set the field’s status as
Read-only. - In the input box, enter
name.
 Note
NoteSetting the field as “Read-only” ensures that respondents can’t change the predefined values.
- Set the Initial Value to
-
Apply the same settings to the “Email” Text Field.
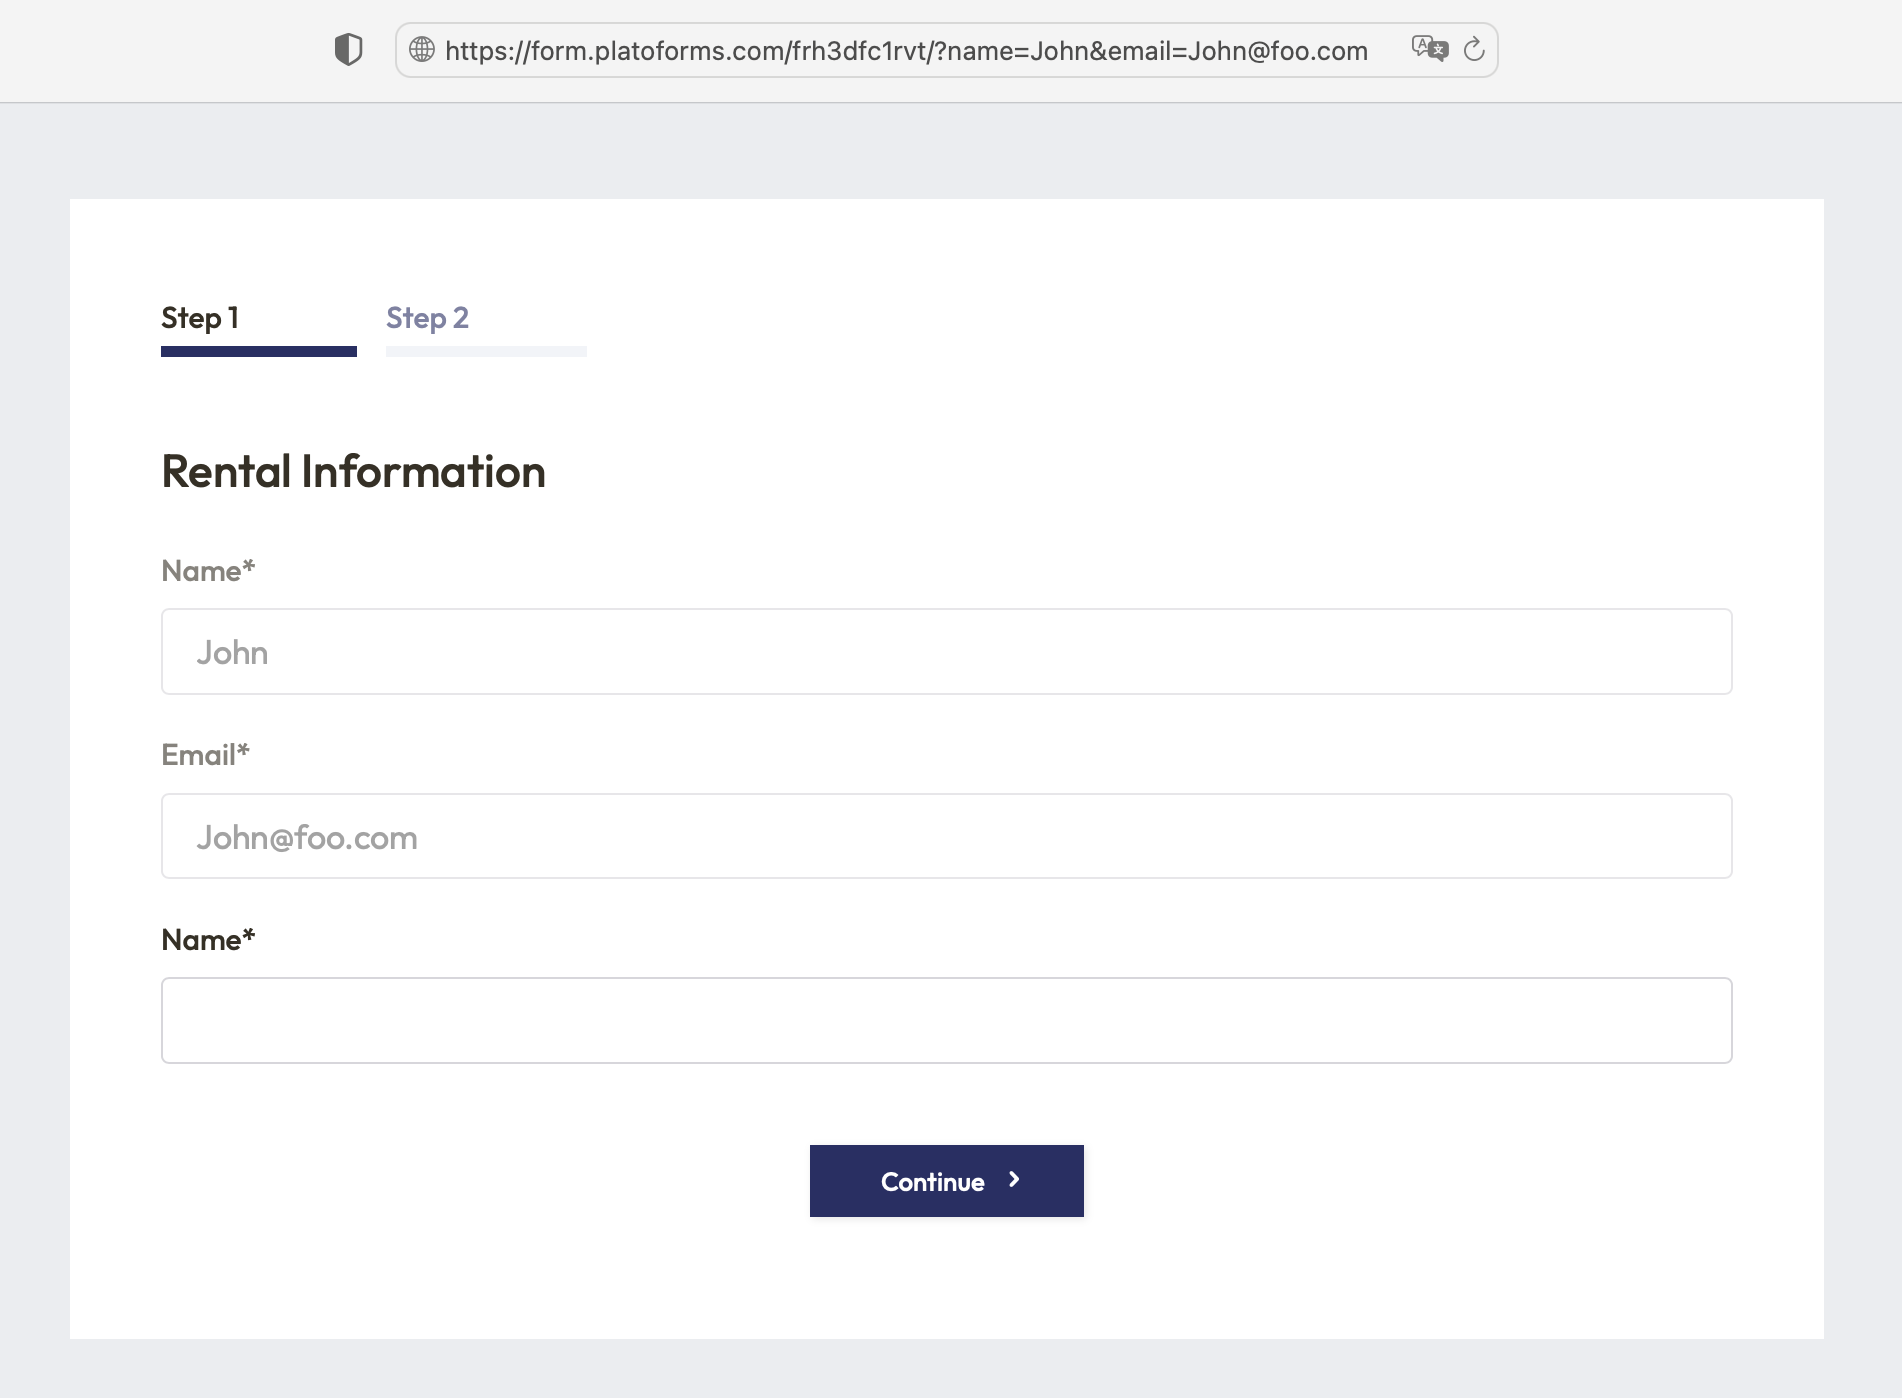
Now, when you open the form’s URL and add ?name=John&email=John@foo.com to the end, both fields will automatically populate with the specified values. You can send this URL to users, saving them the trouble of manually entering this information.
URL Value for embedded form
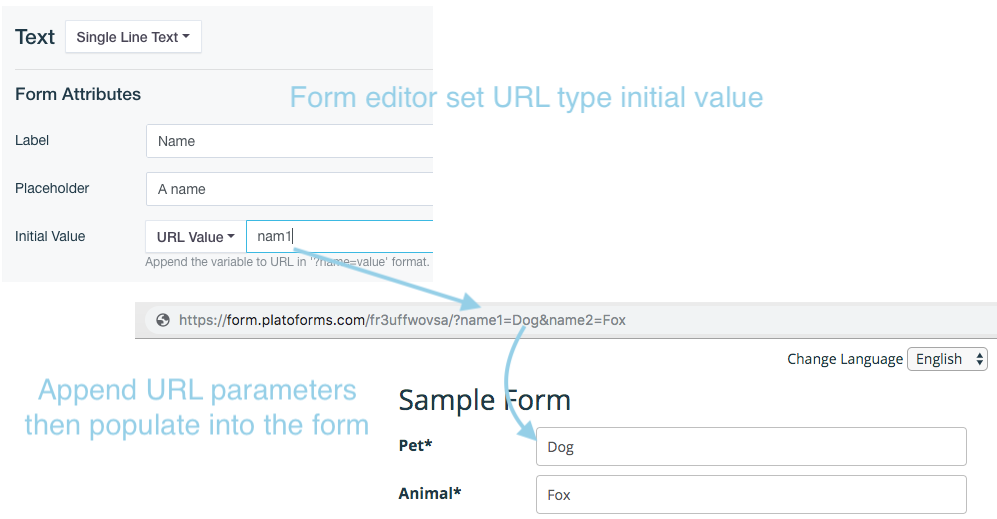
If you have embedded a form on a web page, you can customize the form’s behavior by adding parameters directly to the URL of the web page where the form is embedded. You don’t need to make changes to the embedded script itself. For instance, if your form is embedded on the page https://foobar.com/myform, you can modify its behavior by adding parameters like this: https://foobar.com/myform?name1=fox&name2=dog.
Today’s Date
This option automatically inserts the current date into the field when the respondent completes the form.
Current Time
This option automatically inserts the current time into the field when the respondent fills up the form.
Current Date Time
This option automatically inserts both the current data and time when the respondent fills up the form.
Incremental Code
You can generate unique PDF codes using the incremental code initial value. Set a prefix like RECEIPT- and an initial seed value such as 00001. The code increases with each submission, creating unique codes like RECEIPT-00001, RECEIPT-00002, and so on, automatically in live forms.
In preview mode, the code doesn’t increment automatically. It only increases when the form is live and gets submissions. Preview mode is for testing and reviewing, not for changing the actual data or codes.
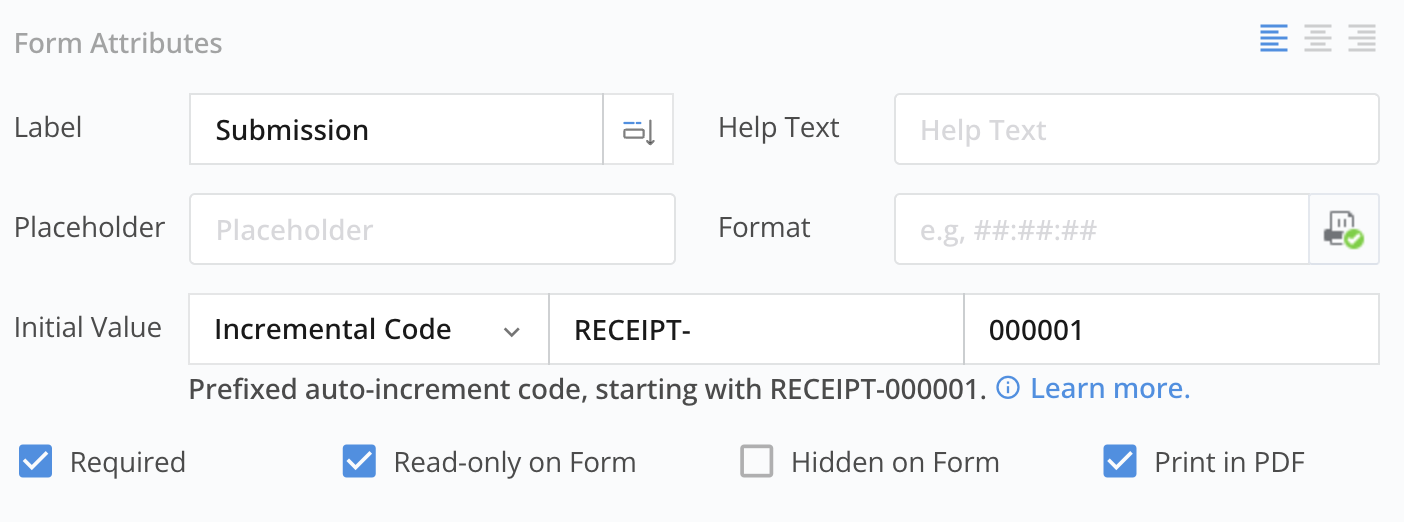
- Opt for a code prefix or leave it out as needed.
- The seed value must comprise numbers and can start with a
0. - If the generated code is shorter than the seed value, it will be padded with zeros to match the seed value’s length. However, if the code is longer, this rule does not apply.
How to update the seed value after the form is published
To update the seed value, it must be greater than the current code. For instance, if your seed is 0001 and you’ve received 110 submissions (current code: 0110), changing it to 000010 won’t work because it’s smaller. Leading zeros in the seed value don’t affect the number.
How to maintain continuous incremental codes
By default, Text Input fields are visible on the form, and PlatoForms assigns incremental codes when the form loads. If someone abandons their submission, it can create code gaps. For example, if three respondents open the form at once, they get codes 0001, 0002, and 0003. If the respondent with code 0002 doesn’t submit, you’ll have PDFs with codes 0001 and 0003. We don’t reuse 0002; the next code is 0004. To avoid this, set the Text Input field to Hide, and codes are allocated only when respondents submit the form, ensuring continuous incremental codes in your PDFs.
The incremental code feature is provided “as is” without a guarantee of absolute uniqueness or continuity. It is not recommended for scenarios that require absolute uniqueness and continuity, such as financial transactions. PlatoForms is not liable for any damage resulting from the use of this incremental code.
Tracking Code
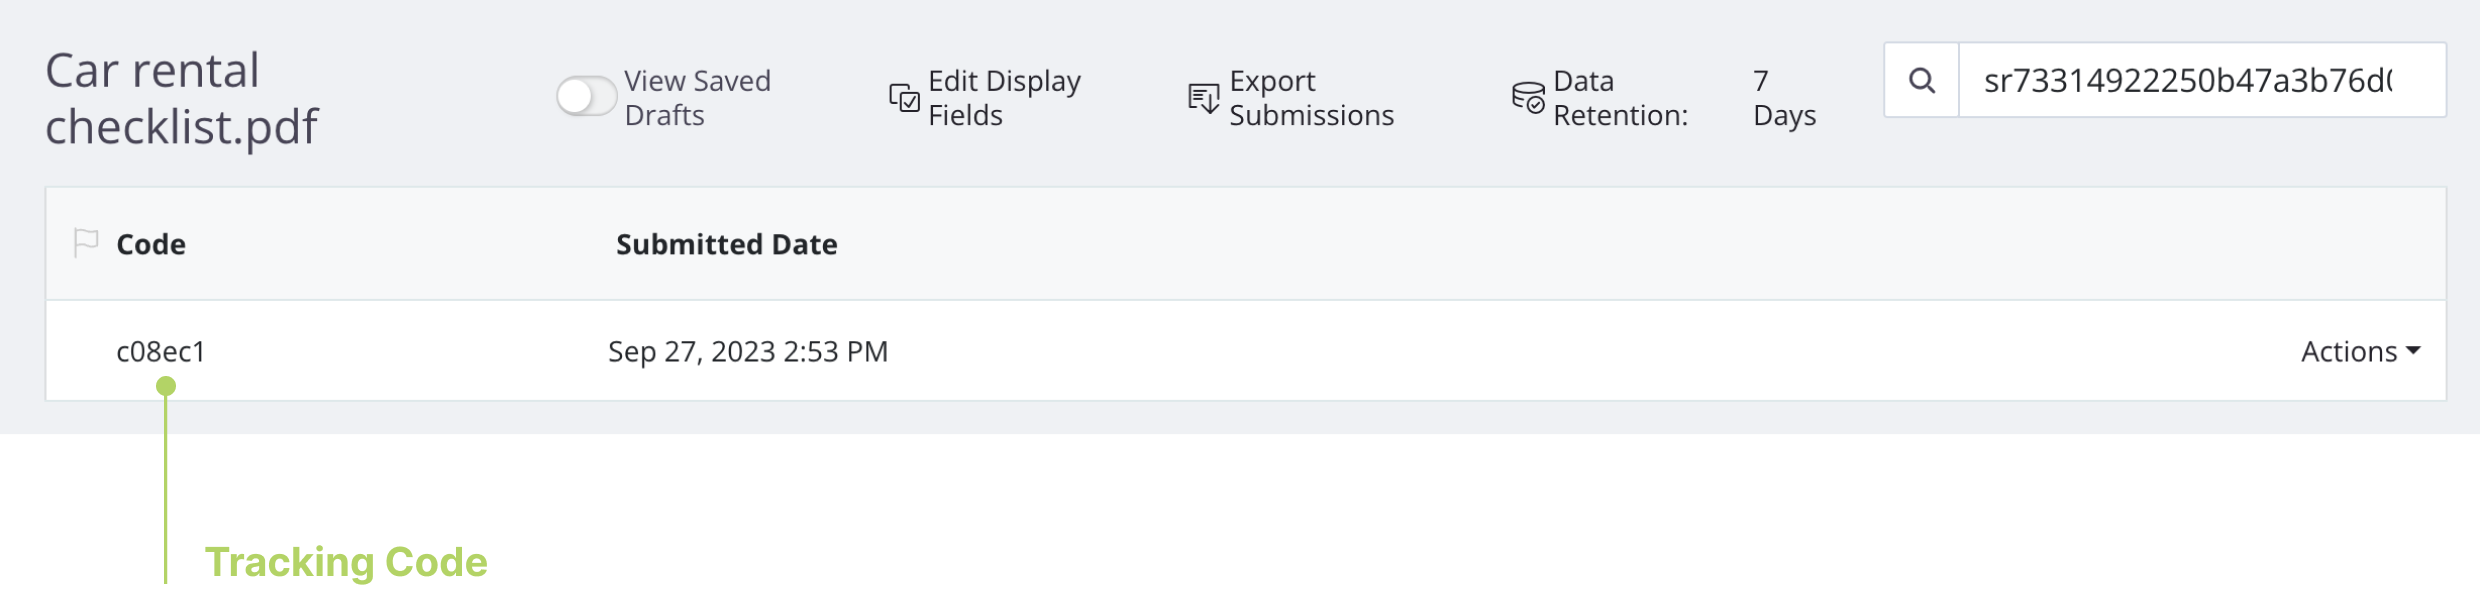
PlatoForms generates a Tracking Code after the respondent submits the form to help you track the information.
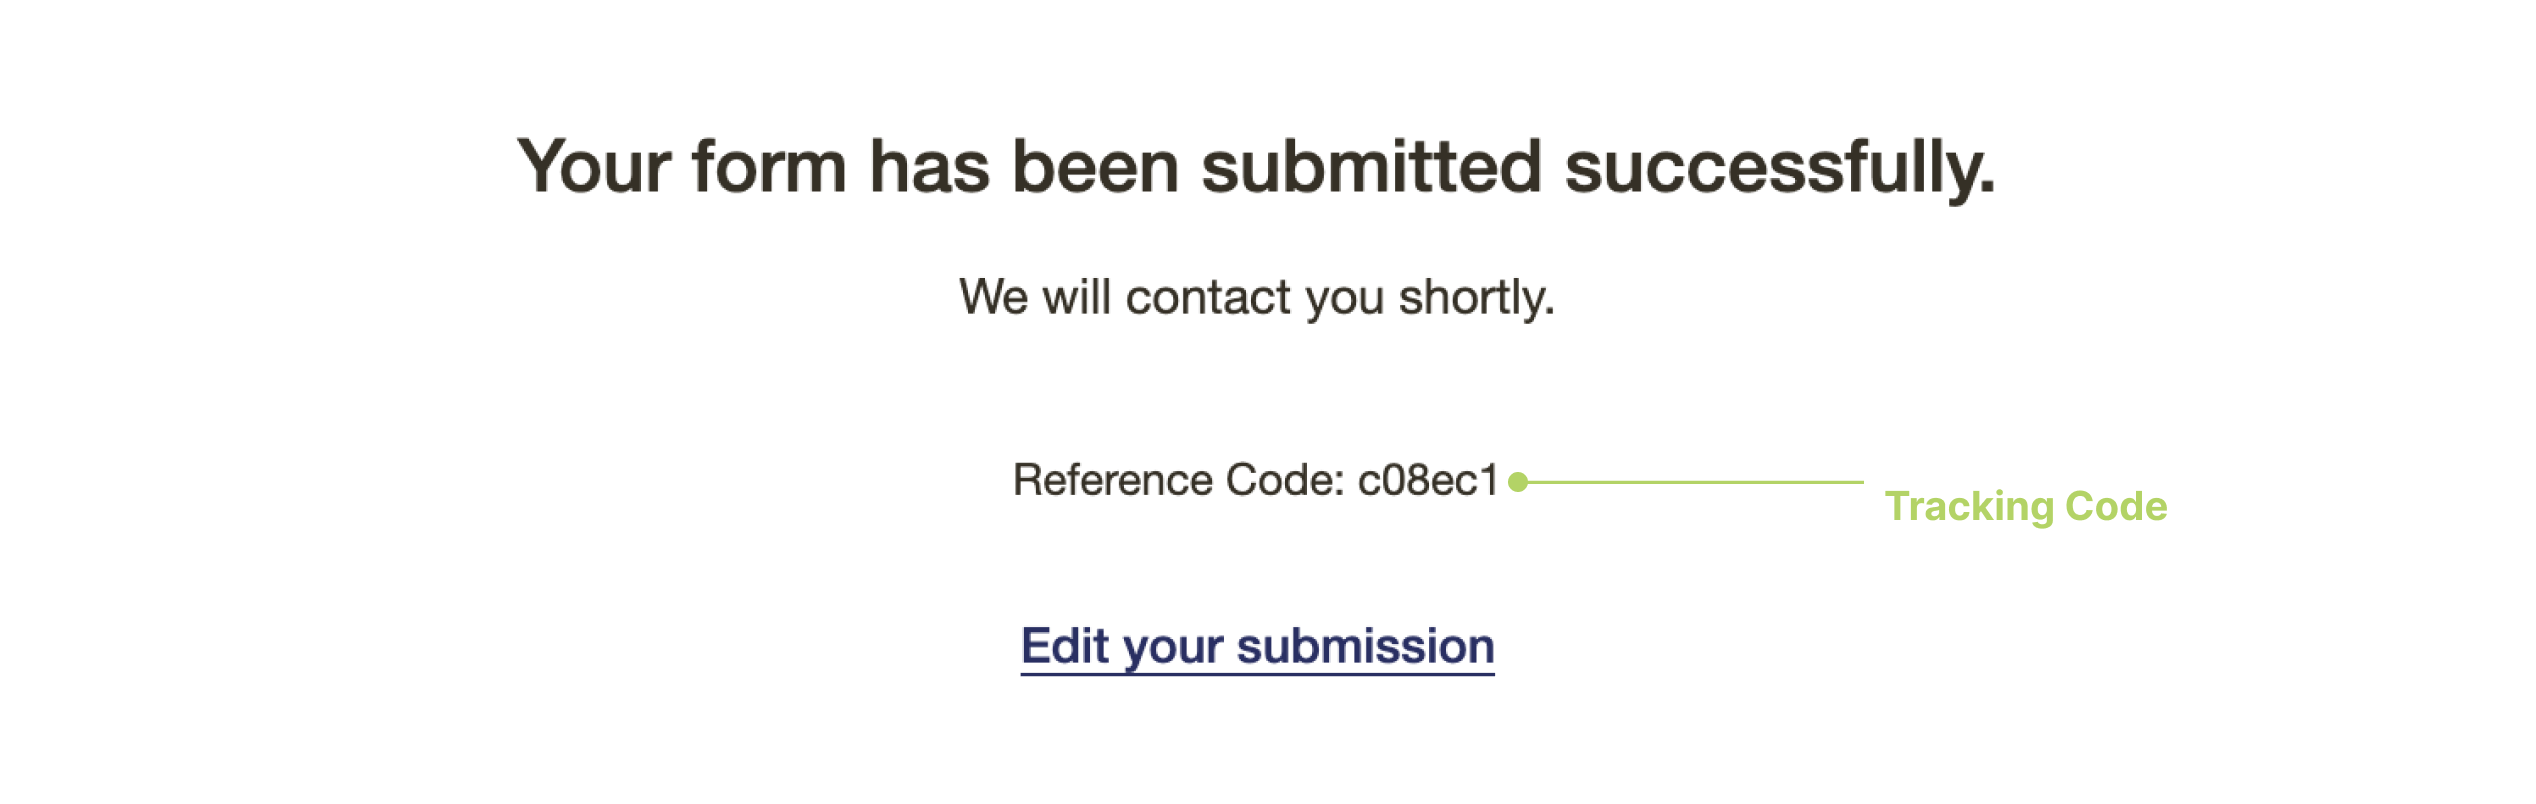
You can view and search for the Tracking Code on the Submissions page.
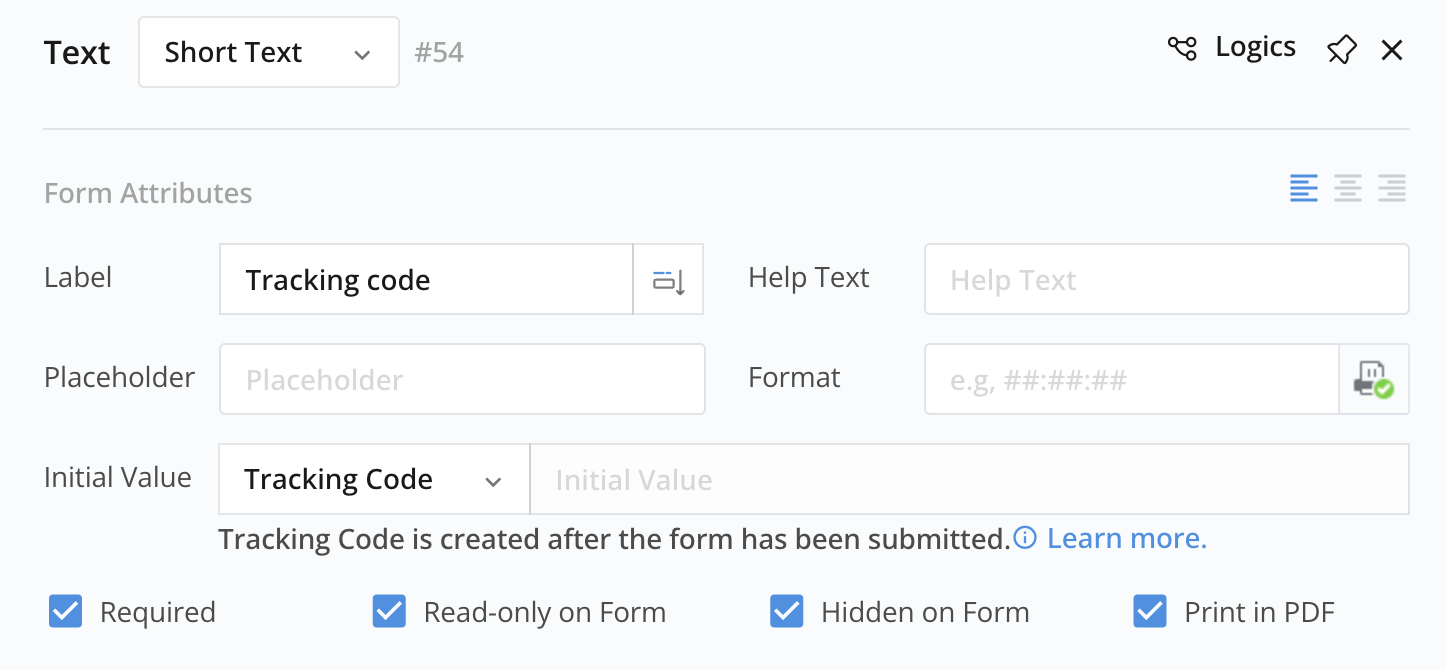
You can set the Initial Value to Tracking Code. When you print the PDF, it links the PDF to form data. However, note that the Text Input field using this Tracking Code as its initial value becomes invisible on the form because the Tracking Code doesn’t exist when the user submits the form.
The Tracking Code is not guaranteed to be entirely unique. There is a very slight chance that duplicate tracking codes may occur in your submissions.
IP Address
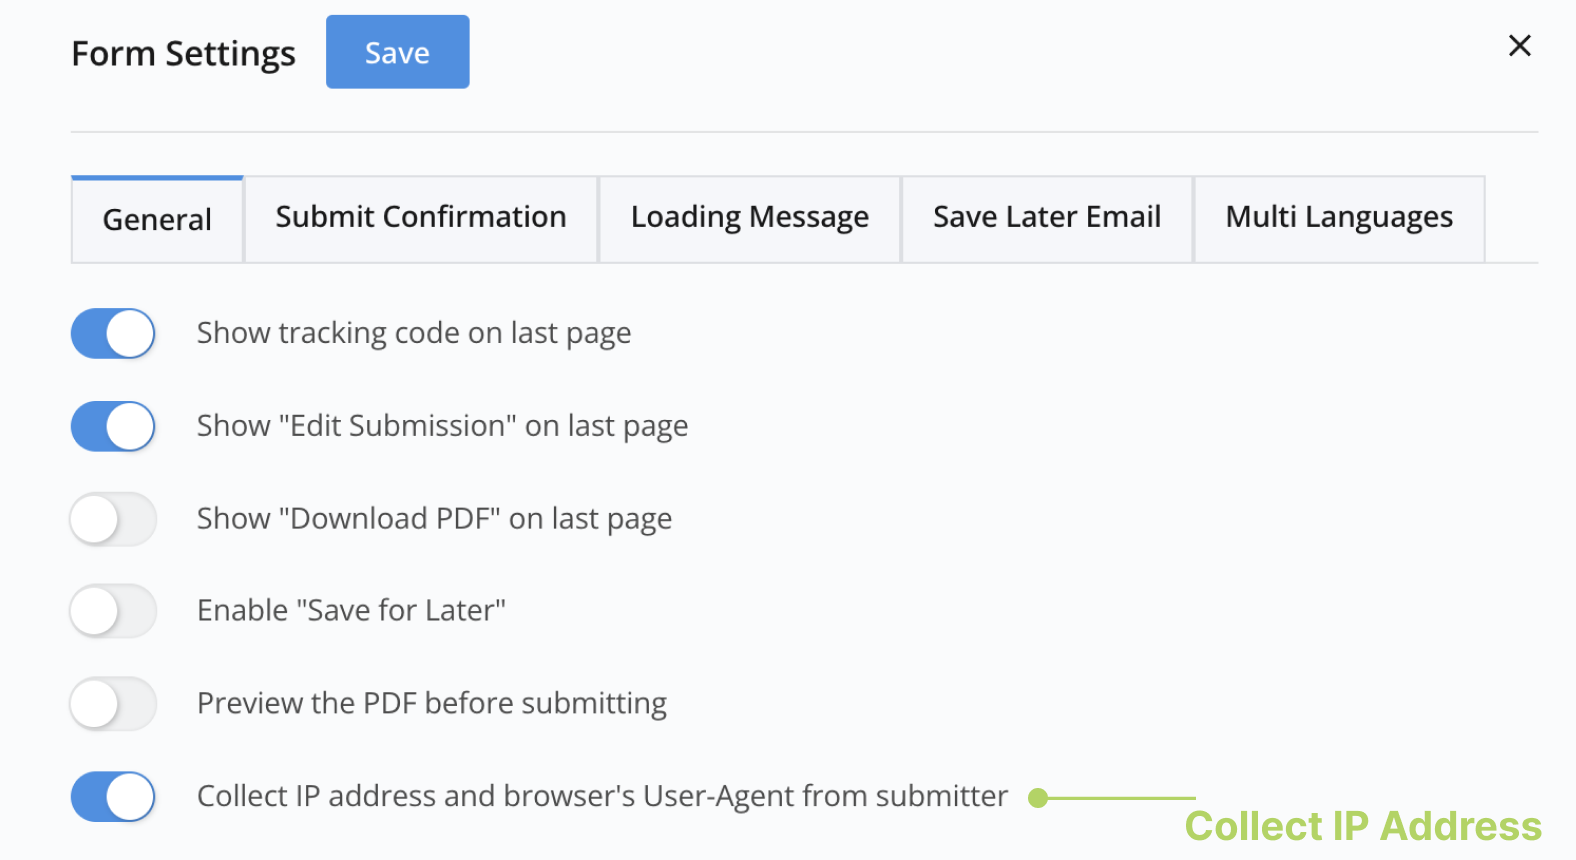
If you’ve enabled the Collect IP address and browser’s User Agent from submitter option in the General tab of Form Settings, setting the Initial value to IP Address will print the submitter’s IP address to the respective field after form submission.
Submission Revision
The Submission Revision initial value lets you monitor changes to a submission over time. Whenever a submission is resubmitted, the system automatically increments the revision number by 1.
To include the revision number in the PDF, you can use an optional Prefix. This will print the prefix followed by the revision number on the PDF document.
Submitted Date
PlatoForms records the submission timestamp in the system automatically — you can always find it on the Submissions page. The Submitted Date initial value solves a different problem: it puts the submission date directly into the PDF document itself.
For contracts, receipts, invoices, or any signed document, the PDF needs to show a date as part of its content — not just as a metadata record in the backend. With this field, the submission date is printed to the exact position you place it on the form, without any manual entry.
Recommended field type: Use a Date or Date and Time Text field (not Short Text) — these field types apply the correct format automatically (e.g., MM/DD/YYYY) and render a date picker in the preview. Hidden on Form is enabled by default so the field stays out of the form view while still appearing in the PDF output.
Example: print the submission date on a contract or receipt
-
Add a Text field to your form and set its type to Date.
-
Set the Label to
Submitted Date(or any label you want to appear on the PDF). -
Set the Format to
MM/DD/YYYY. The placeholder updates to match automatically. -
Set the Initial Value to Submitted Date.
-
Check Hidden on Form — the field won’t be visible to respondents, but the date will appear at this position in the generated PDF after submission.
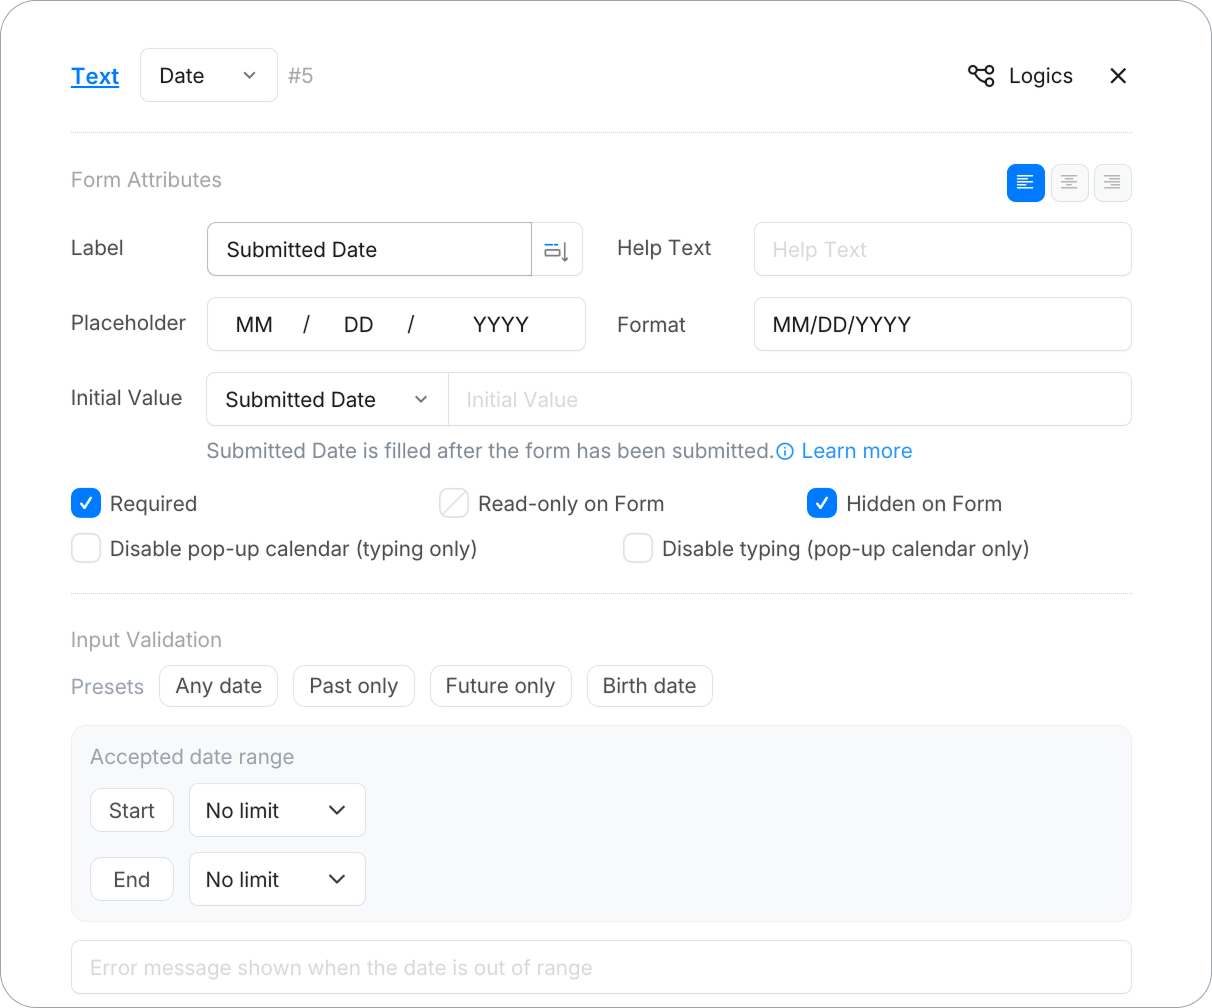
The field remains empty during form filling. Once submitted, PlatoForms fills in the submission date and prints it to the PDF at the position you placed the field.
The Input Validation section for Date fields lets you set an accepted date range — No limit, a Fixed date, or a Relative date (e.g., “0 years before open date”). For Submitted Date use cases where the field is hidden and auto-filled, you can leave this at the default No limit.