










API and Webhooks
On this page
The API and Webhooks page is where your team manages the tools for connecting PlatoForms to external services: webhook endpoints that push form submissions to other systems, OAuth2 applications for third-party integrations, and long-lived tokens for server-to-server API calls. This chapter walks through how to access the page and configure each of these.
Access the API and Webhooks page
-
Log in to your Dashboard.
-
In the left sidebar, click on your team name to open the team menu.
-
Select API and Webhooks from the list.
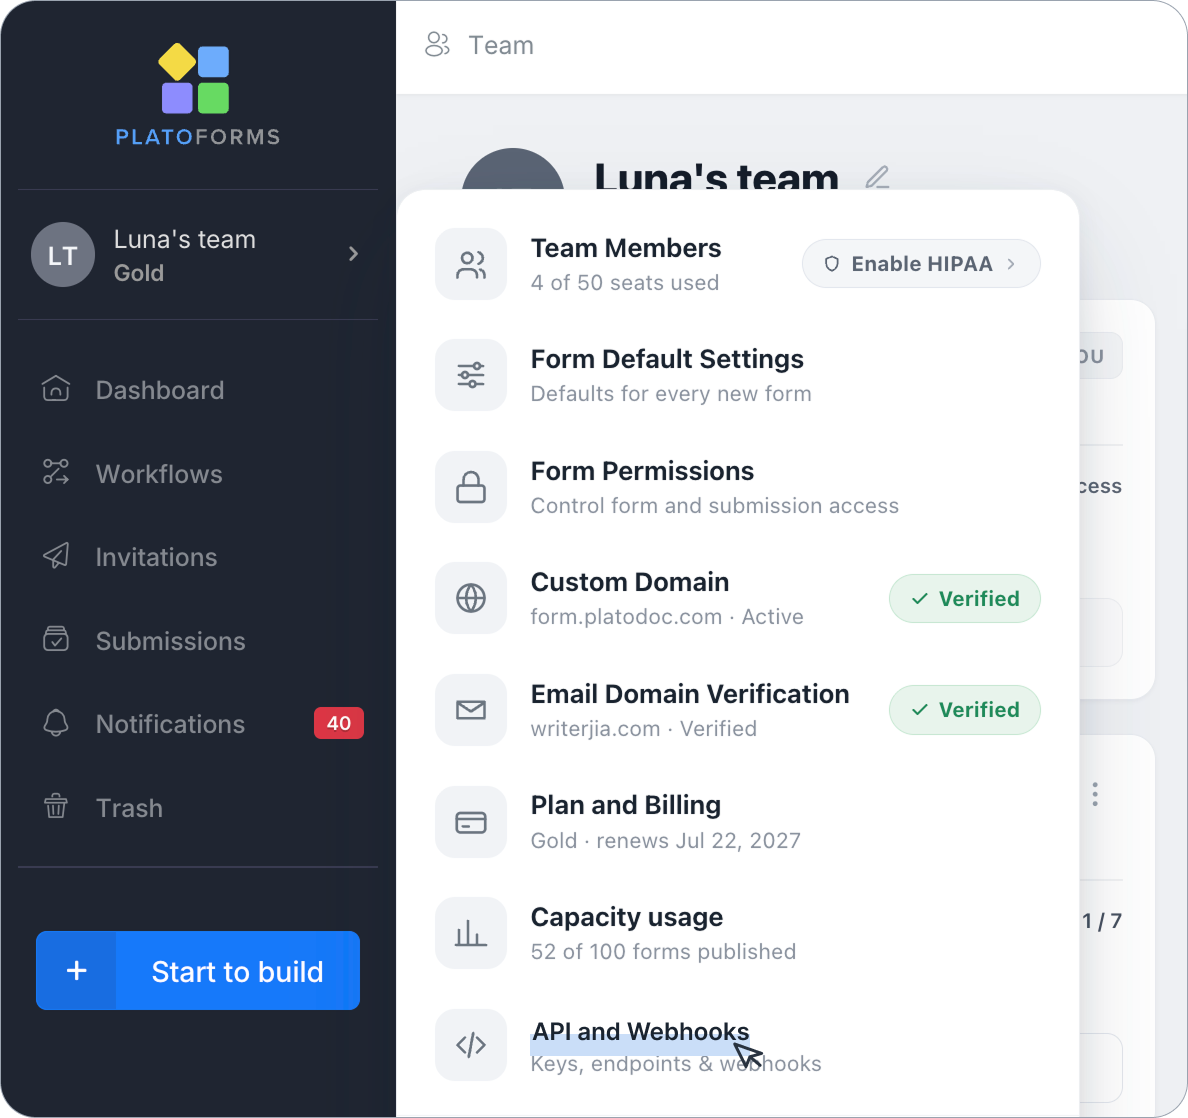
What you’ll see based on your permissions
If you have access
The page opens directly to API URL & Tokens, where you can view and manage your webhooks, OAuth2 applications, and tokens.
Team admins always have direct access to this page.
If you don’t have access
API and Webhooks is shown with a lock icon and a “Request access from admin” label.
Click Request access from admin to send a request.
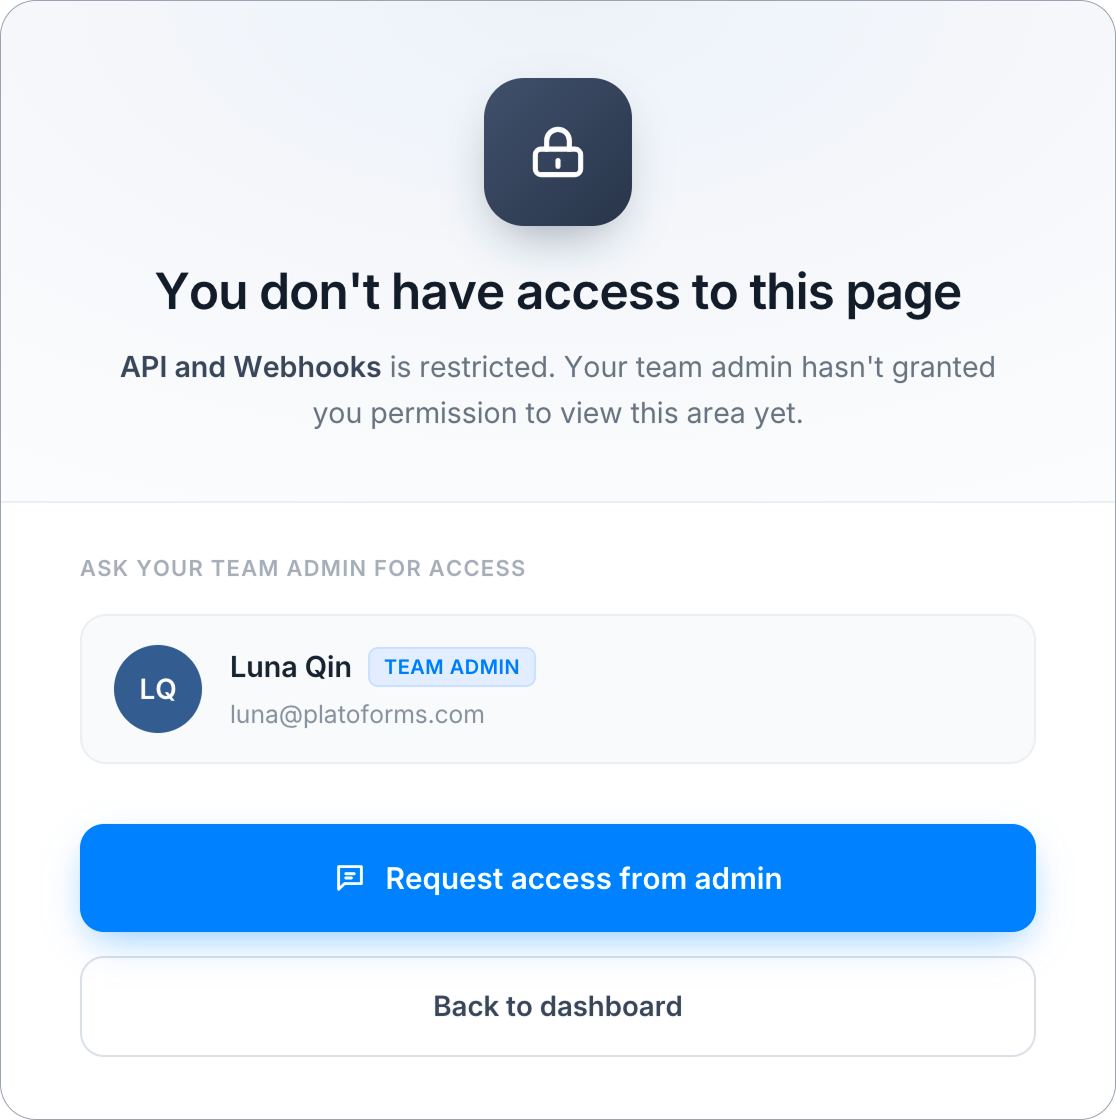
Your team admin receives an email notifying them of the request. Once access is granted, you’ll be able to open API and Webhooks from your own team menu.
Configure Webhook endpoints
Set up endpoints to receive real-time notifications when forms are submitted or other events occur. Useful for integrating form data into other applications or services.
Click + Add endpoint to create a new one, or the edit icon next to an existing endpoint to modify it.
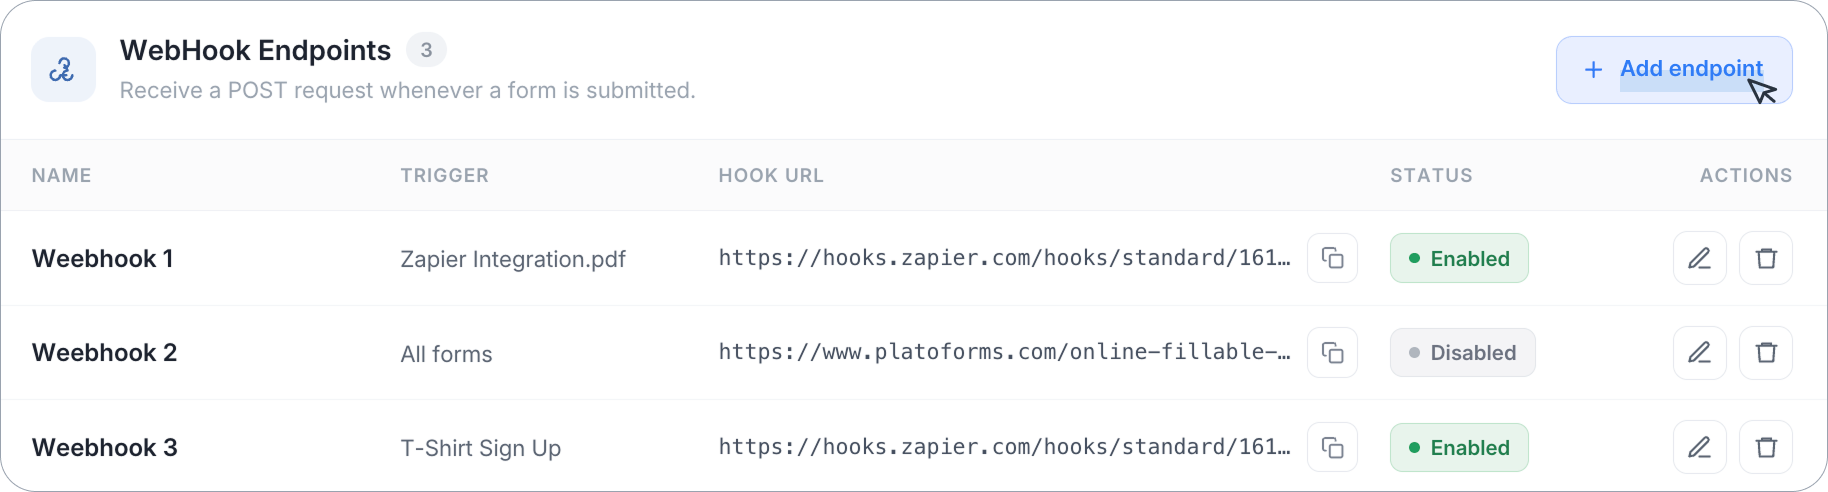
When adding or editing an endpoint, you can configure:
| Field | Description |
|---|---|
| Name | A label to help you identify the endpoint. |
| WebHook URL | The URL that will receive the POST request. |
| Custom request headers | Up to 5 header names and values sent with every delivery, for example a secret your server checks. Click + Add header to add one. |
| Sends when | The event the endpoint receives: A form is submitted (default), A workflow run or task changes, Documents are requested, received or reviewed, A renewal is scheduled, sent, completed or expired, or An incomplete entry starts, changes, stalls or is submitted (events draft.started, draft.updated, draft.stalled, draft.resumed, draft.submitted and draft.expired, for forms with Save for Later; see Incomplete entries). |
| Target Form | Choose All Forms to receive the chosen event for every form, or select a specific form. With A form is submitted, All Forms triggers the webhook for any form submission. |
| Include shareable links | Include shareable submission links in the payload. |
| Submission data as Dict (instead of List) | Change the structure of the submission data in the payload. On by default for endpoints created on this page; off for endpoints created through the API. |
| Instant Hook (No waiting for PDF creation) | Fire the webhook immediately instead of waiting for the submission PDF to finish generating. |
| Exclude signature data from payload | Omit signature data from the payload. |
| Webhook Enabled | Toggle the endpoint on or off without deleting it (available when editing an existing endpoint). |
Click Save to apply your changes, or Delete to remove the endpoint entirely.
The payload options (shareable links, Dict, Instant Hook and signature data) apply to submission webhooks only.
Delivery and failures
Any 2xx answer counts as delivered. A redirect is not followed, and a server that does not answer within 30 seconds counts as a failure. The edit window shows Last error: with a short reason, such as “HTTP 500” or “No response within 30 seconds”.
An endpoint that keeps failing (at least 5 times in a row over at least 72 hours) is turned off automatically, and the team owner and members with API access get an email. Fix the receiving server, then turn on Webhook Enabled and click Save. Events that happened while it was off are not sent.
Create an OAuth2 Application
PlatoForms’ APIs are safeguarded by the OAuth2 protocol, a secure authentication and authorization framework. An “OAuth2 Application” refers to a registered application utilizing OAuth 2.0 for interaction with the system.
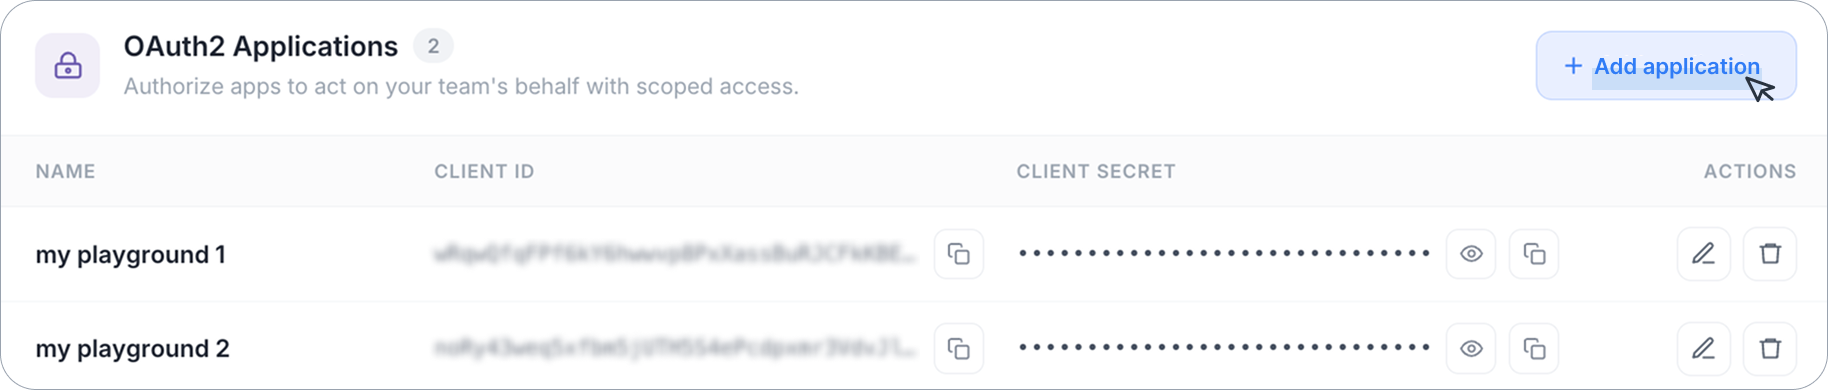
By creating an OAuth2 application, you can securely obtain a Client ID and Client Secret through an authentication process. This, in turn, facilitates the secure authorization of other applications to access the platform’s API. The creation of an ‘OAuth2 Application’ sets up the essential components for secure integration, allowing interactions with the API using OAuth2 for both authentication and authorization.
To create an OAuth2 Application:
-
Click + Add application.
-
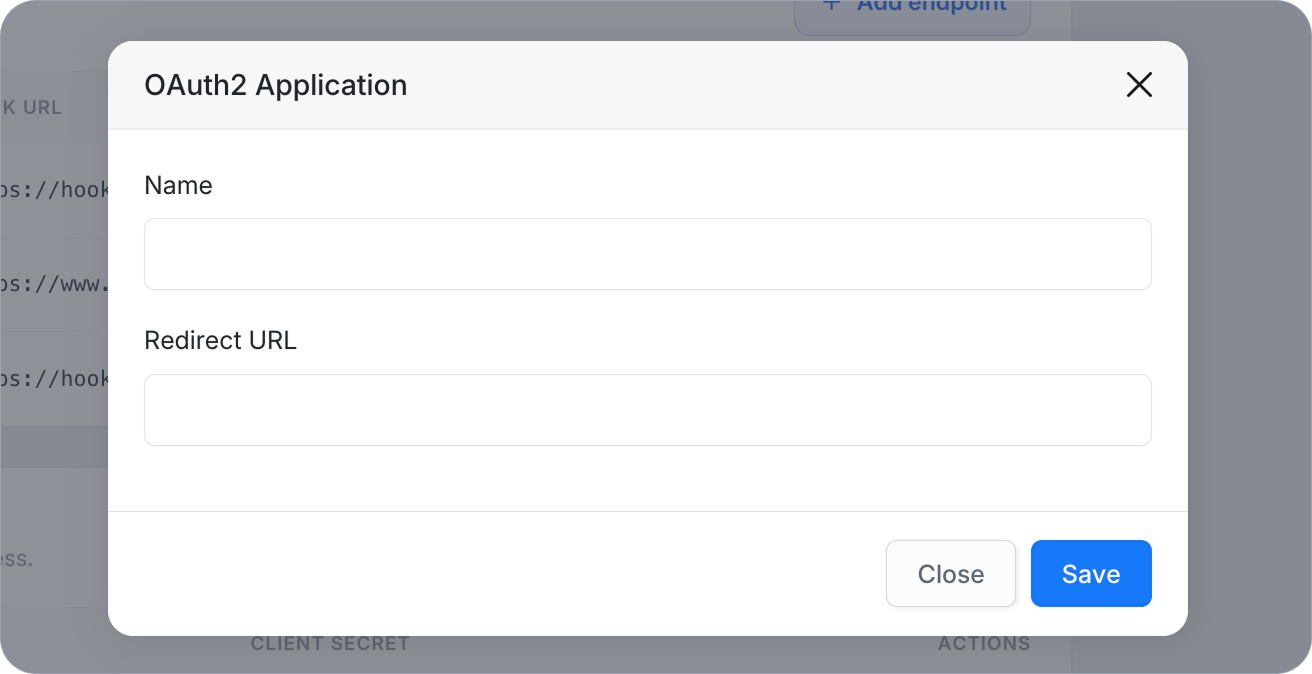
In the window that opens:
-
Provide a Name for your application, which helps identify it within the system.
-
Specify a Redirect URL, which is crucial for the OAuth2 flow.
-
-
Confirm your settings by clicking Save.
Once the application is saved, the system generates a unique Client ID and a Client Secret. Copy the secret right away: it is stored hashed and shown only once. If you lose it, use Regenerate secret on the application; the old secret stops working immediately, so update every integration that uses it.
Create and reset your token
If you are a developer requiring prolonged API access, the platform offers the capability to create and reset your team’s Non-expiry Token. This feature eliminates the need for regular token refresh, ensuring uninterrupted and extended API access for server-to-server requests. Each team has a single non-expiry token.
Click Create or reset to generate the token, and Delete to remove it.
The token carries the team owner’s API access. Resetting it replaces the token, and integrations still using the old token stop working at once, so check with whoever set them up first.
AI Assistant Access (MCP)
The AI Assistant Access (MCP) panel on this page switches AI assistant access on or off for the whole team. See AI Assistant (MCP).
Treat tokens, Client IDs, and Client Secrets like passwords. Anyone with access to them can access your team’s data.
If you’d rather work with your forms through an AI assistant conversationally, without writing any code, see AI Assistant (MCP).
Paper intake
The Paper intake card on this page turns Import from paper on or off for the whole team and holds its settings: who can import, whether original scans are kept, and the review sensitivity. See Settings, plans and privacy.