
PDF Document Creator
On this page
Design contracts, letters, certificates, reports, and more right inside PlatoForms — from a blank canvas, a preset library, or a single sentence to the AI Assistant. When your document is ready, export it as a PDF or convert it into a fillable PDF or online form without rebuilding anything.
After converting your design to an online form, manage it from Work on online forms.
Getting started
-
From your Dashboard, click Start to build.
-
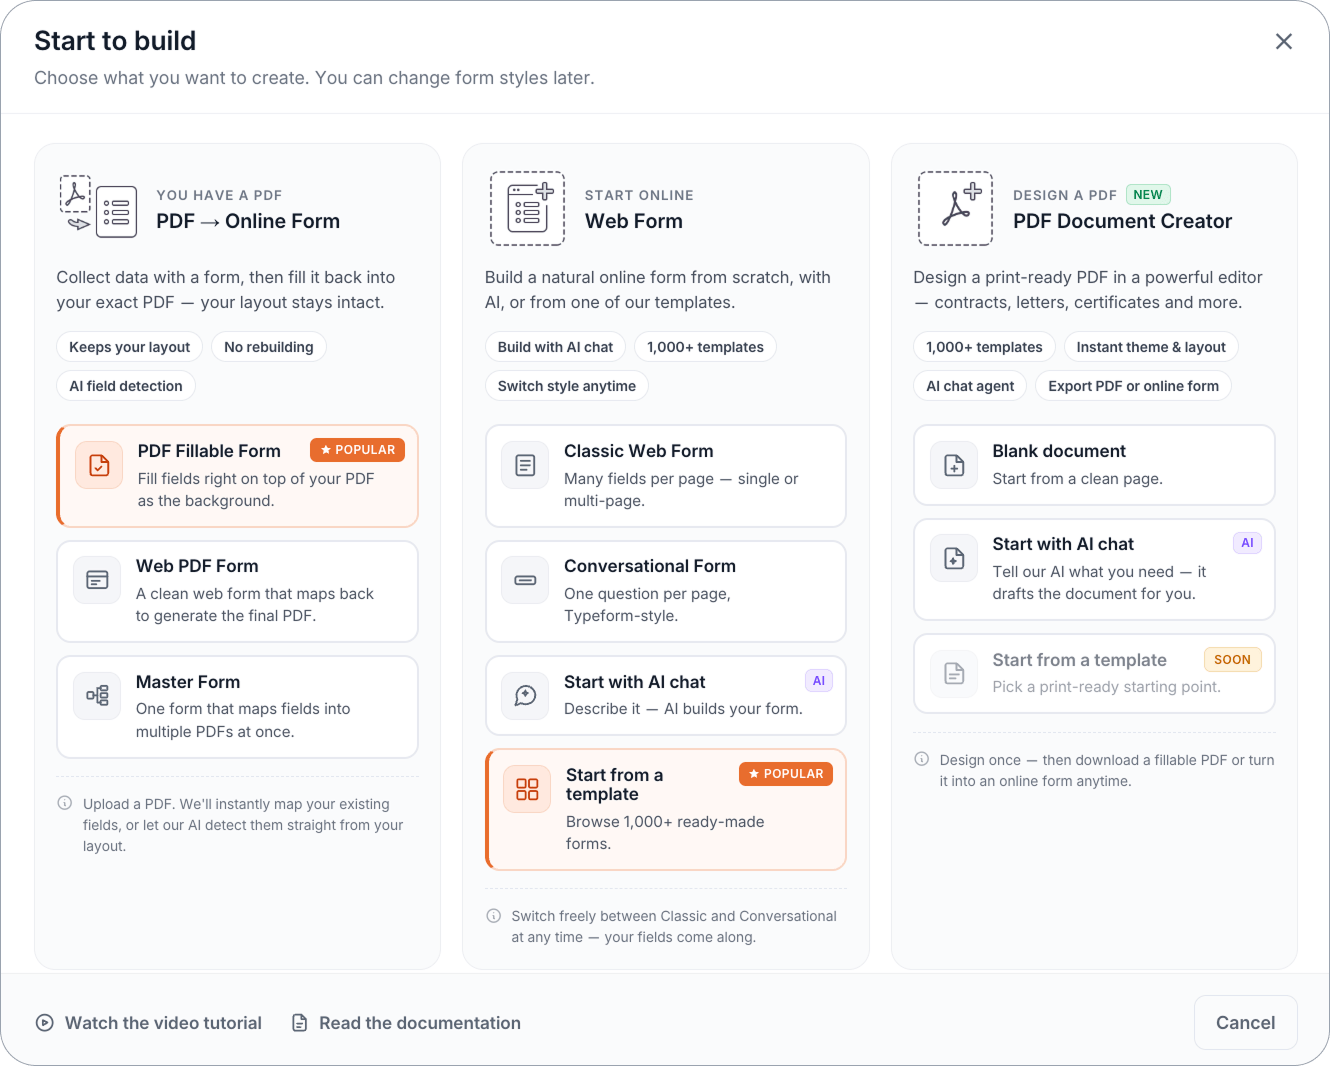
Under DESIGN A PDF, choose PDF Document Creator.
-
Pick a starting point:
- Blank document — start from a clean page.
- Start with AI chat — describe what you need and the AI Assistant drafts it for you.
- Start from a template — choose a ready-made document layout and customize it.
Explore the editor
The editor has three main areas:
Left sidebar — adding content
The left sidebar contains individual component icons (Text Input, Choice, Dropdown, Signature, and more). Hover any icon to see its name. At the bottom of the sidebar is the Library icon, which opens a panel of pre-styled component variants.
Canvas — the page
The canvas is your document. It shows a dot grid and ruler markings to help you align and position components. Content flows top to bottom across one or more pages.
Right panel — settings and tools
The right panel has four tabs: Chat, Theme, Layouts, and Setting. Each tab controls a different aspect of your document.
Add content
Using the AI Assistant
Open the Chat tab and describe what you need in plain language. For example:
“A one-page consulting agreement with a signature block”
Tips for prompting:
- To generate a full document: “Build an event registration form with a header and warm colors”
- To restyle: “Make it look corporate, use a minimal style”
- To add sections: “Add a contact section with name, email, and phone”
- To modify selected components: “Make these match the rest of the page”
The AI Assistant builds a complete document in seconds, including fields, section headers, and layout.
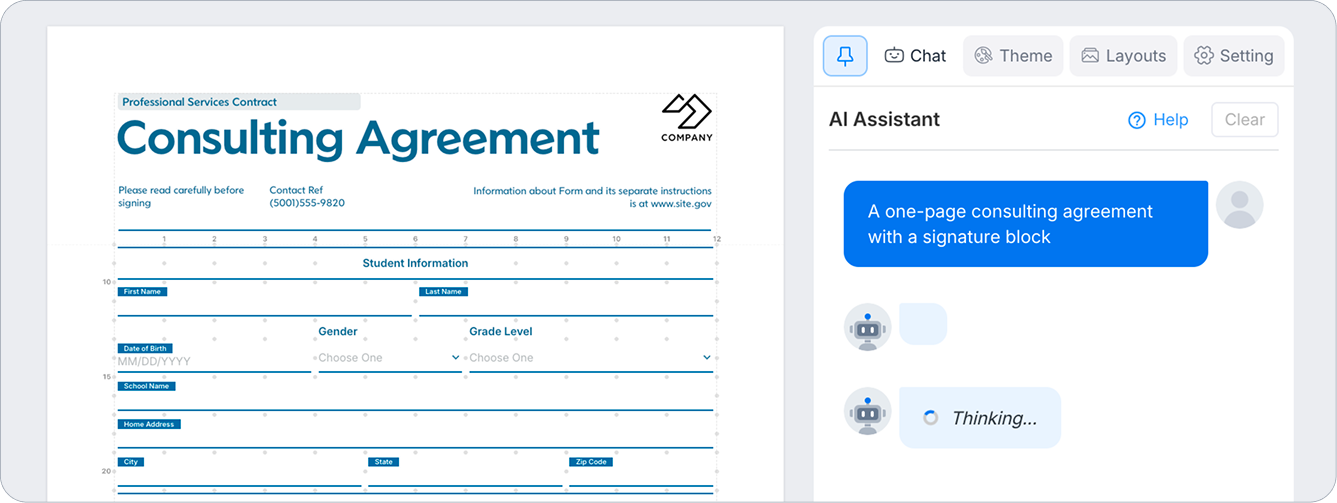
To target specific components, select them on the canvas. You can select a specific component on the canvas, then prompt the AI to modify just that piece.
Dragging and clicking components
Hover any icon in the left sidebar to see what it adds, then drag it onto the canvas or click to place it. Once placed, you can:
- Move it by dragging the grid handle (blue square icon) in the top-left corner of the selected component.
- Resize it by dragging any corner or edge handle — all elements scale proportionally.
- Duplicate it with Cmd/Ctrl + D.
- Delete it with the Delete key or the trash icon in the property panel.
Using the Library
Click the Library icon at the bottom of the left sidebar to browse pre-styled component variants. Components are grouped by type:
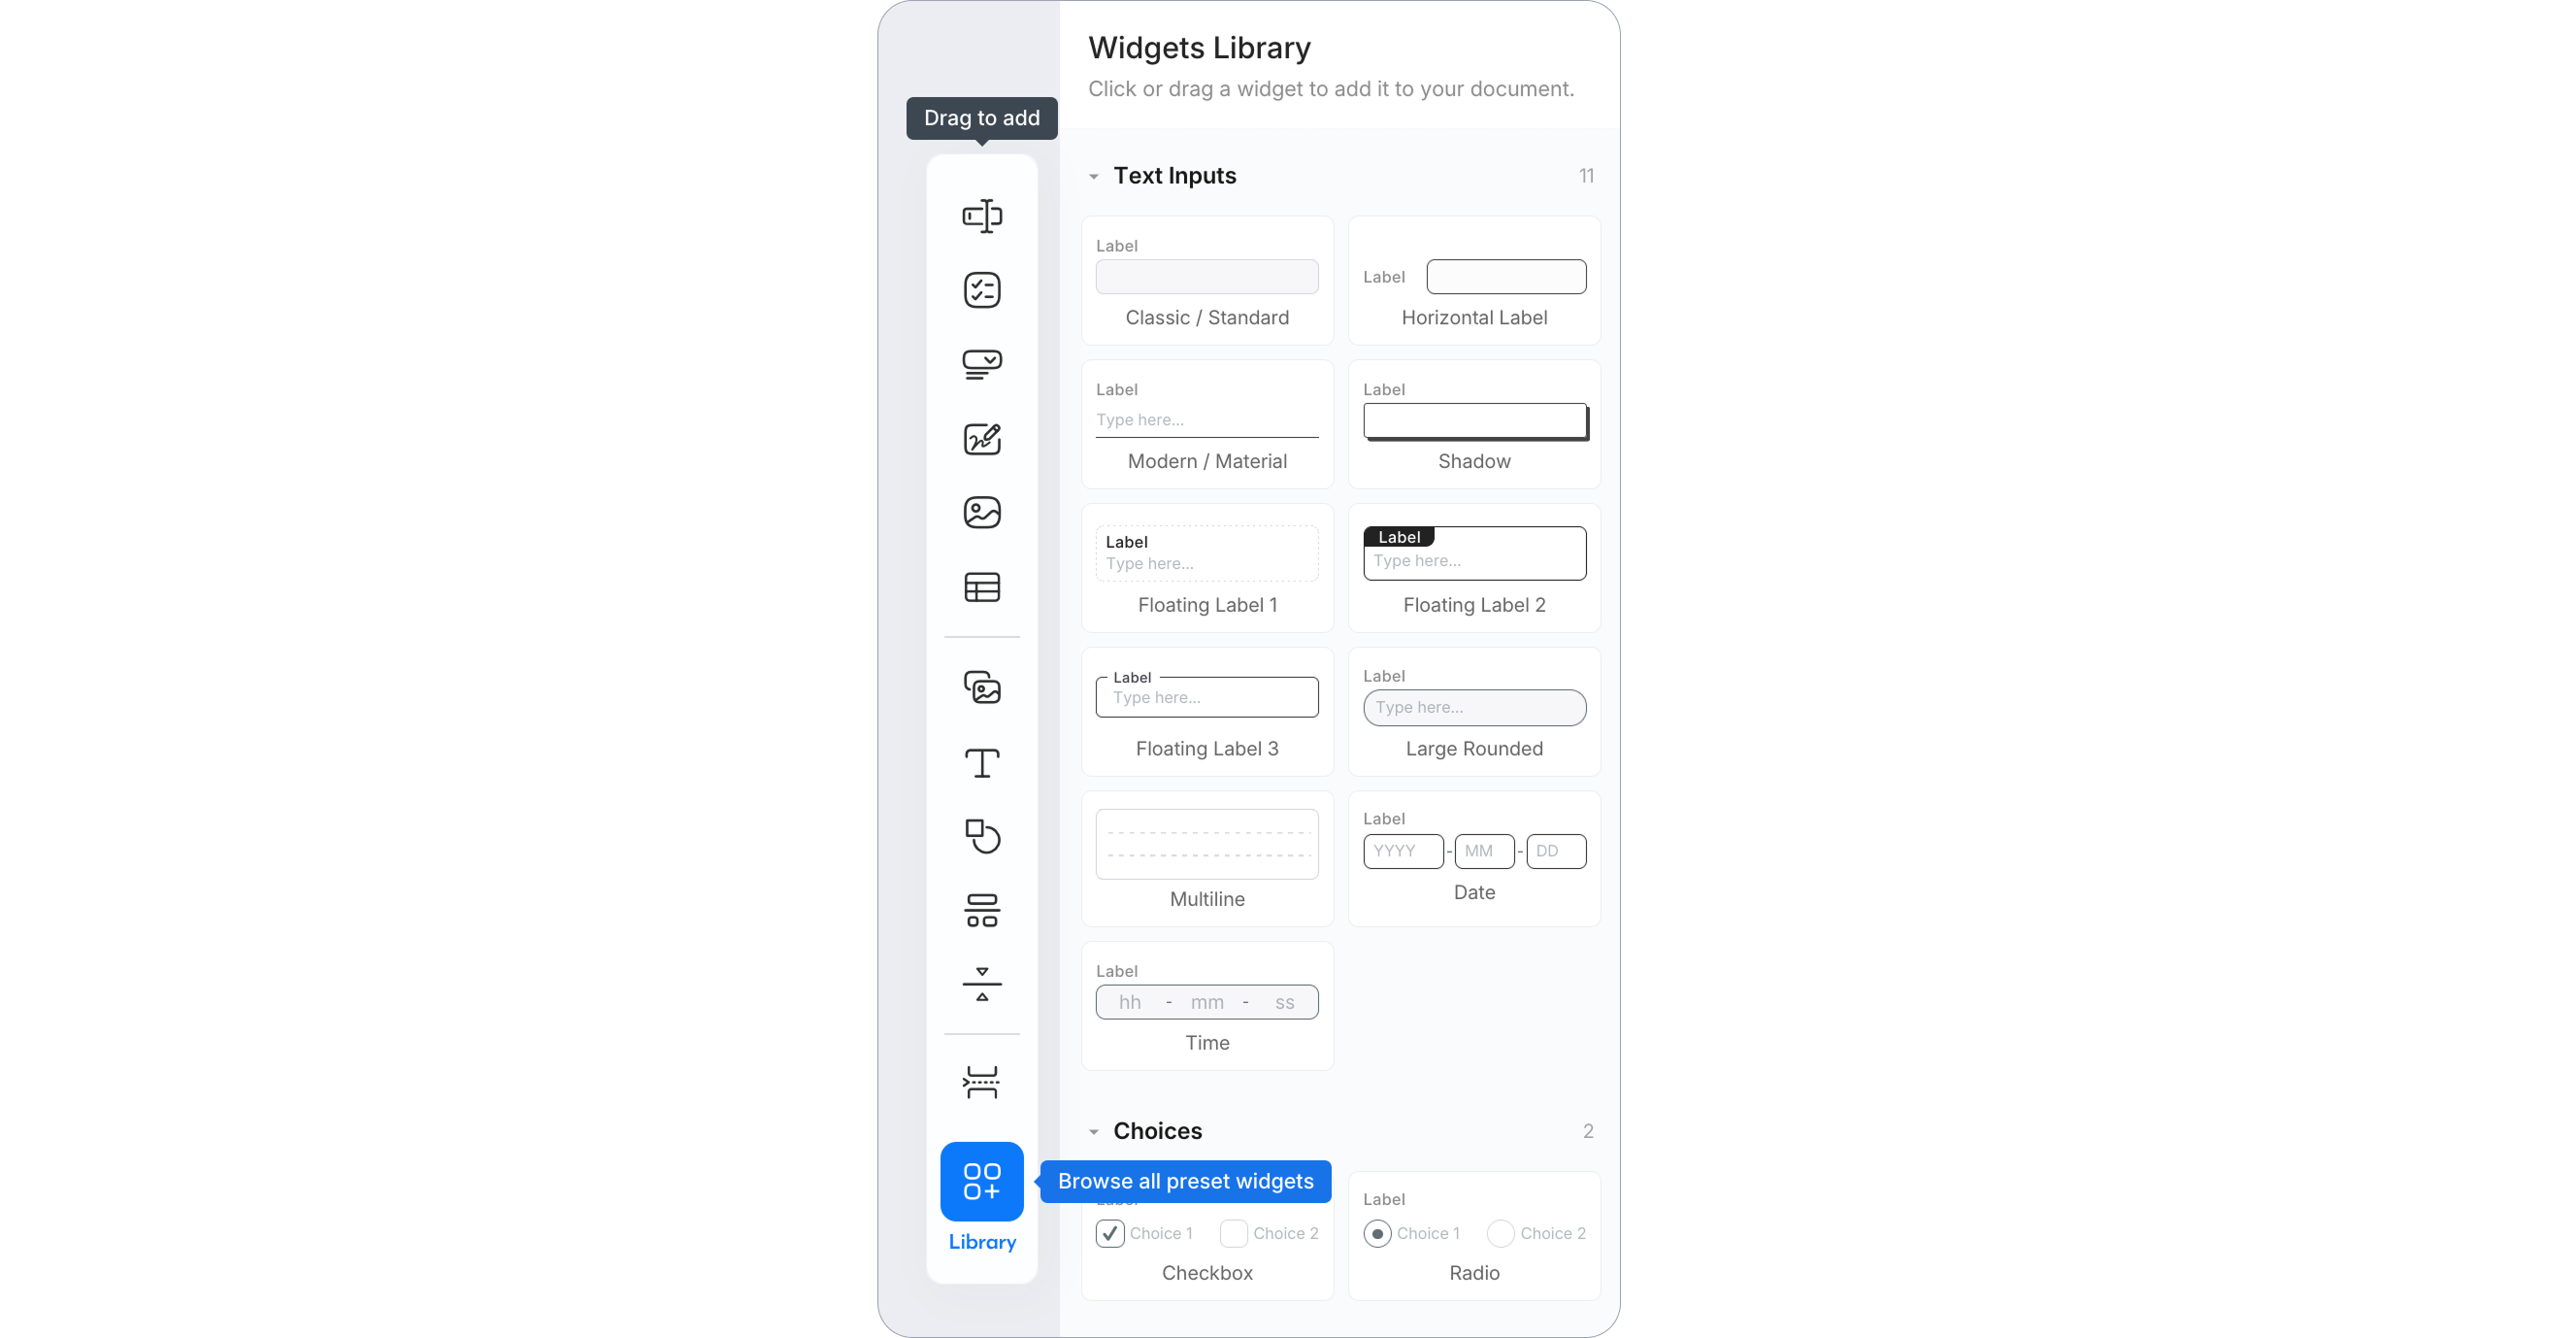
Click or drag any variant to add it to your canvas. The result matches the preview thumbnail.
Page layout
How pages work
PDF Document Creator uses soft page breaks by default: when content reaches the bottom of a page, it flows automatically onto the next page.
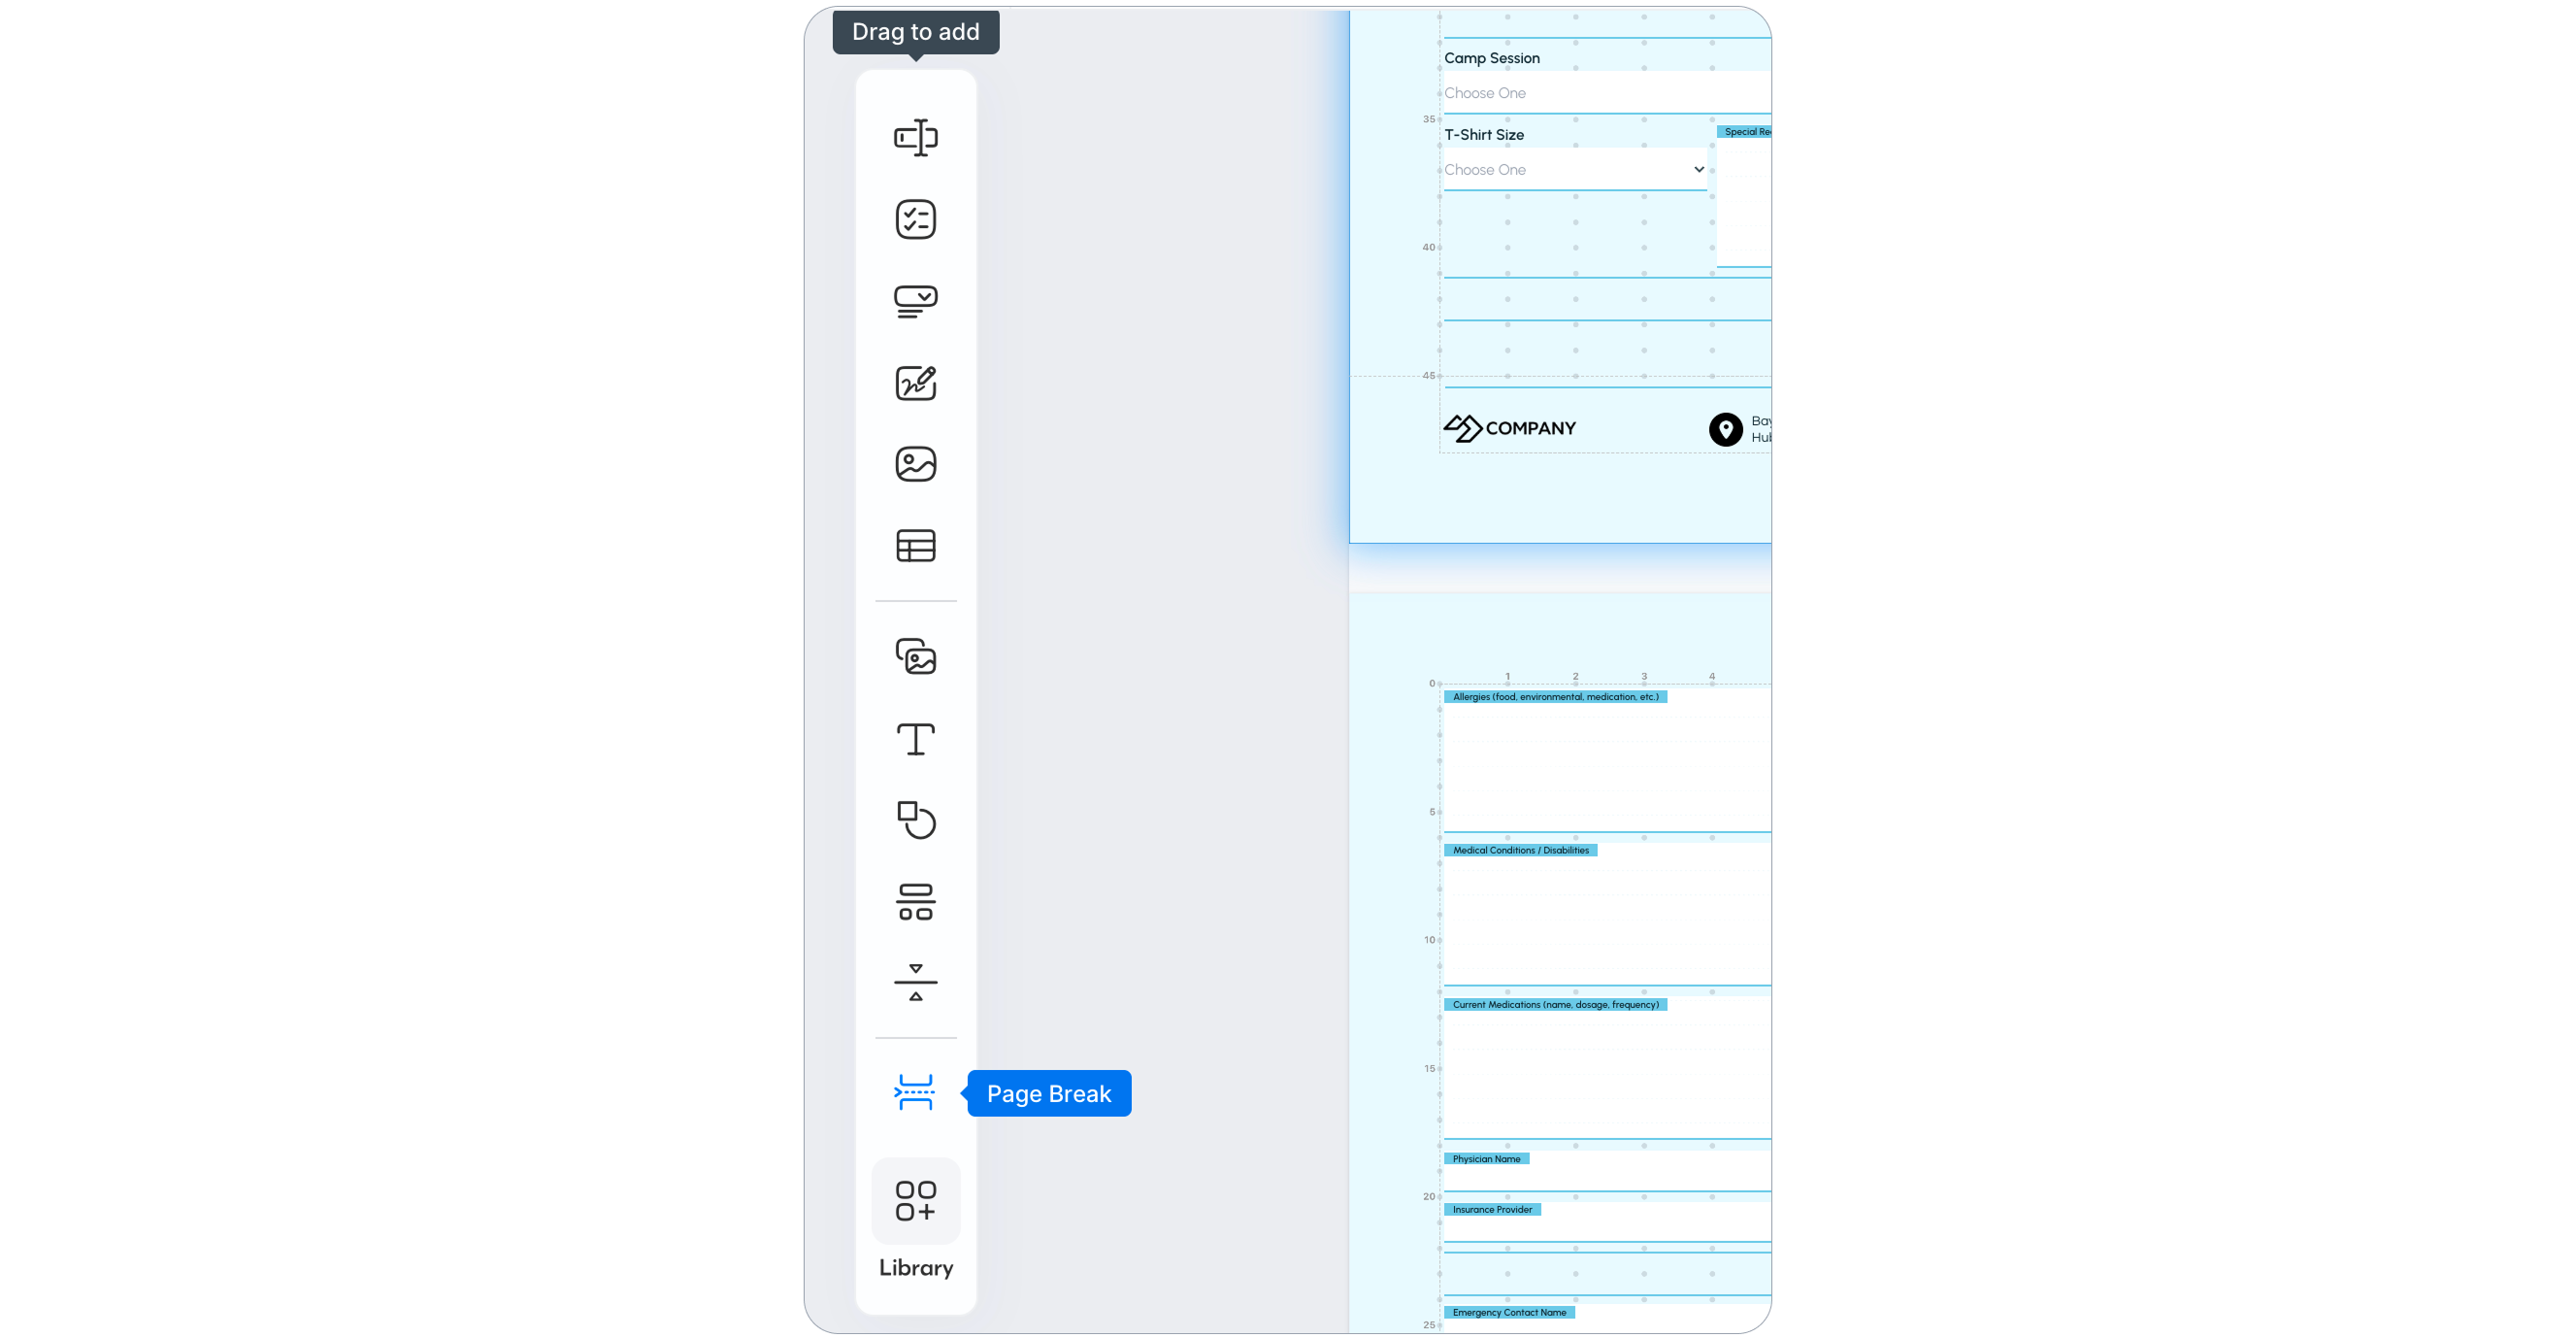
Insert a hard page break
To force a page to end at a specific point — for example, before a signature page or a new section:
-
Place your cursor where you want the break.
-
Add a Page break field from the form fields panel.
Remove empty rows
If there is unwanted space between components, small × icons appear along the right edge of the canvas. Click any × to remove that empty row.
Headers and footers
Headers and footers are added and managed from the Layouts tab.
To add a header or footer:
-
Open the Layouts tab.
-
Under Add to Page, click + Header or + Footer.
Headers and footers are set per page — they do not automatically copy to other pages. To reuse the same header or footer, save it as a layout (see Save and reuse layouts) or copy and paste it with Cmd/Ctrl + C and Cmd/Ctrl + V.
Save and reuse layouts
-
Open the Layouts tab.
-
Click Save as layout.
-
Give the layout a name, then click Save.
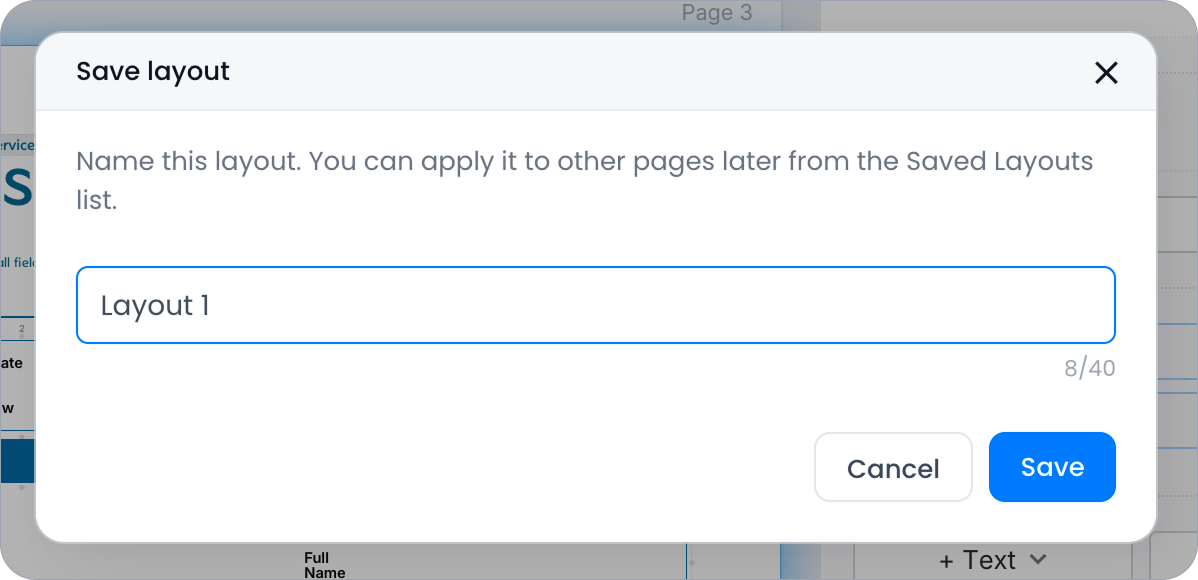
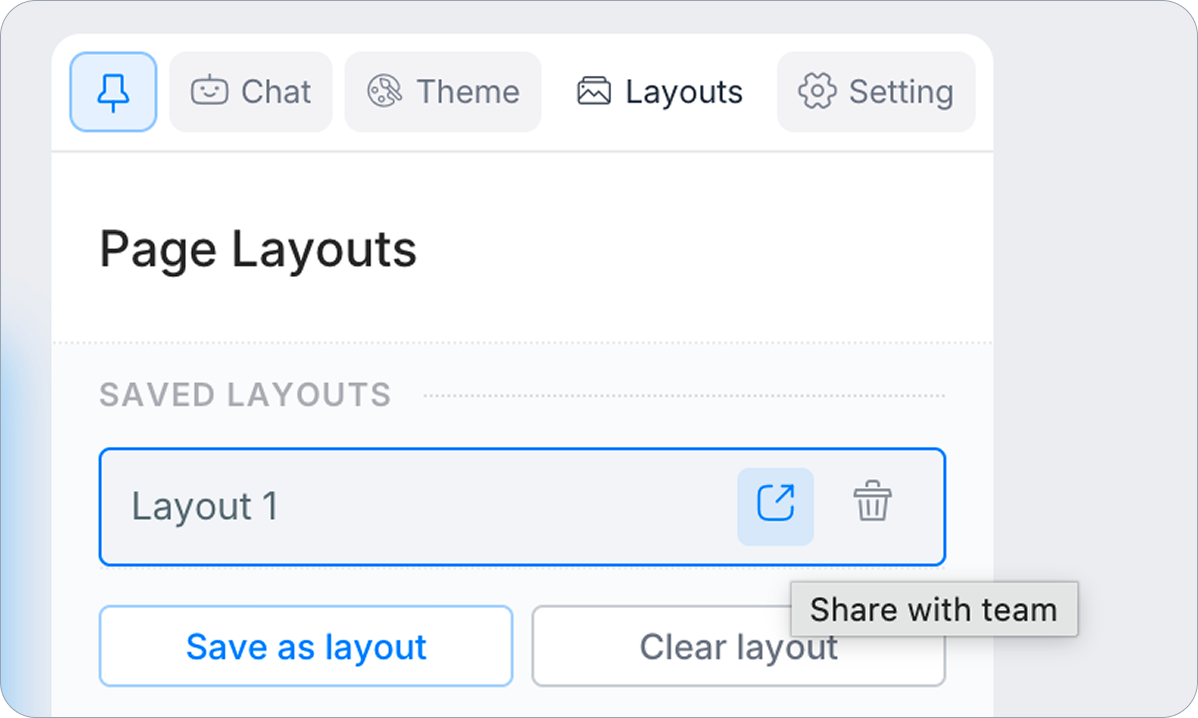
Saved layouts appear under Saved Layouts. Click any saved layout to apply it to the current page. Use the share icon to share a layout with your team.
Document settings
Open the Setting tab to adjust document-level options: default font family and size, how font sizes are balanced across labels and input fields, page background color or image, and page margins.
Version history
PDF Document Creator saves your work automatically. Press Cmd/Ctrl + S to save a named version. Click History in the top navigation bar to browse and restore previous versions. PlatoForms also records AI-generated changes in version history, allowing you to return to an earlier stage of the editing process when needed.
Cmd/Ctrl + S doesn’t always create a new history entry. If you save too frequently, multiple saves are grouped into a single history entry to avoid creating too many history records.
Translate
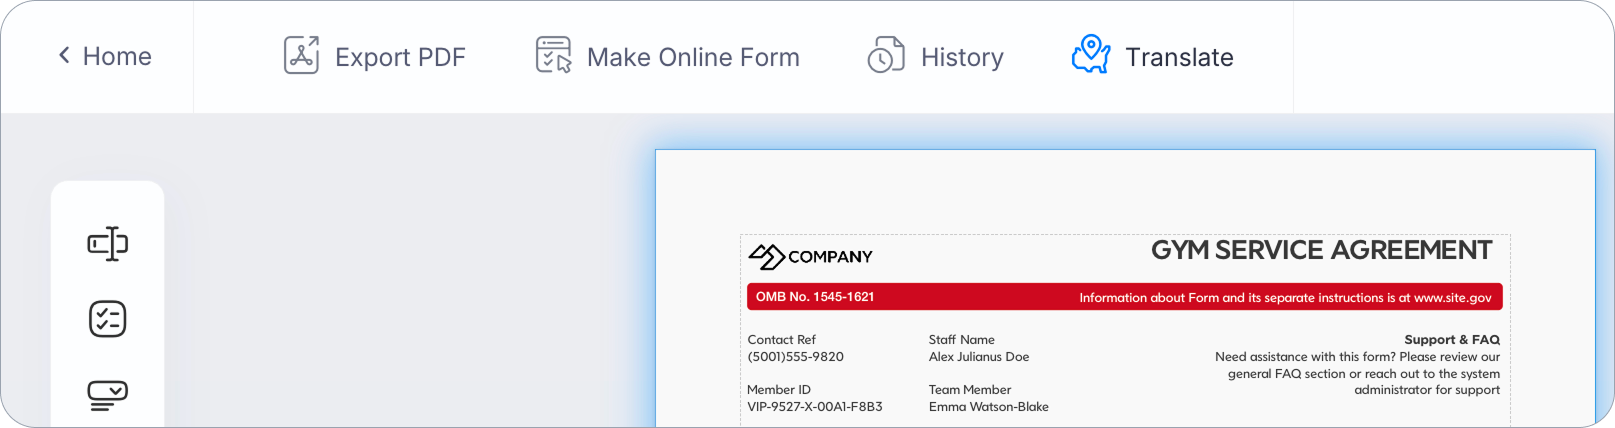
To create a version of your document in another language, click Translate in the top navigation bar.
-
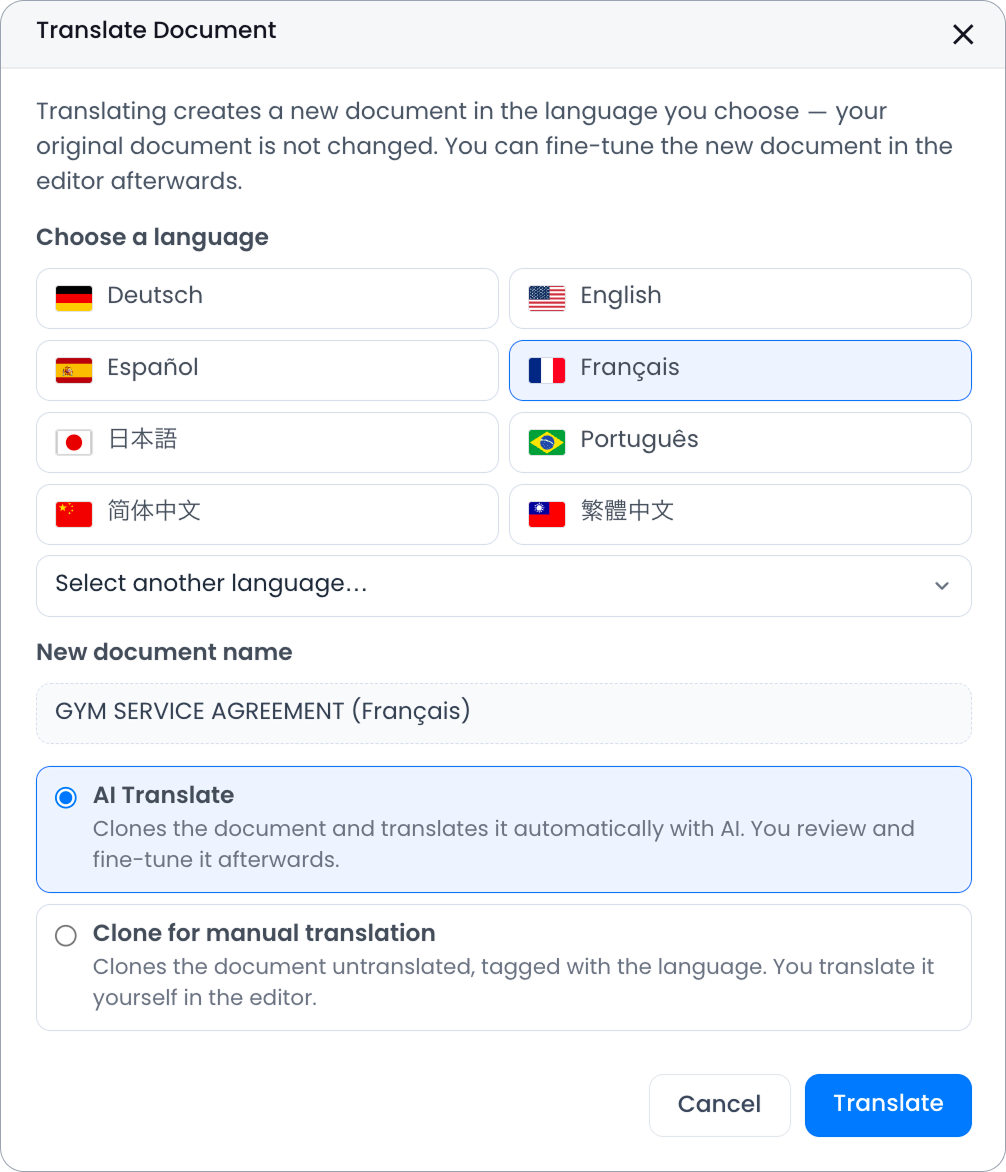
Select a target language — eight languages appear directly (Deutsch, English, Español, Français, 日本語, Português, 简体中文, 繁體中文), or search for more using Select another language…
-
Choose how to create the translated copy:
- AI Translate — clones the document and translates the content automatically. Review and fine-tune the result in the editor afterward.
- Clone for manual translation — clones the document without translating, tagged with the language you selected, so you can translate it yourself directly on the canvas.
Your original document is never modified — both options always create a new, separate copy.
AI Translate can take a minute or two to process. Shorter languages (like Chinese) tend to translate cleanly; longer ones (like German) can occasionally stretch a layout — an easy fix in the editor afterward.
Export and publish
When your document is ready, you have two options from the top navigation bar:
Export PDF
Download your document as a PDF file.
| Mode | Best for | Notes |
|---|---|---|
| Read-only PDF | Printing, archiving, sharing as a fixed document | Layout is preserved exactly as designed |
| Fillable PDF | Documents that need to be filled in | Layout is preserved in most cases; results may vary for complex designs |
Choose Read-only PDF when layout accuracy is critical.
Convert to an online form
Convert your design into an interactive form. There are two paths:
| Path | Best for |
|---|---|
| PDF Fillable Form | Keeping the PDF as the background while fields become interactive |
| Web PDF Form | A clean web-based form that maps fields back to generate the final PDF |
After choosing a path, you can configure each field’s properties — label, placeholder, format, required/read-only/hidden settings, input validation, and conditional logic.
Once converted, your form is managed from Work on online forms. See:
- Manage web PDF form — for Web PDF Form
- Manage online PDF form — for PDF Fillable Form
- Configure online form — settings, notifications, logic
- Publish and share — share your form
Keyboard shortcuts
| Shortcut | Action |
|---|---|
| Right-click | Show context menu |
| Cmd/Ctrl + C / V | Copy / paste components |
| Cmd/Ctrl + D | Duplicate |
| Cmd/Ctrl + Z / Shift + Z | Undo / redo |
| Cmd/Ctrl + A | Select all on the page |
| Cmd/Ctrl + G / Shift + G | Group / ungroup |
| Cmd/Ctrl + S | Save a version |
| Delete | Remove selected component |
| Arrow keys | Nudge component (hold Shift for bigger steps) |
| Shift + Click | Select multiple components |
| Esc | Deselect / exit editing |
| Space + Drag | Pan the canvas |
Video Tutorial
Prefer watching a video? Check out the tutorial below.