Set PayPal Payment properties
Tabs
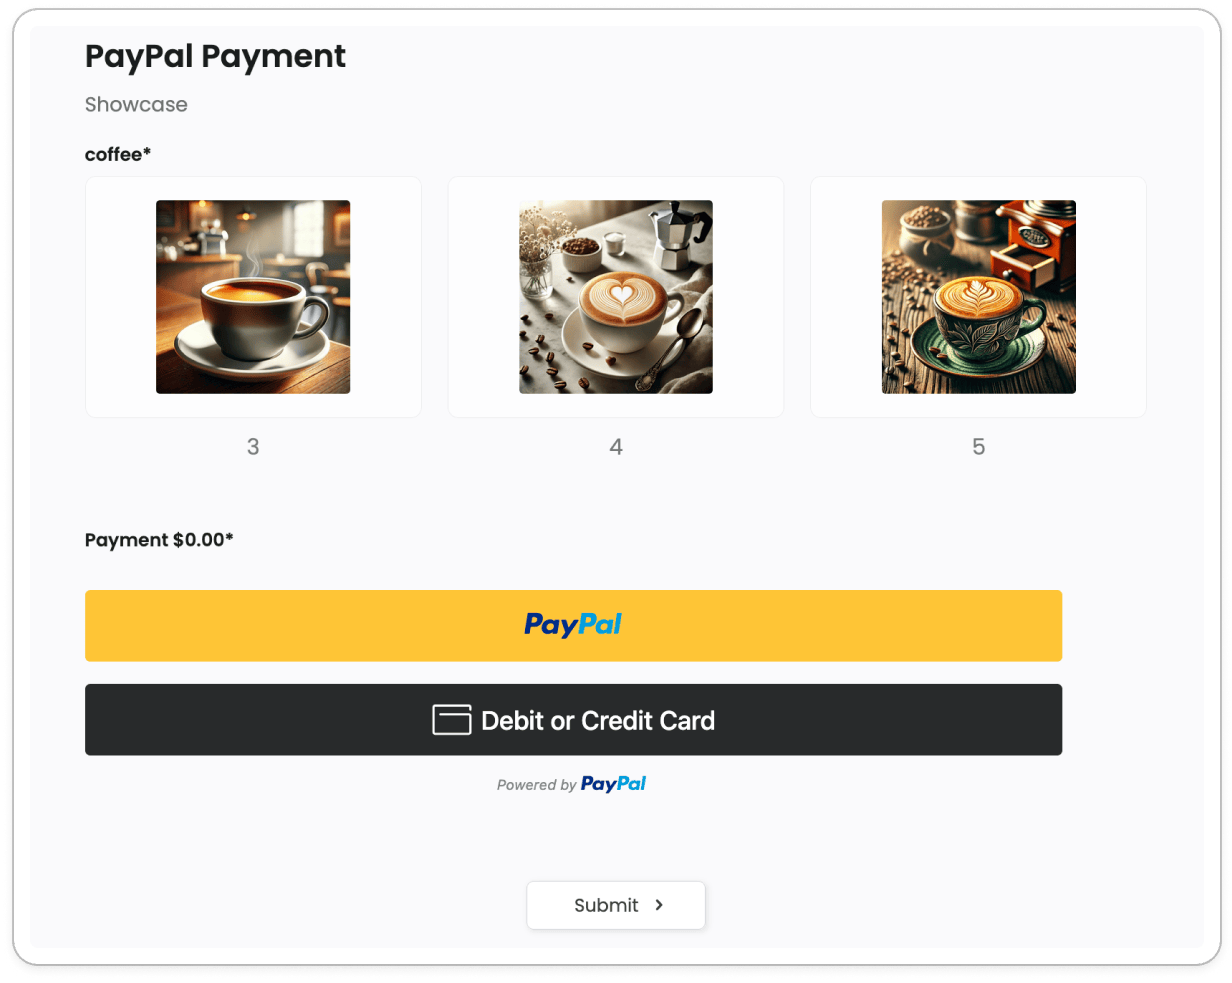
The PayPal Payment field lets you accept payments directly inside your form using PayPal’s smart button suite.
It handles multiple payment methods in a single widget — including PayPal, credit or debit cards, and Pay Later — and supports dynamic pricing that updates in real-time as users fill out the form.
Add field
To add a PayPal Payment field, in the form builder, select PayPal Payment from Enhanced Features in the left toolbar.
Connect your PayPal account
Before the widget can process payments, you need to connect a PayPal merchant account.
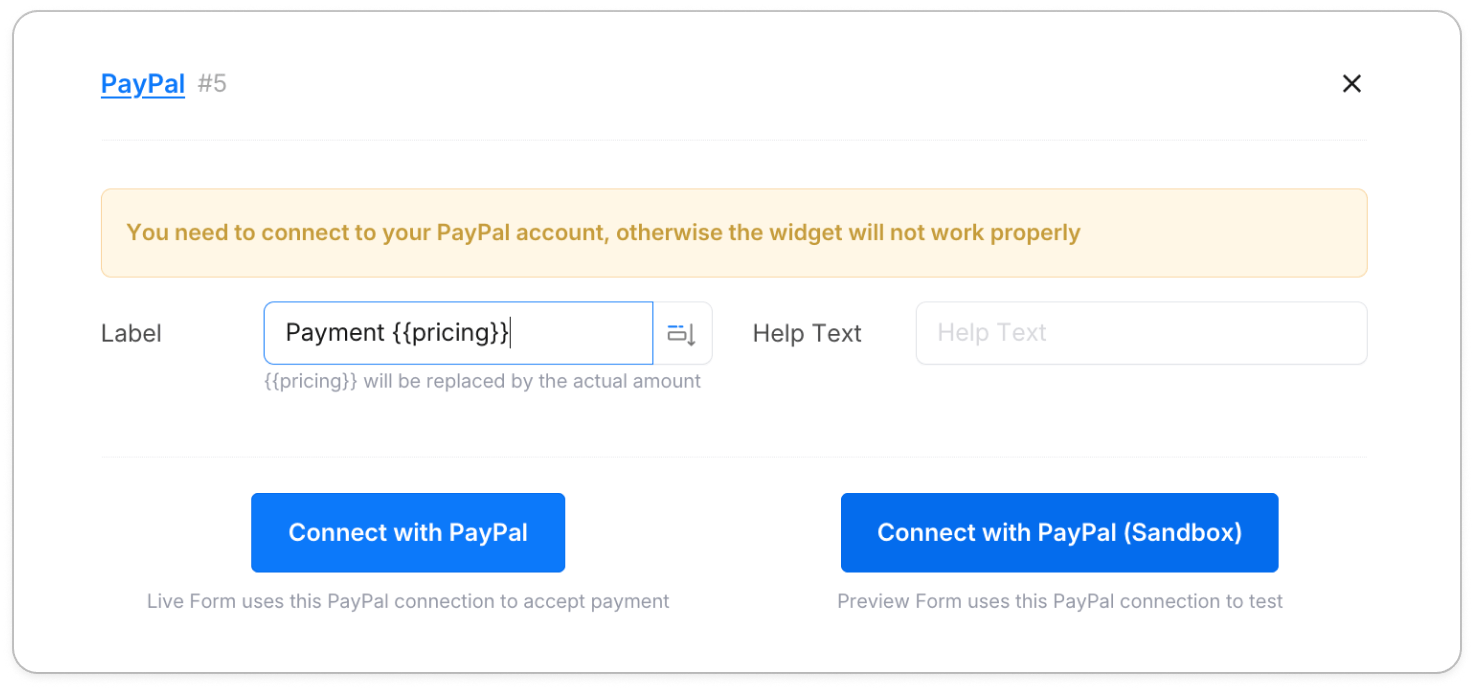
The properties panel provides two separate connection slots:
- PayPal — used by the live form to accept real payments
- PayPal (Sandbox) — used in preview mode for testing with test funds
Click Connect under either slot to begin the OAuth authorization flow. Once authorized, the button changes to Revoke Connection, confirming the account is linked.
If you see an attention message saying PayPal has not granted permission, click Revoke Connection and reconnect your account to refresh the authorization.
Configure payment amount
The widget supports two ways to set the payment amount.
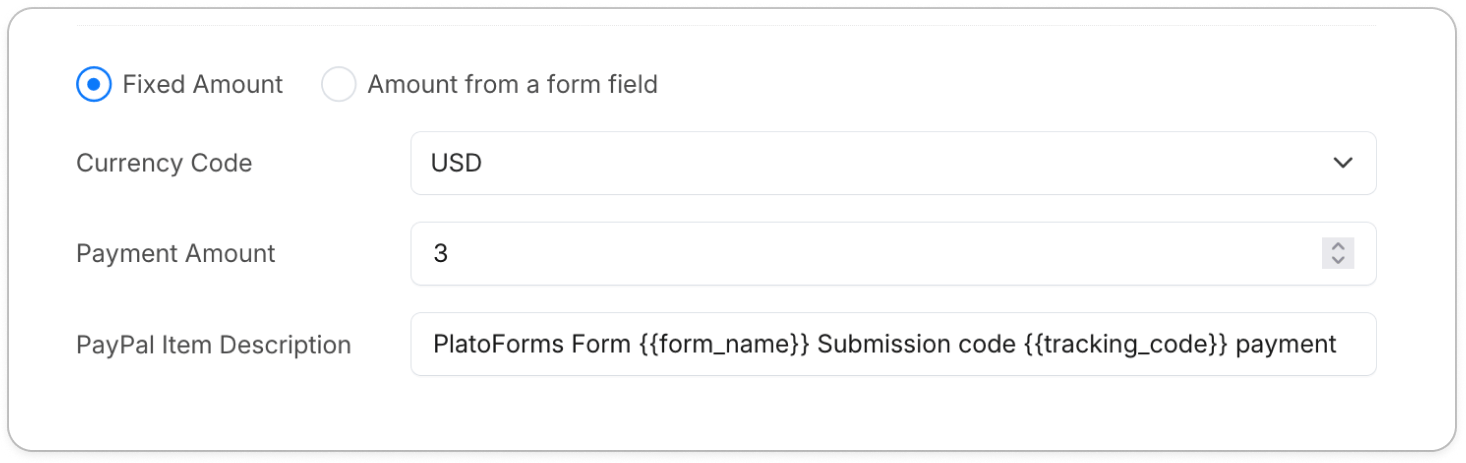
Fixed amount
Select Fixed Amount and enter a number directly. Every submission charges the same price.
Amount from a form field
Select Amount from a form field to link the payment to a dynamic value calculated elsewhere in the form.
- Add a Short Text field to the form, label it (for example,
pricing), and mark it as Hidden on Form. Its value will be set by form logic to match the intended price. - In the PayPal widget properties, set Payment Amount Field to that field (for example,
#5 SingleText - pricing). - Optionally, include
{{pricing}}in the widget Label — it will be replaced by the live amount as users interact with the form.
You can combine this with form logic to set the price based on user selections.
IF (product is “Coffee”) THEN (set pricing field) to “2”.
For more details, refer to Set Form Logic.
Currency and item description
| Setting | Description |
|---|---|
| Currency Code | The currency used for the transaction (for example, USD, EUR, JPY). Defaults to USD. |
| PayPal Item Description | The order description visible to the buyer. Supports variables such as {{form_name}} and {{tracking_code}}. |
Smart payment buttons
One PayPal Payment widget automatically renders multiple payment options based on the buyer’s region, browser, and order amount.

| Button | Description |
|---|---|
| PayPal | Standard PayPal login and checkout flow. |
| Debit or Credit Card | Lets buyers pay directly without a PayPal account. |
| Pay Later | Instalment or deferred payment option. Availability depends on region and order amount. |
You do not need to configure each button individually. PayPal’s smart rendering handles which options to display automatically.
Test and go live
Always test the complete payment flow before publishing your form.
| Mode | Used for | PayPal connection |
|---|---|---|
| Sandbox | Testing with fake funds in form preview | PayPal (Sandbox) slot |
| Live | Real payments on the published form | PayPal slot |
Set up sandbox accounts
PayPal automatically provides two mock accounts for testing. To find them:
-
Go to the PayPal Developer dashboard.
-
Under the Testing Tools menu, select Sandbox Accounts.
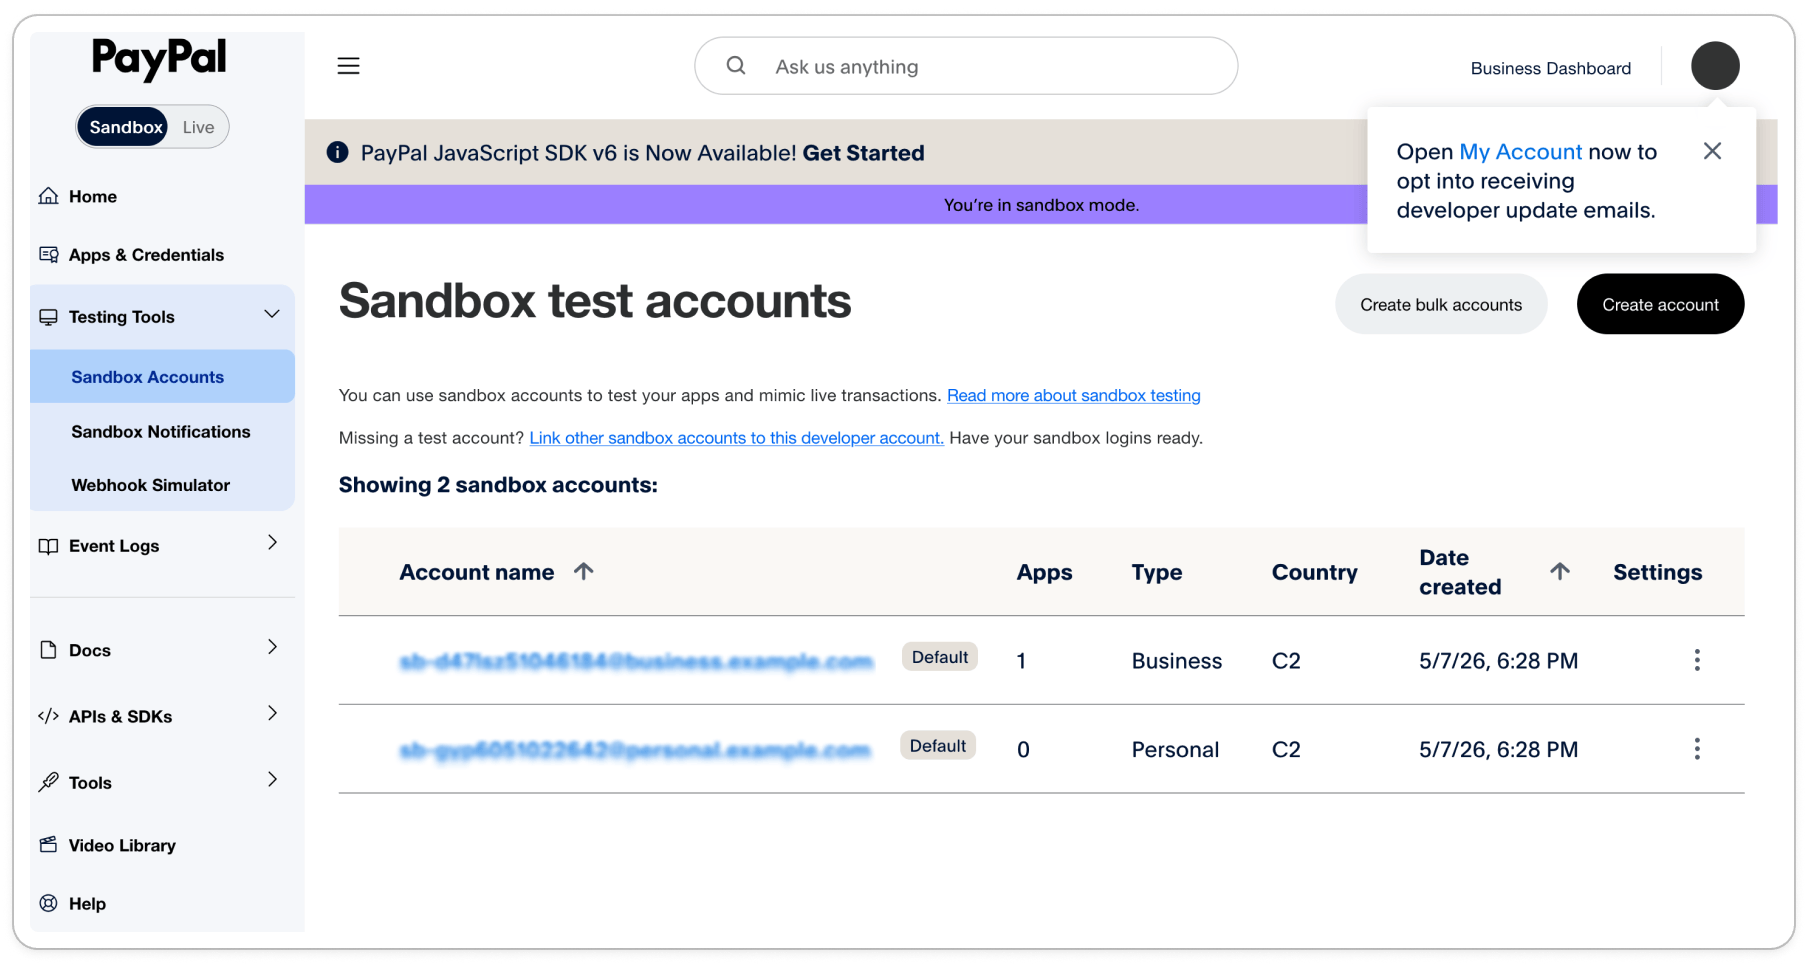
-
You will see two pre-created accounts — one with type Business and one with type Personal.
-
Click either account name to view its details, including the email address and password needed for testing.
| Account type | Role |
|---|---|
| Business | Mock merchant — use these credentials to connect the PayPal (Sandbox) slot in PlatoForms |
| Personal | Mock buyer — use these credentials to complete a test payment on the form |
Connect the sandbox account
- In the PayPal widget properties, click Connect under the PayPal (Sandbox) slot.
- When prompted, enter the credentials of the Business sandbox account.
- Authorize the connection. The slot will show Revoke Connection when successfully linked.
Test the payment flow
- Make sure you are logged out of any PayPal session in your browser.
- Open the form’s public URL in an incognito window.
- Fill out the form and select options to trigger the dynamic price.
- Click the PayPal button and log in using the Personal sandbox account credentials.
- Complete the test payment and verify the submission is recorded correctly.
Always use an incognito window when testing as the buyer. PayPal will block the transaction if it detects the merchant and buyer accounts are active in the same browser session.
Validation and security
- Pre-payment validation: The PayPal checkout flow only activates after all required fields in the form pass validation. Buyers cannot proceed to payment until the form is complete.
- Secure card processing: All sensitive payment data — card numbers, CVV — is handled directly by PayPal’s encrypted infrastructure. PlatoForms never stores card details, reducing your PCI compliance burden.
Video tutorial
Learn better visually? Watch the full walkthrough.