


Google Forms does not include a payment question type or a native checkout. You can add a payment link, show a QR code, or install a third-party add-on. Payment links and QR codes keep the form response and payment separate. Some add-ons can connect them, but Google Forms does not provide that connection natively.
This guide explains how each method works, its limits, and when an integrated payment form is the simpler option. The first two methods are free to set up, but payment processing fees may still apply. Google Forms add-ons may also charge for advanced features.
| Method | Cost to start | Payment matched to submission? | Best for |
|---|---|---|---|
| Confirmation-message payment link | Free | No | Occasional fixed-price payments |
| QR code in the form | Free | No | In-person and community events |
| Google Forms add-on | Varies | Depends on the add-on | Teams that must remain in Google Forms |
| Integrated payment form | Depends on provider and plan | Yes | Registrations, orders, and client services |
What Google Forms provides for payments
Google Forms provides question types for collecting text, choices, files, dates, times, and ratings. Its documented question types do not include a payment field, card field, or checkout. To collect a payment, you need to use a separate payment service or install a third-party add-on from Google Workspace Marketplace.
Never collect card numbers, expiry dates, or security codes in ordinary form fields. Send payment details directly to a payment processor through its hosted checkout or integrated payment component.
Method 1: Add a payment link to your confirmation message
Best for: Occasional fixed-price payments from people you already know or expect.
The easiest free workaround is to include a payment link in the confirmation message that appears after someone submits your form.
Steps:
-
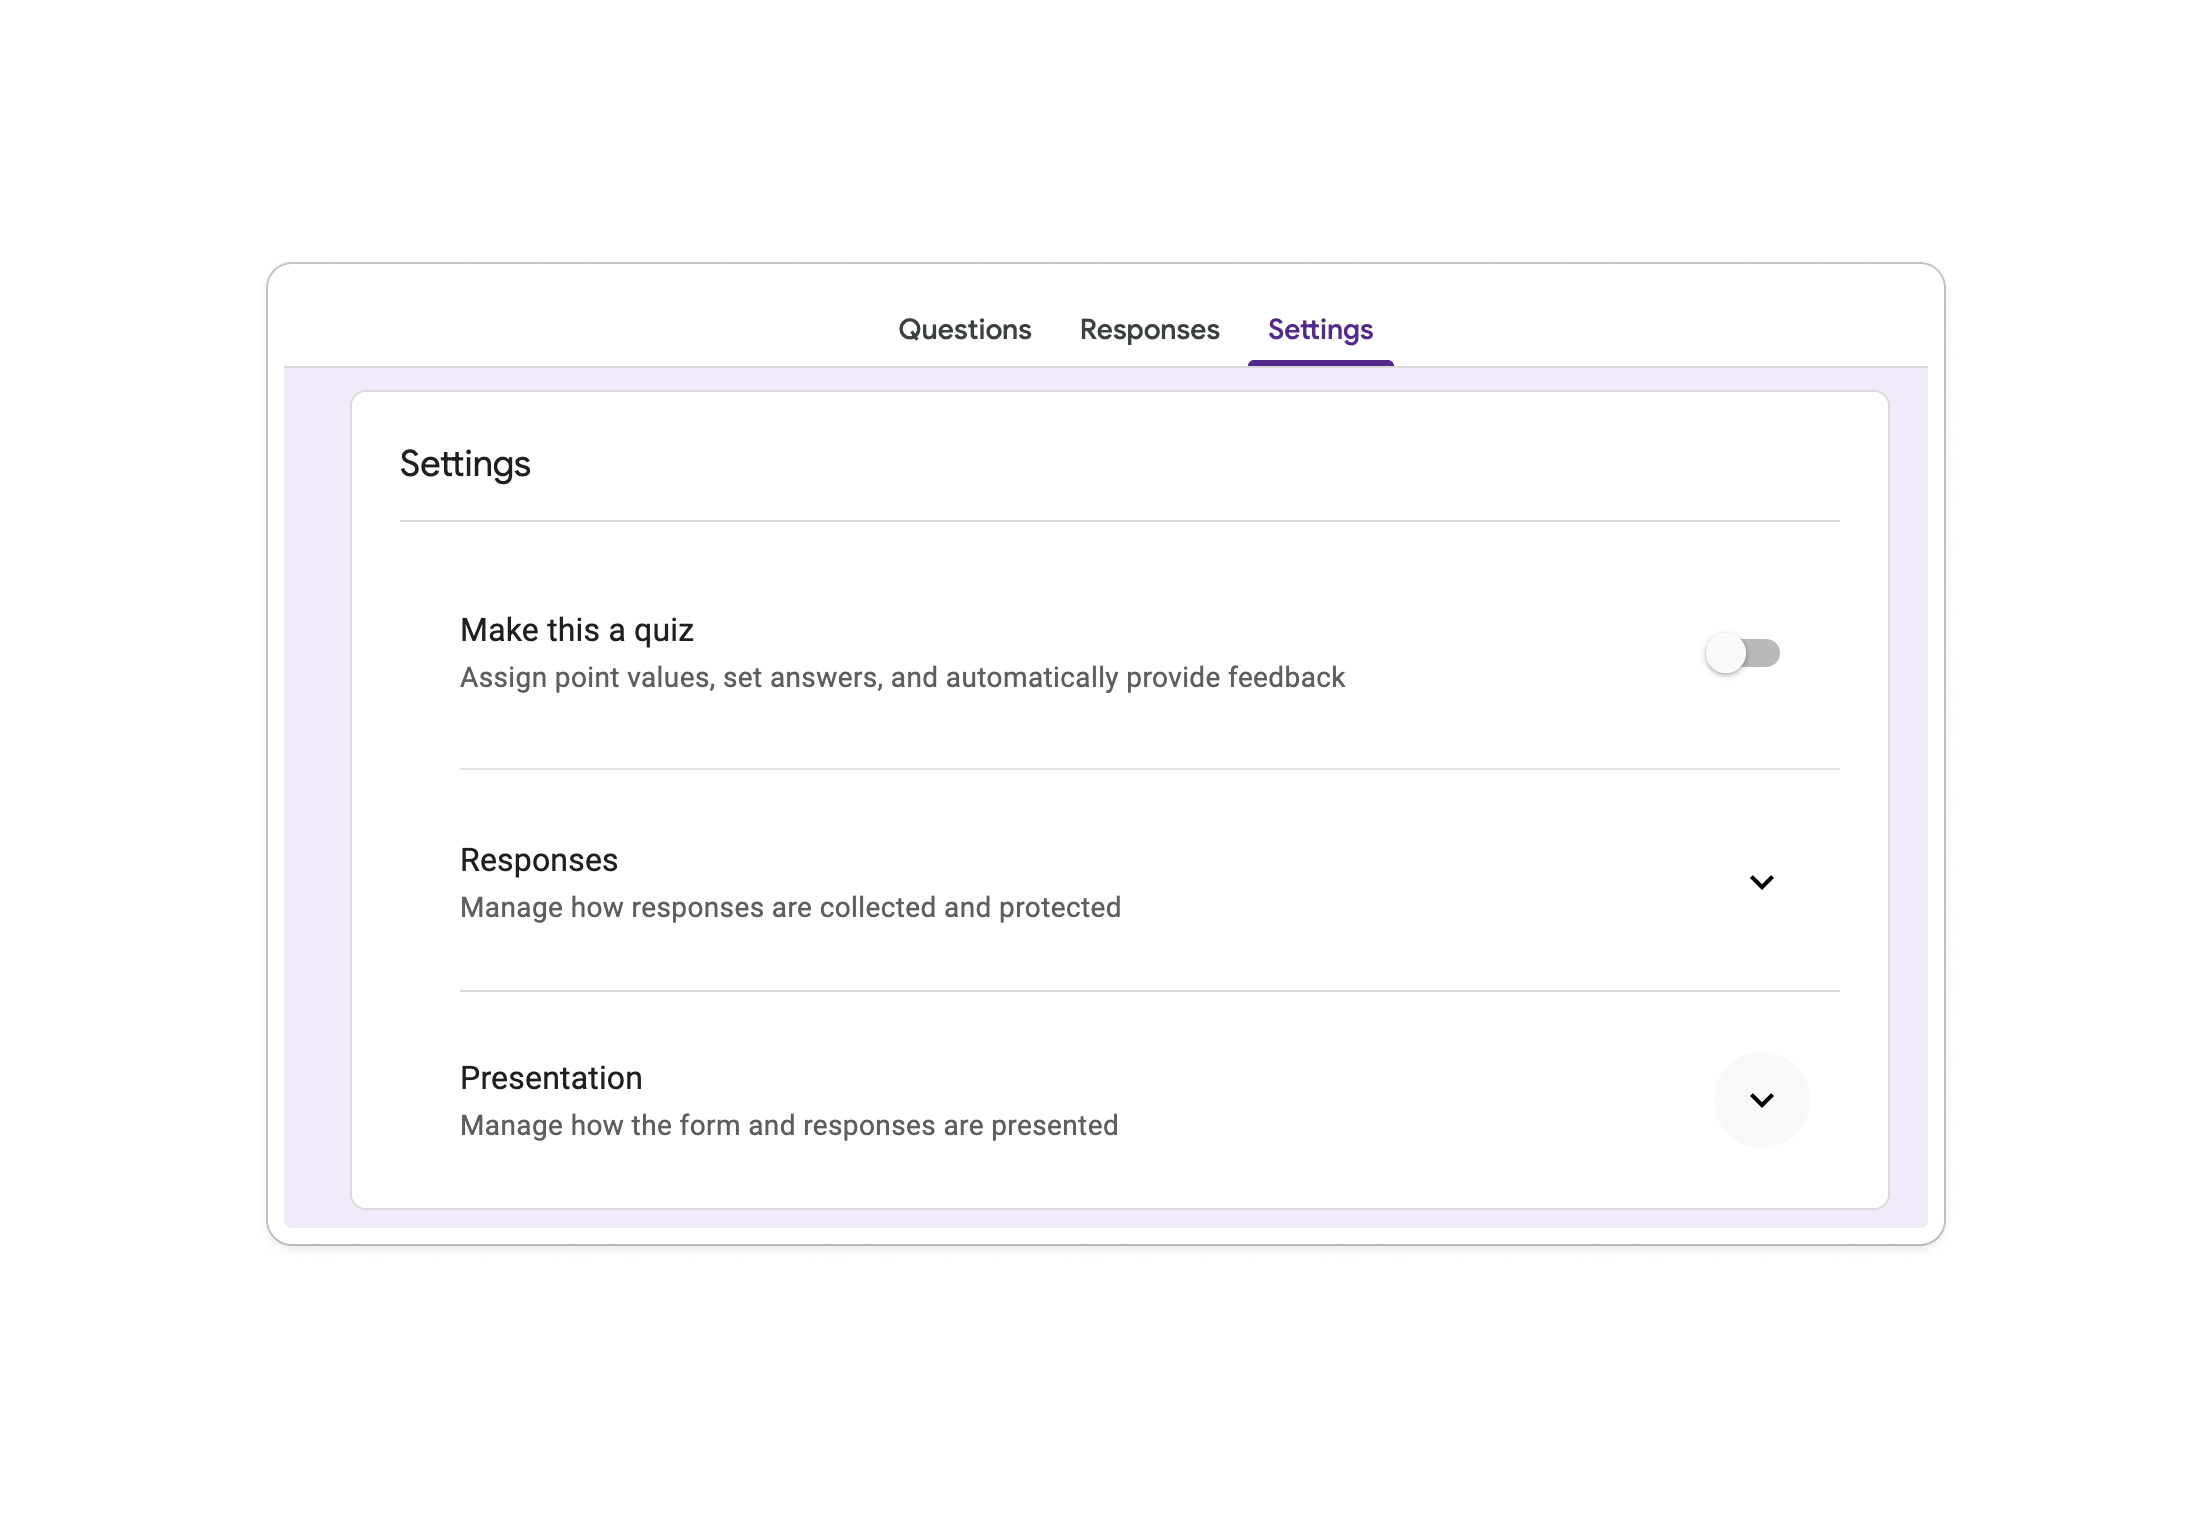
Open your Google Form and switch to the Settings tab.
-
Expand the Presentation tab.
-
Next to Confirmation message, click Edit, then paste the full payment URL, such as a PayPal.Me link or Stripe Payment Link.
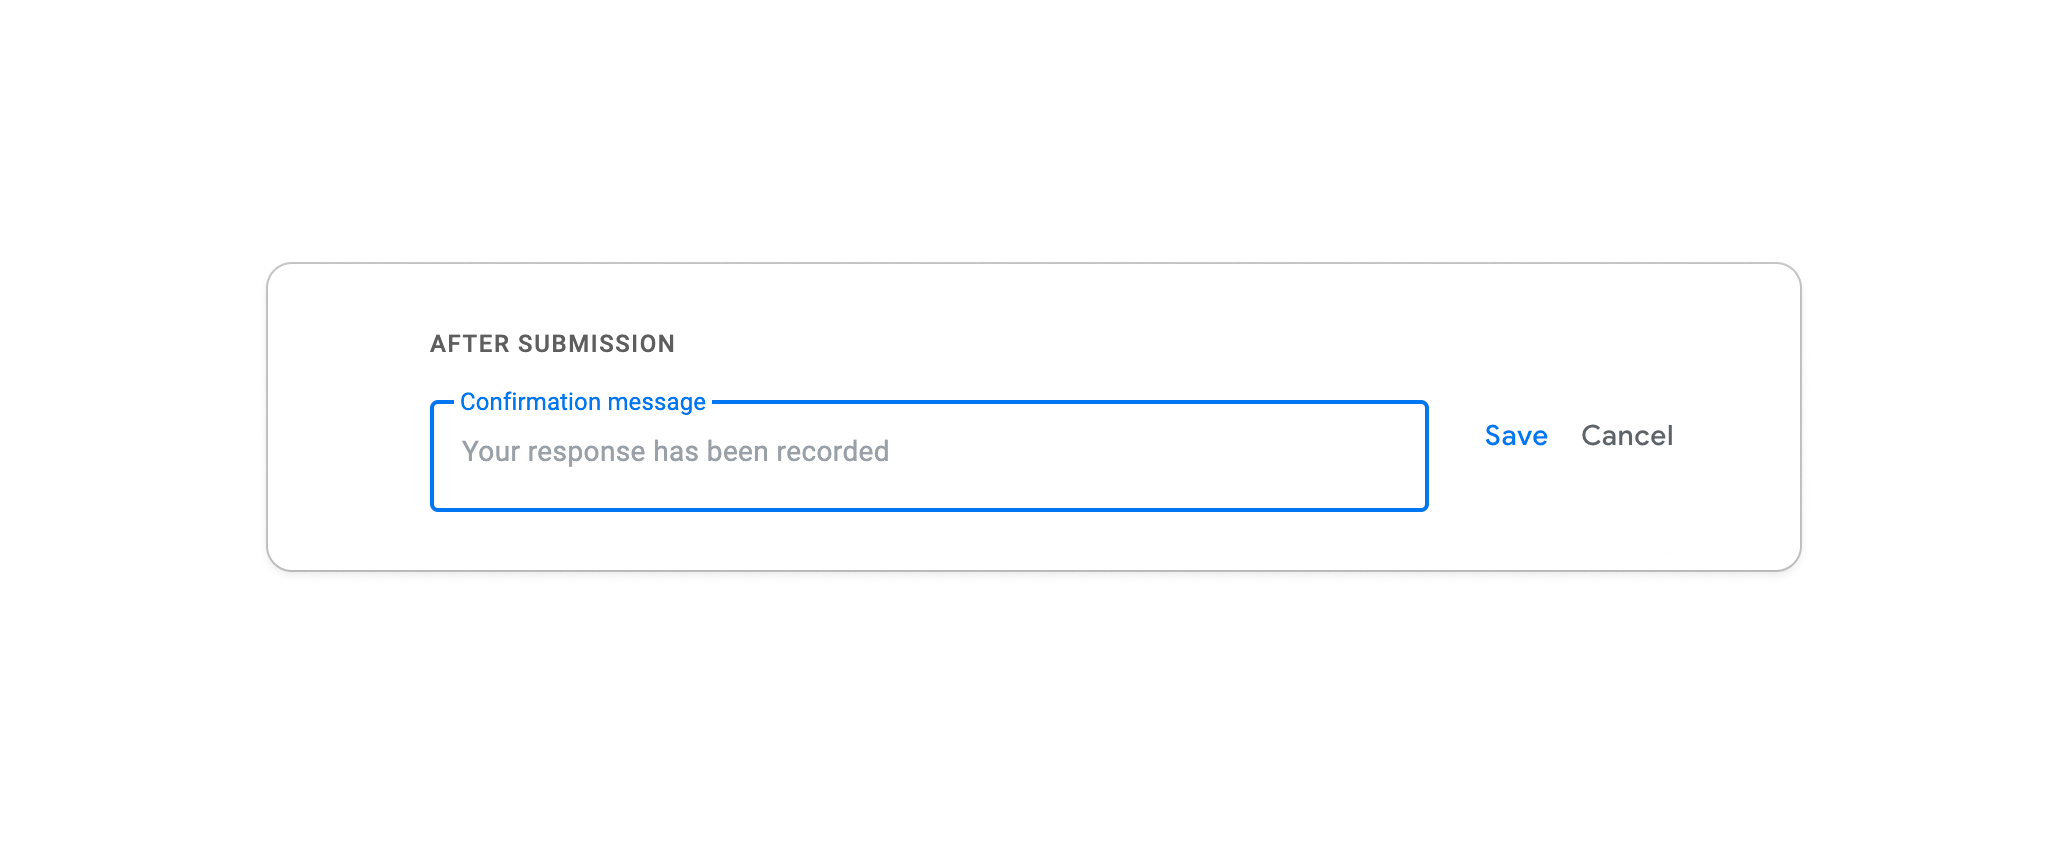
Example confirmation message:
“Thank you for registering! Please complete your payment of $50 here: [your payment link]. Your spot will be confirmed once payment is received.” -
Click Save.
-
Open the published form and submit a test response. Confirm that the full payment URL opens the correct checkout page.


Limitations:
-
No automatic way to verify who has paid — you’ll need to manually match payments to form responses.
-
Respondents can submit the form without ever paying.
-
A payment link in the confirmation message does not automatically calculate or receive a different amount based on the respondent’s answers.
What manual matching looks like: If 100 people register for an event and 30 pay, you have two separate records: Google Sheets with the form responses and your payment dashboard with the transactions. There is no shared transaction ID between them. You must match people by name or email, which can lead to errors when the details differ across the two systems.
Method 2: Embed a QR code inside the form
Best for: In-person or community events where respondents are likely to use the same peer-to-peer payment app, such as Venmo or Cash App.
Instead of a link after submission, you can embed a QR code directly inside your form so respondents can scan and pay mid-form or at the end.
Steps:
-
Generate a QR code for your payment platform, such as PayPal, Venmo, Cash App, or Zelle. Check the platform’s instructions for where to find or create it.
-
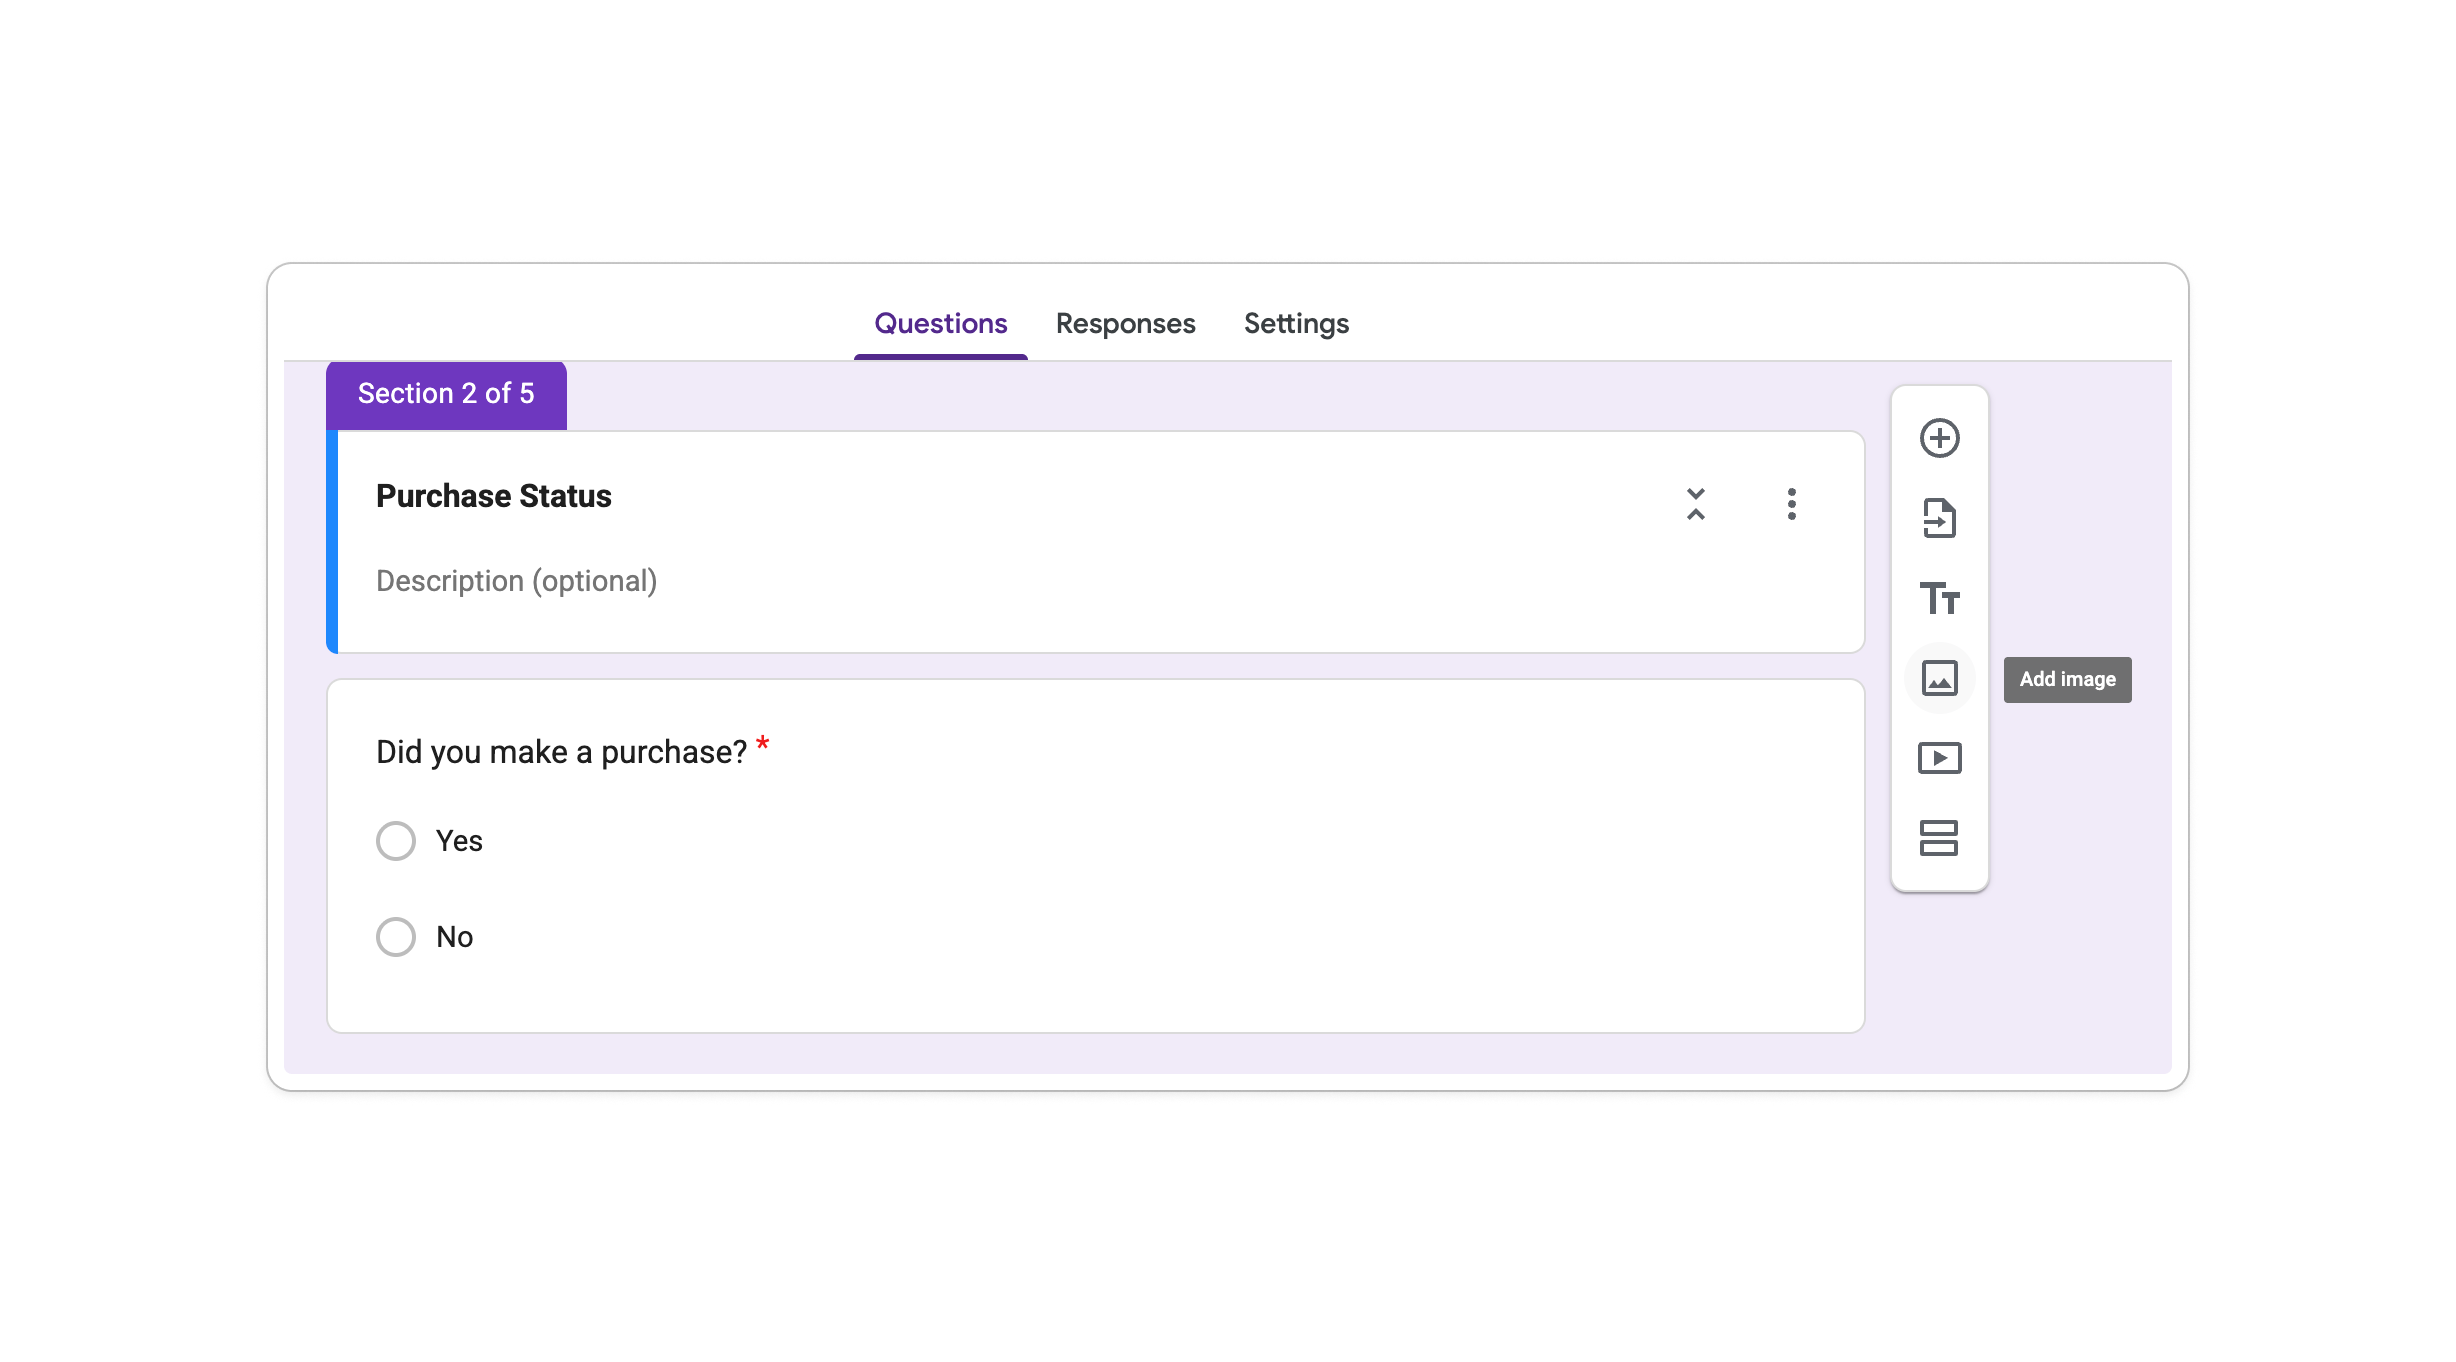
Open your Google Form and click Add image. Google Forms lets you add an image on its own or attach one to a question.
-
Upload your QR code image.
-
Add instructions asking respondents to scan and pay before submitting.

Limitations:
-
The QR code may open an app or a website, depending on the payment service and the respondent’s device.
-
A QR code is easiest to use on a desktop screen, printed sign, or second device. It may be inconvenient for someone completing the form on a phone.
-
Still no automatic confirmation that payment has been made.
-
The separate payment step may feel less consistent with a branded client workflow.
Refunds and disputes: If a customer requests a refund, you must process it in the payment app and look up the related form response separately. Because the form and payment do not share a transaction ID, matching the records takes extra work.
Method 3: Use a Google Workspace add-on
Best for: Businesses that want to stay within Google Forms and need automatic payment calculation.
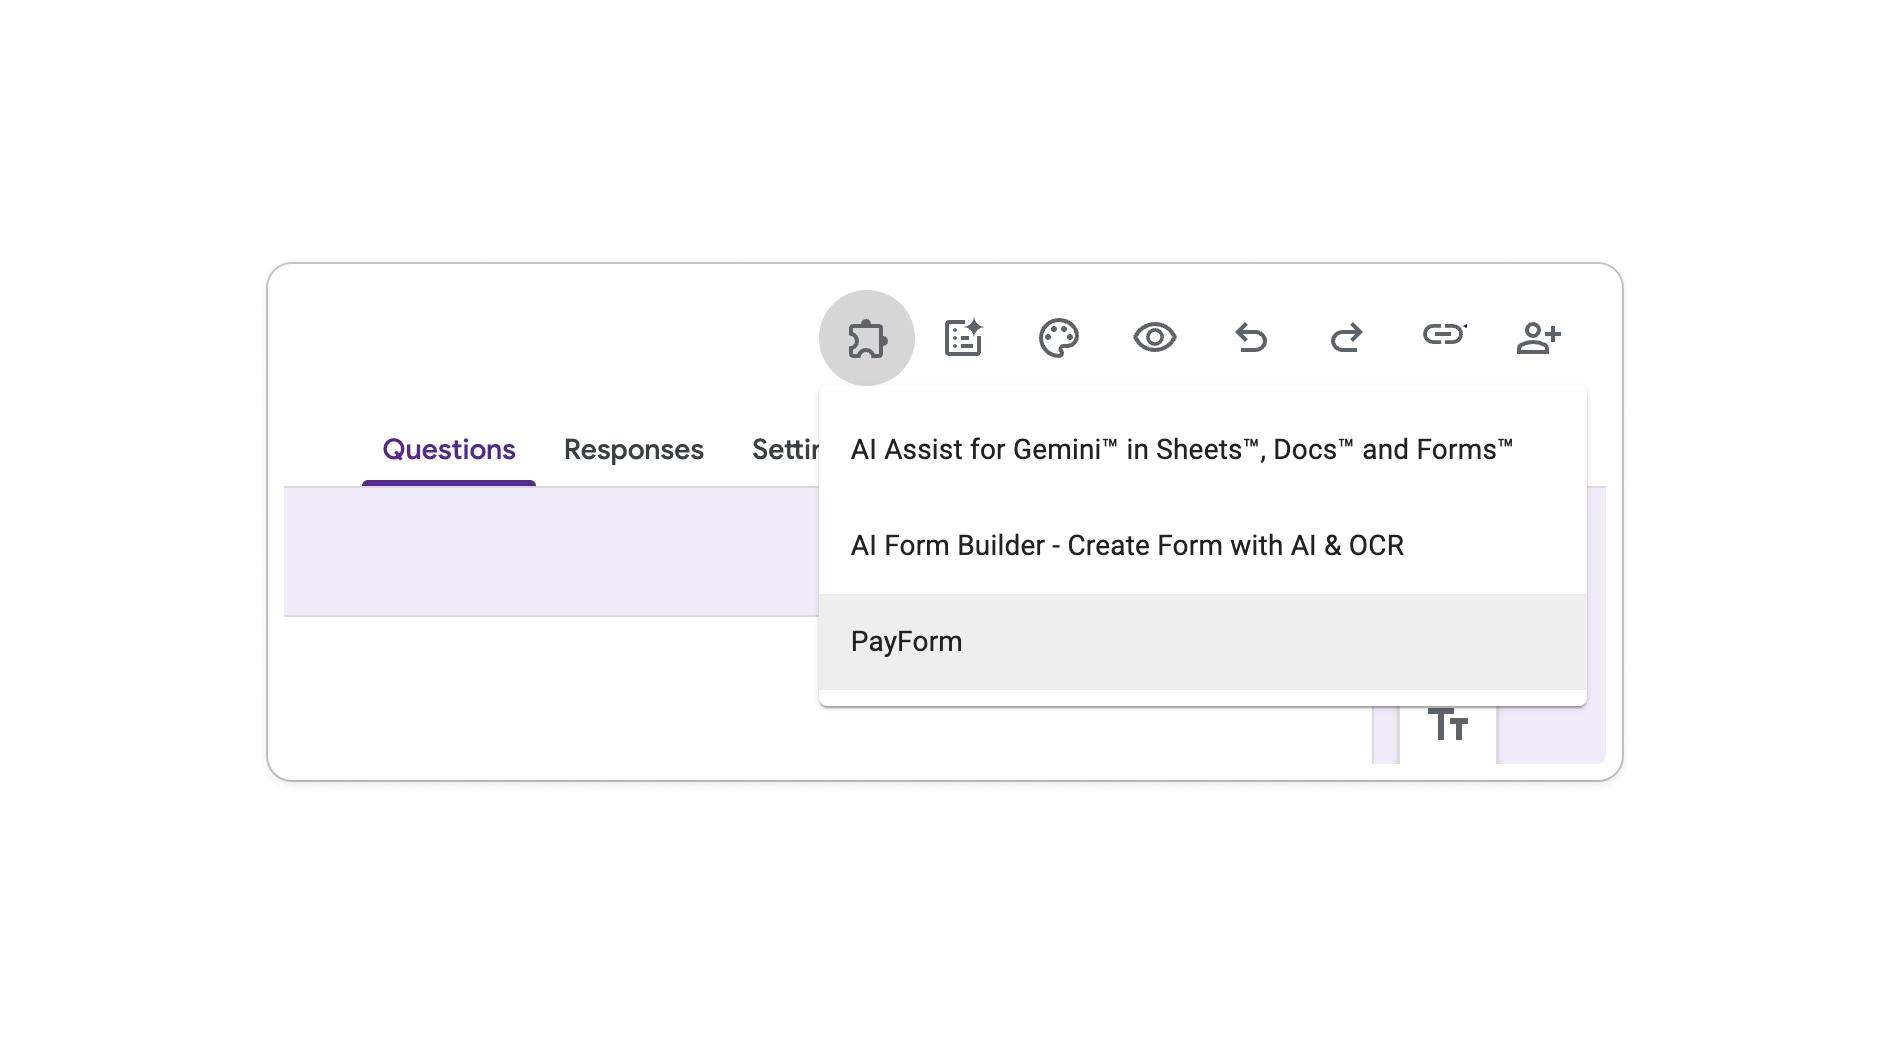
Google Workspace Marketplace offers add-ons such as PayForm that connect Google Forms to payment services. Features vary by add-on, but some can calculate a total from form answers, connect a response to a payment, or send the respondent to a checkout page.
Steps:
-
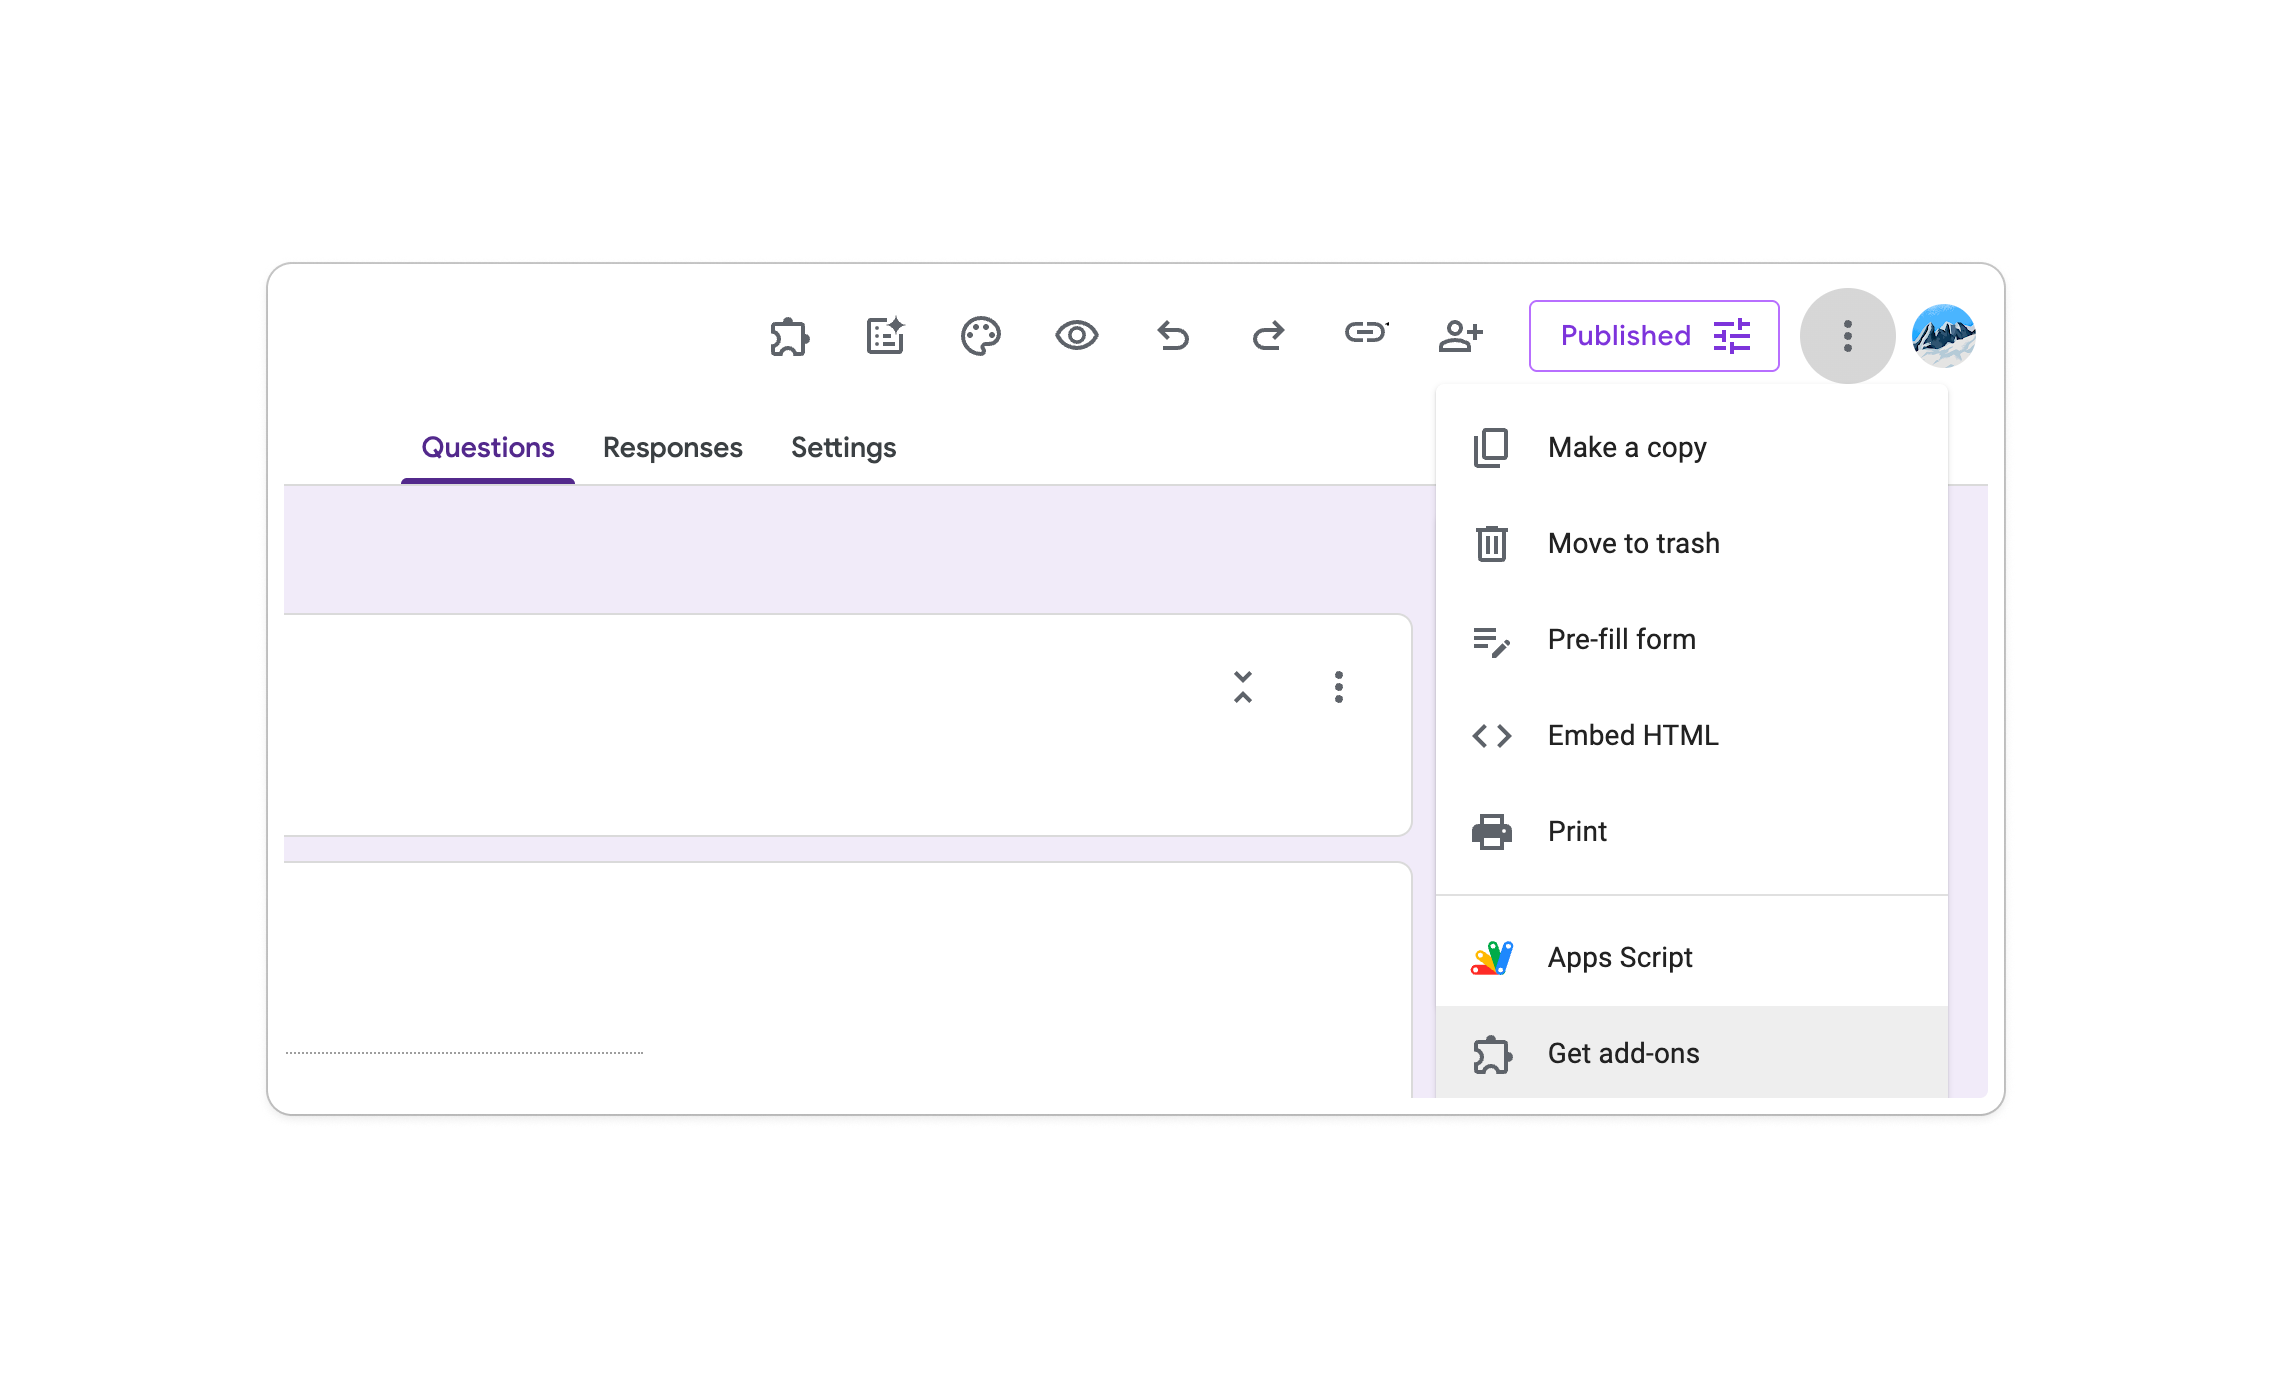
Find an add-on: Open the form, click More at the top right, select Add-ons, and search for a payment tool such as PayForm.
-
Review and install it: Check its pricing, supported payment services, account permissions, privacy policy, and recent support history before granting access to your form data.
-
Open the add-on: Click the puzzle icon (🧩) and select the tool you installed.
-
Follow its setup guide: Connect a supported payment service and configure prices using the instructions provided by the add-on developer.


Limitations:
-
Features, checkout design, and payment tracking vary by add-on.
-
Free plans may have limits, and paid features or payment processing fees may apply.
-
The add-on may need permission to read or manage your Google Forms data.
-
Support, security updates, and maintenance are handled by the add-on developer, not Google.
The limitations of Google Forms payment workarounds
All three methods can work, but they share one limitation: Google Forms does not provide the payment connection itself. Depending on the setup, you may need to match payments to responses manually or rely on a third-party add-on.
If you collect payments regularly, an integrated online payment form can keep the form response and payment in one workflow. PlatoForms provides payment fields for supported web forms and connects them to Stripe, PayPal, or Square.
Here is how the two approaches compare:
| Feature | Google Forms (with workarounds) | PlatoForms |
|---|---|---|
| Native payment field | Not available | Stripe, PayPal, and Square |
| In-form payment | Requires a third-party add-on | Available with embedded payment fields |
| Dynamic pricing | Depends on the add-on | Available with all three providers |
| Test mode before going live | Depends on the payment tool | Stripe and PayPal; Square is live-only |
| Payment linked to submission | Depends on the setup | Included in the payment workflow |
| PDF generation and e-signatures | Not native | Available in supported form workflows |
| Additional form add-on required | Yes | No |
A more integrated option: collect payments in the form
If your business collects payments regularly—for client onboarding, service agreements, event registrations, or product orders—an integrated payment field can reduce the work needed to match responses with transactions.
With PlatoForms, the form response, payment status, amount, and transaction details stay connected in the submission record. PlatoForms supports three payment providers. Use only one payment method on each form because combining providers can cause conflicts in the amount, currency, or payment status. All three support fixed and dynamic pricing. The integrations require an eligible PlatoForms plan. PlatoForms does not add transaction fees, but the payment provider’s fees still apply.
Stripe — cards, Apple Pay, and Google Pay
Stripe offers two payment experiences: an embedded payment field and Stripe-hosted Checkout. With the embedded field, you can choose a fixed amount or an amount pulled from another form field. It supports credit and debit cards. Apple Pay and Google Pay can appear on supported browsers and devices after you complete the required domain setup in Stripe.
Stripe also supports Test Mode. Connect Stripe in Test Mode and use test card numbers to check the payment flow without making a real charge.

For dynamic pricing, select Amount from a form field and connect the payment field to a calculated value elsewhere in the form. Add {{pricing}} to the payment label to show the current amount as the respondent completes the form.

Best for: Businesses that mainly accept cards, need Apple Pay or Google Pay, or want to test the payment setup before launch. See the Stripe integration guide for full setup.
PayPal — PayPal, cards, and Pay Later
The PayPal Payment field shows PayPal’s Smart Payment Buttons inside the form. Available options may include PayPal, credit or debit cards, and Pay Later. The options shown depend on factors such as the buyer’s location, order amount, currency, and PayPal eligibility.
PayPal provides Sandbox accounts for testing. Connect a sandbox account for preview submissions so you can test with mock buyer and merchant accounts without using real money.
Best for: Businesses whose customers prefer PayPal or eligible Pay Later options.
Square — embedded field or checkout redirect
Square offers two modes. The Square Payment field keeps the respondent on your form throughout—they enter card details inline, with no redirect. Square Checkout redirects the respondent to a Square-hosted page after submission and automatically sends them a receipt email.
One important limitation: Square supports live payments only — there’s no sandbox or test mode. Any test submission charges a real card. If you need to verify the flow, charge a small amount and refund it from your Square Dashboard.
Watch: setting up the Square Payment field in PlatoForms — fixed pricing, variable pricing, and viewing the transaction ID in submissions.
Best for: Businesses that already use Square and want to connect online form payments to the same provider. See the Square integration guide for full setup.
All three providers support fixed amounts and amounts taken from another form field, although the setup labels may differ. Not sure which provider to use? See Stripe vs. Square vs. PayPal for a side-by-side comparison.
Which method should you choose?
| Your situation | Recommended method | Why it may fit |
|---|---|---|
| Occasional, low-volume payments from people you already know or expect | Payment link in the Google Forms confirmation message | Simple to set up, but payments must be matched to responses manually |
| In-person or community events | QR code in the Google Form or at the event | Easy to display on a screen or printed sign |
| Regular card payments, Apple Pay, or Google Pay | PlatoForms with Stripe | Offers embedded or hosted checkout and supports Test Mode |
| Customers who prefer PayPal or eligible Pay Later options | PlatoForms with PayPal | Shows available PayPal payment options inside the form |
| Businesses that already use Square | PlatoForms with Square | Offers an embedded field or Square-hosted checkout |
Google Forms is a useful tool for collecting responses, but it does not include a native payment field. If payments are a regular part of your workflow, an integrated form builder may be a better fit.
Once payments are live, you can set up logic-based email routing to notify the right team or send a custom confirmation email based on the order. Need to collect a signed waiver or consent form alongside payment? See how to combine waivers and payments in a single form.
Already using Google Forms? Import your existing form into PlatoForms for free, then configure a supported Stripe, PayPal, or Square payment field. Your original Google Form stays unchanged.
Starting from scratch? Start a free 15-day trial or customize an event registration template. No credit card is required for the trial.


