Pre-filled forms
Tabs
This guide covers the methods for pre-filling form data, including manual entry for individual invitations and bulk uploads via CSV.
What is a pre-filled form?
Pre-filling allows you to populate form fields with data before sending them to respondents. When a recipient opens the invitation link, the designated fields are already filled in with the information you provided manually or via a CSV file.
Apply pre-filled form
PlatoForms offers two ways to pre-fill your invitations: Manually for individual recipients or in Bulk via CSV upload.
Individual Pre-fill (Manual)
Use this method when you want to customize data for a single respondent.
-
After setting up your invitation, click Pre-fill Form in the Invitation panel.

This will open a new page displaying the associated form. -
On the associated form, fill in the info you want. The fields you fill will turn yellow.

-
Change these pre-filled fields’ status by clicking the eye or pen icons:
- Hidden (Eye icon crossed): The pre-filled field is invisible to respondents.
- Read-only (Pen icon crossed): Respondents can see the data but cannot change it.
- Editable: Respondents can see and modify the pre-filled content.
-
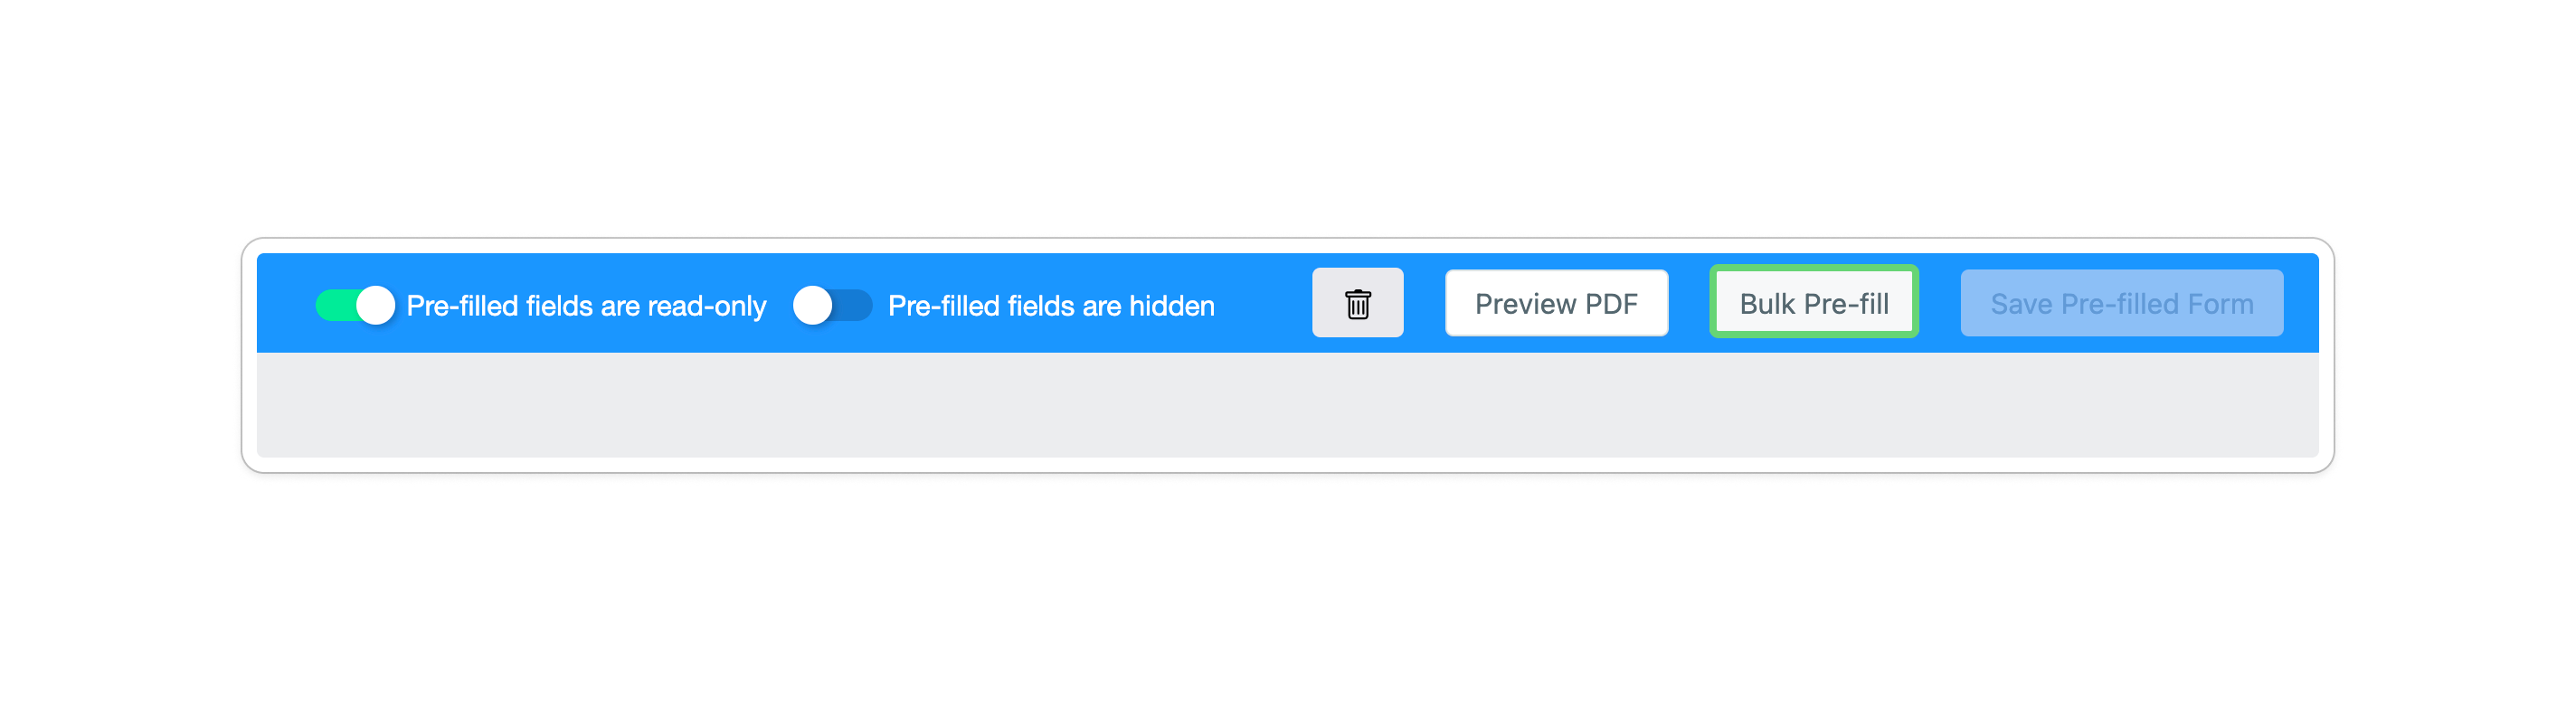
(Optional) Use the global toggles at the top to set whether pre-filled fields are Read-only or Hidden for all recipients.
-
Click Save Pre-filled Form.
Bulk Pre-fill (via CSV)
If you need to send invitations to hundreds of recipients with unique data for each, use the Bulk Pre-fill feature to save hours of manual entry.
-
In the Invitation panel, click Pre-fill Form and select Bulk Pre-fill.
-
Download CSV Template: Always start by downloading the system-generated template. This ensures your CSV headers match the required Field IDs (e.g.,
fid4 - Name).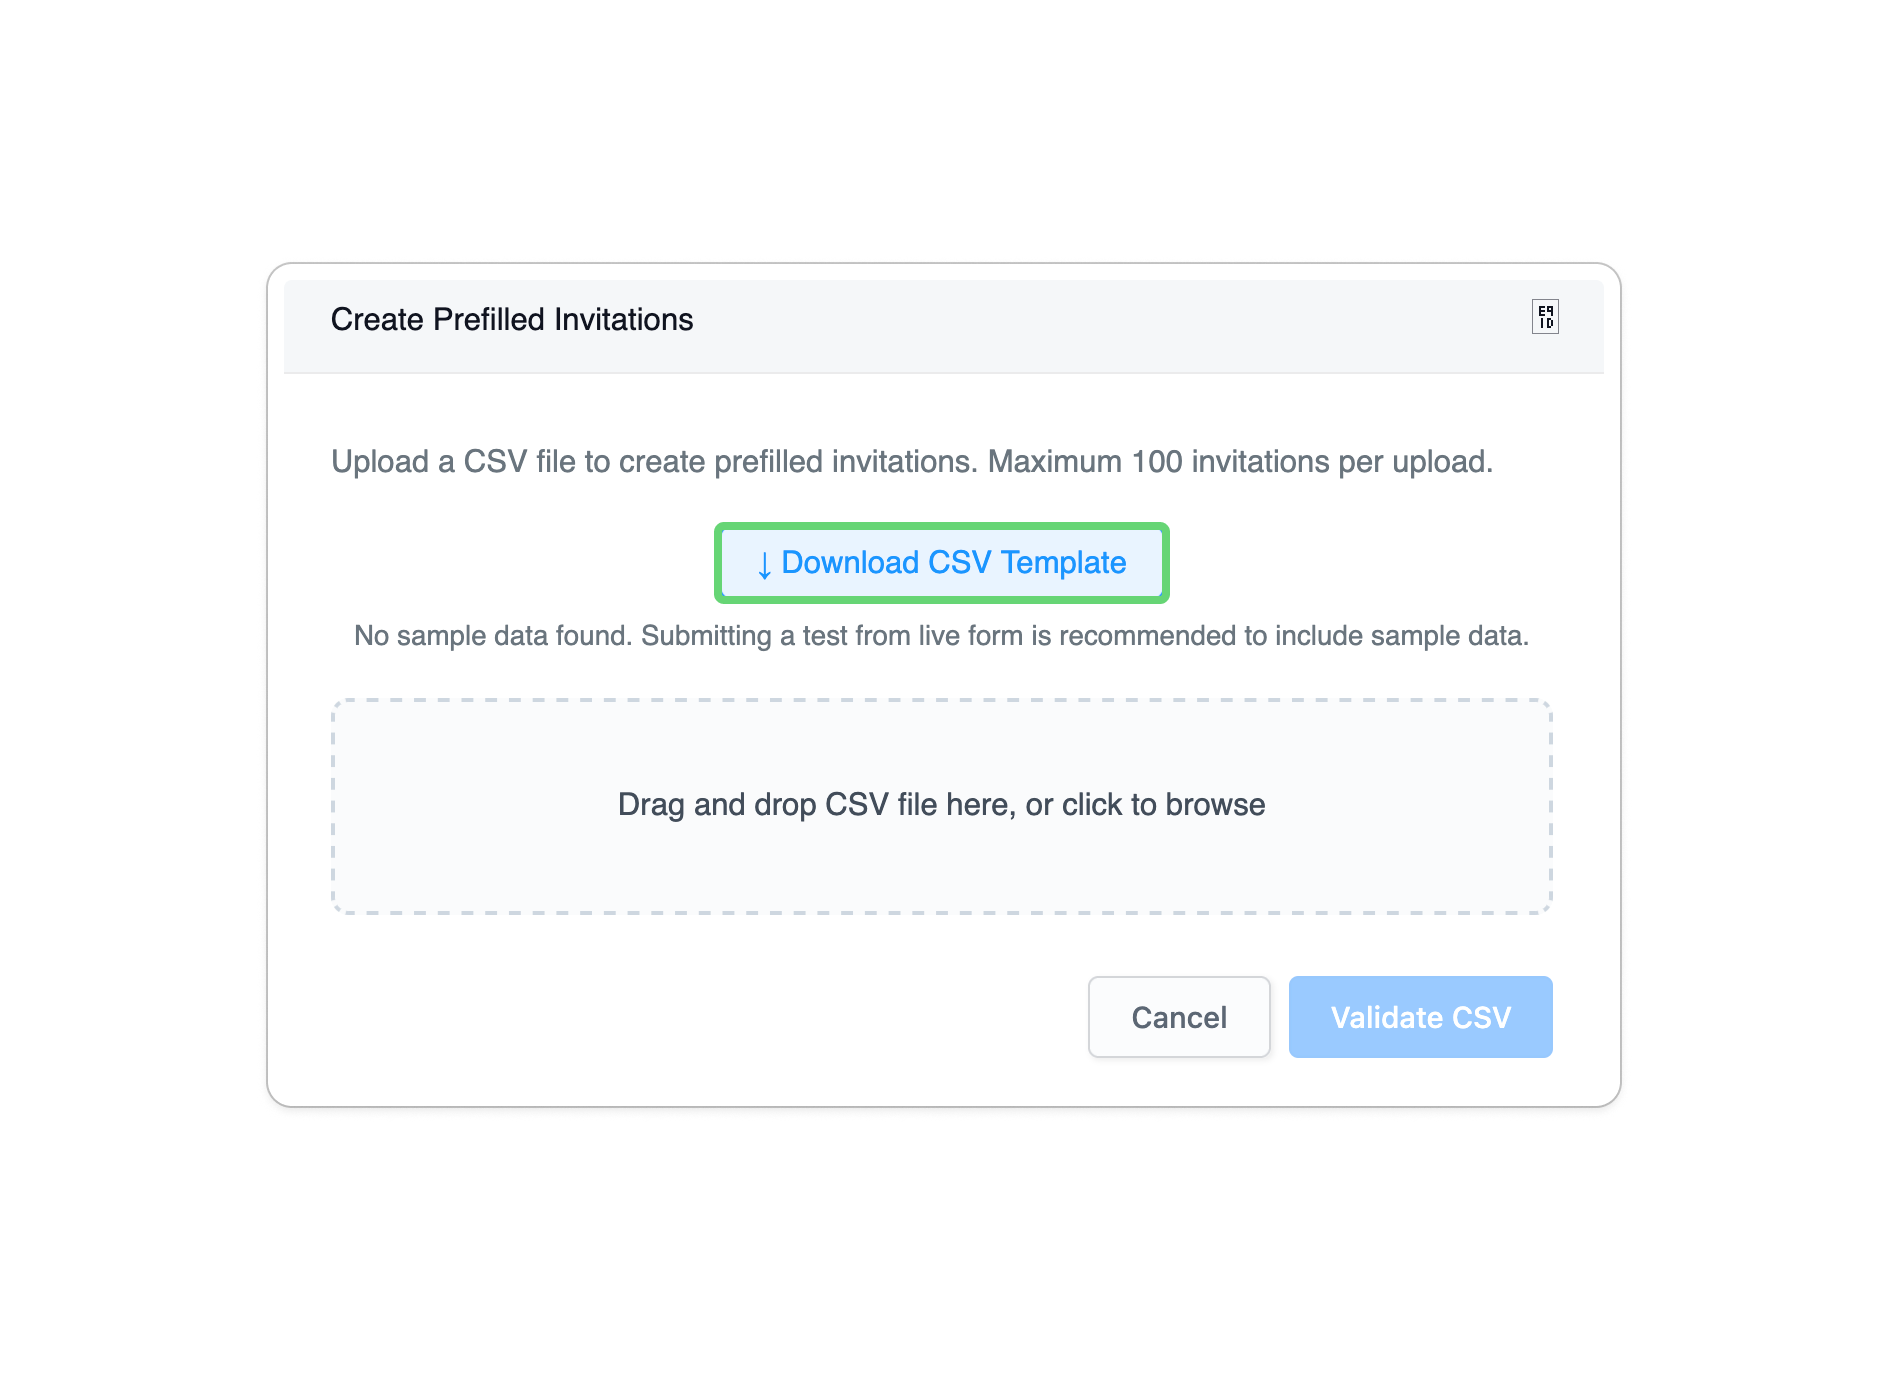
-
Prepare your data: Add your recipient emails and their specific data into the CSV.
NoteEnsure your file is saved as a UTF-8 CSV so the system recognizes the formatting and IDs correctly
-
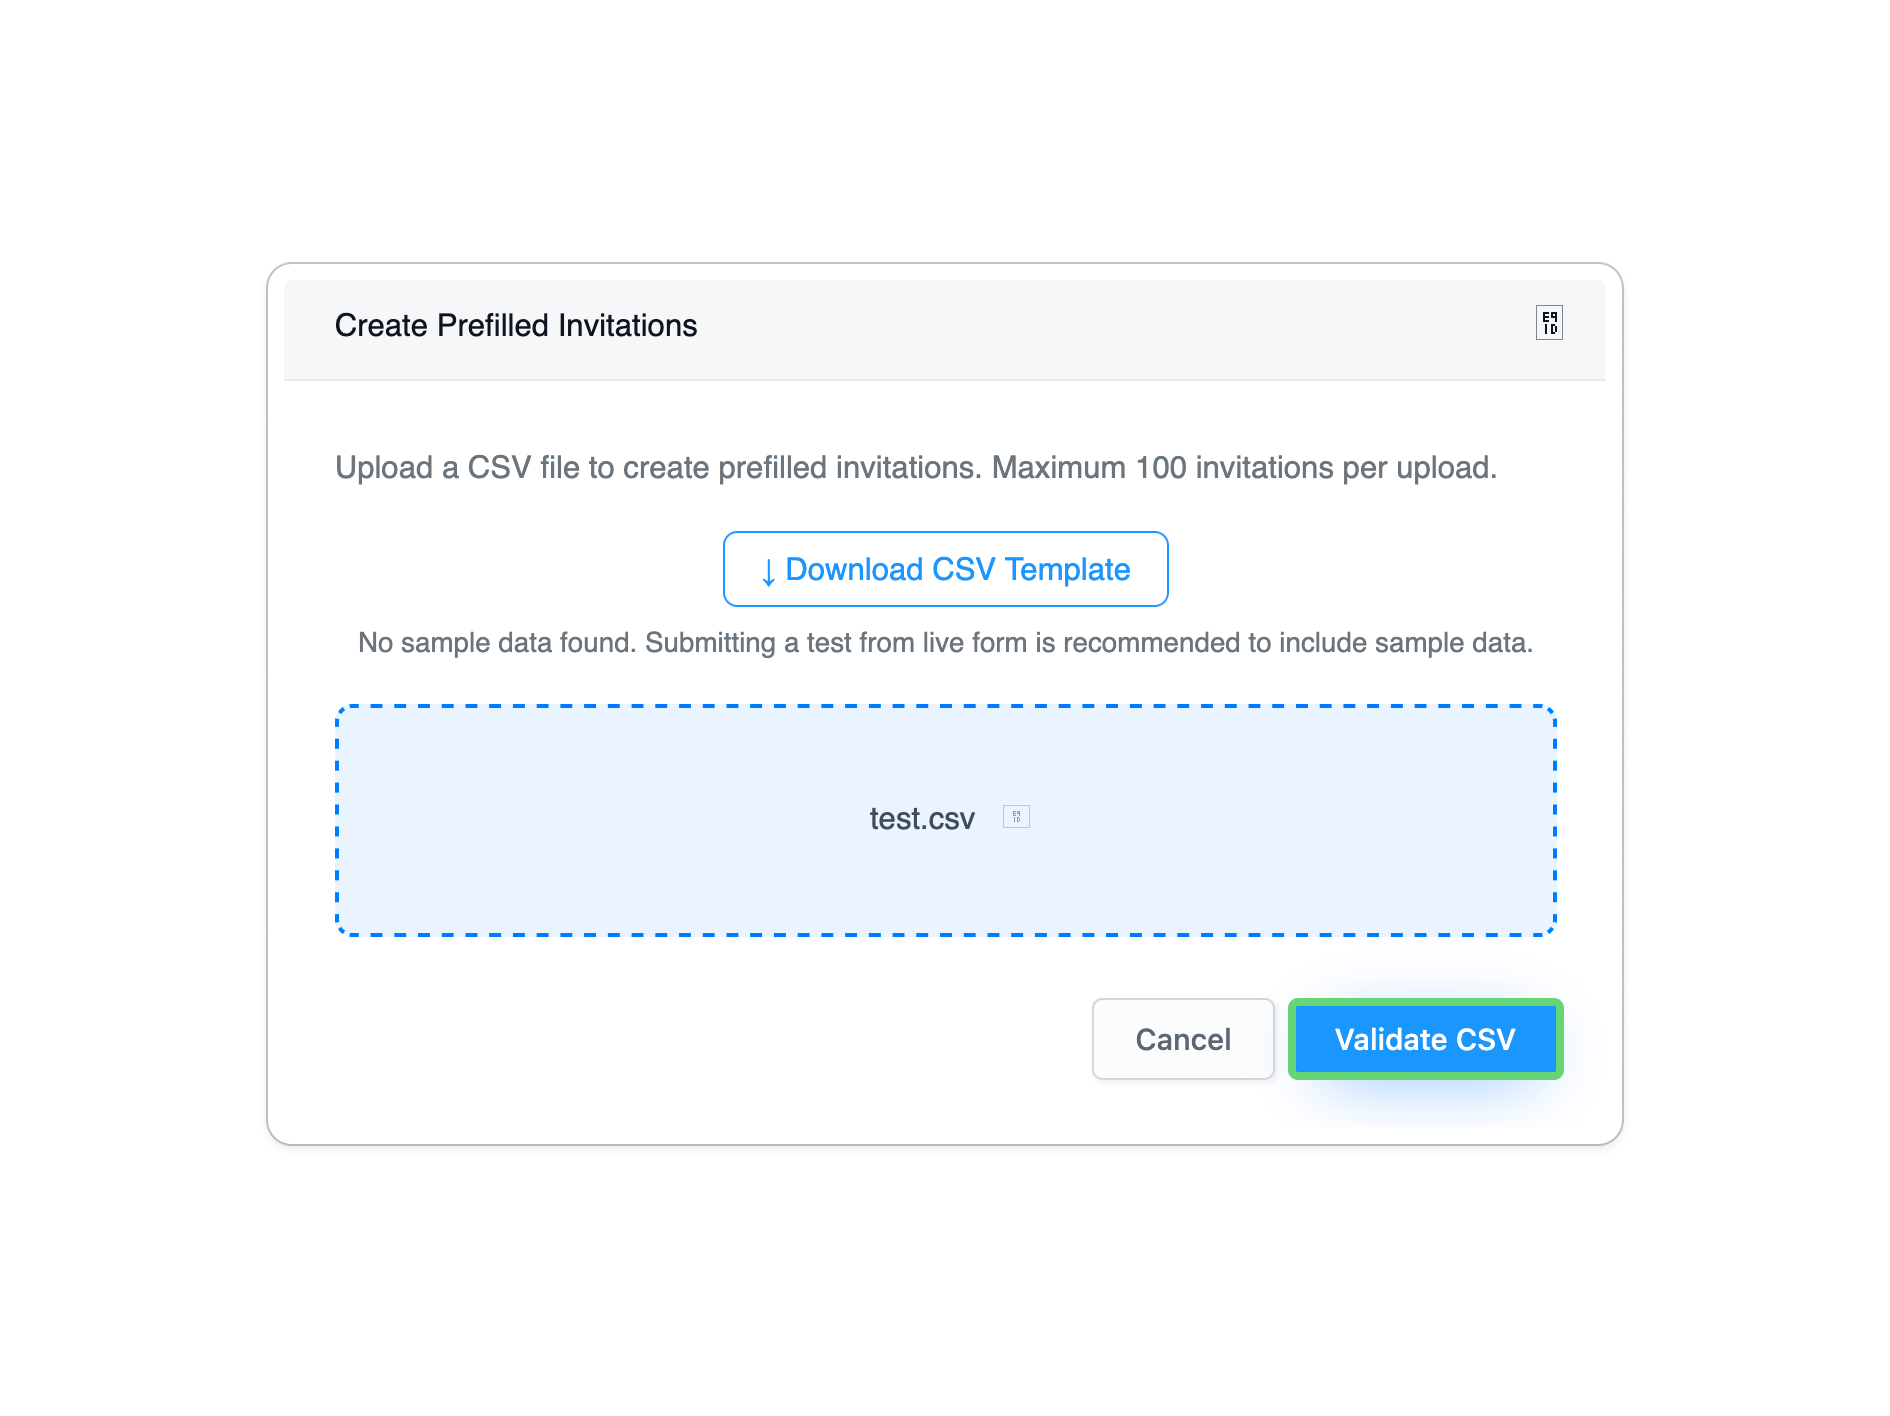
Upload and Validate: Upload your file and click Validate.
-
(Optional) Use the global toggles at the top to set whether pre-filled fields are Read-only or Hidden for all recipients.
-
Click Save Pre-filled Form.
Ways to create pre-filled forms
Choose the method that best aligns with your workflow:
| Option | Description |
|---|---|
| Individual Pre-fill | Manually fill out a form for one specific recipient. Ideal for highly customized, one-off cases. |
| Bulk Pre-fill (CSV) | Upload a CSV to generate mass invitations with unique data. Perfect for high-volume distributions. |
| “Initial value” | Set default values for Text Input fields, filling them in automatically when the form loads. |
| “Save for later” | Pre-fill your form fields and provide a link for respondents to complete the rest later. Note: This isn’t mainly for pre-filling, but for respondents to save and continue filling out forms at a later time. Since respondents can edit saved data, you might not be able to track previous records if they make changes |