
Team option lists
On this page
A team option list lets your team reuse the same Dropdown options, such as departments, locations, or product codes, across multiple forms. Edit the list once instead of updating every field manually. Saving a change updates linked form drafts, and you can choose to update published forms too.
When to use it
- You use the same Dropdown options in multiple forms.
- You update the options regularly and need to keep linked forms consistent.
- Multiple team members manage the options, and you need to see who last edited the list.
If the options are used in only one field, edit them directly in that field. See Set Dropdown properties.
Open Option Lists
From the Dashboard, click your team name in the top-left corner, then click Form Default Settings. Open the Option Lists tab in the left-hand navigation.
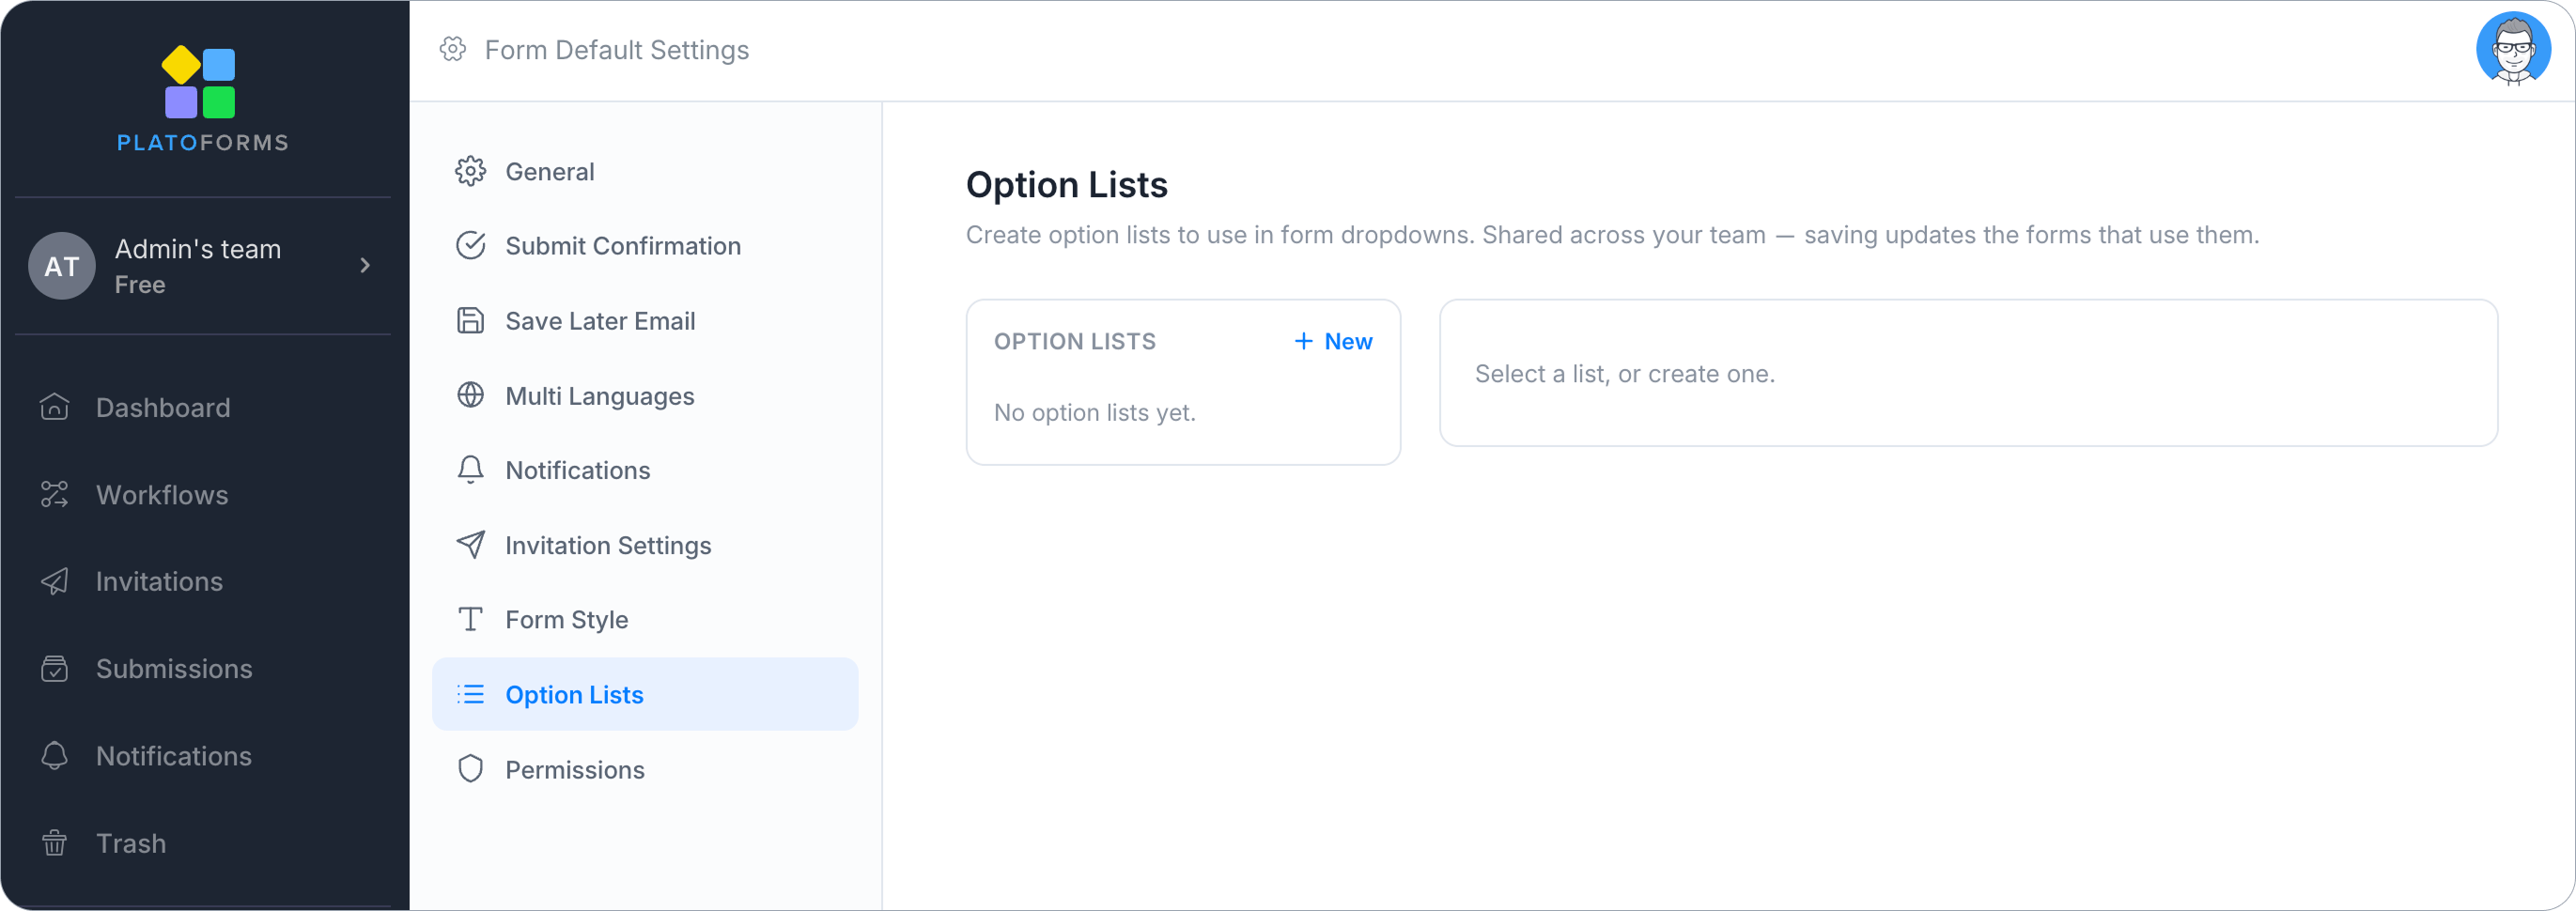
Most Form Default Settings apply only to new forms. Option Lists also work with existing forms. Published forms update only when you choose to update them.
Create a list
Create a list to define the Dropdown options you want to reuse across multiple forms.
-
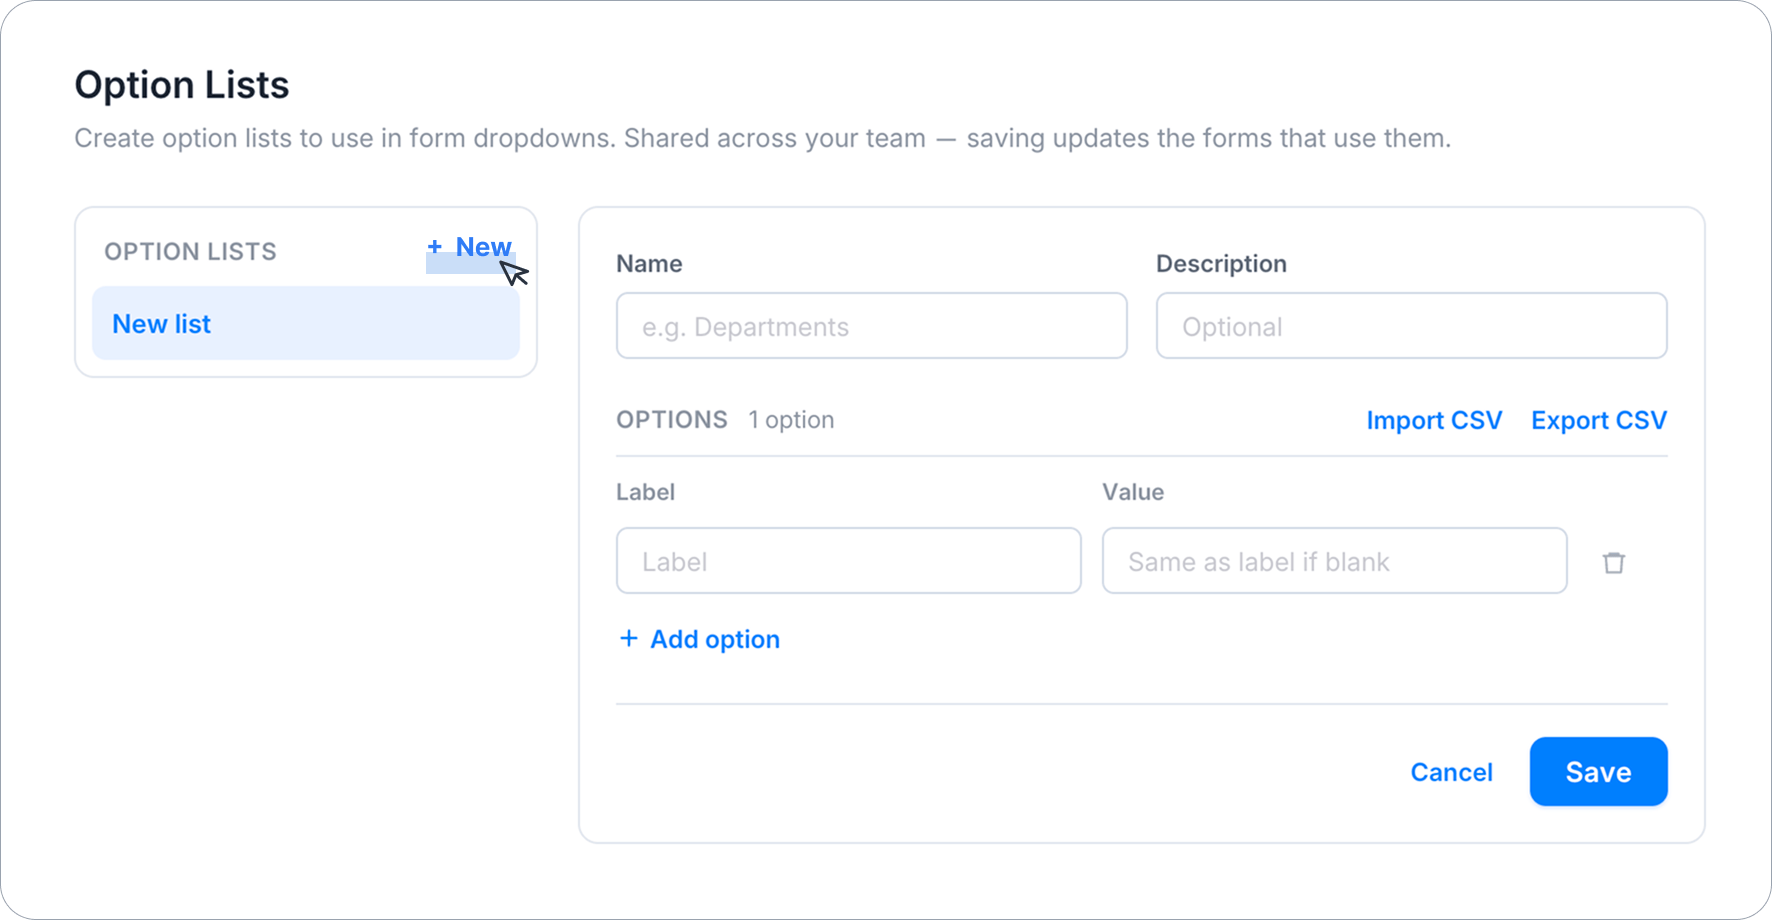
In the Option Lists tab, click + New.
-
Enter a Name, such as Departments. Add an optional Description to explain what the list is for.
-
Add your options. Each option has a Label and a Value:
- Label — the text respondents see in the dropdown.
- Value — the text stored in the submission and printed in the PDF. Leave it blank to reuse the label.
This is the same label/value split described in Separate item label and value.
-
Click Add option for another row, or Import CSV to bring in a long list at once.
-
Click Save.
Import or export options with CSV
Use Import CSV to add a long list of options without entering each row manually. The first row of the CSV must contain the column headers Label and Value.
Use Export CSV to download the current options. You can keep the file as a backup, edit it in a spreadsheet, or use it as a correctly formatted starting point for another list.
Anyone on your team can create, edit and delete option lists. Each list shows who last edited it and when.
Use a list in a form
-
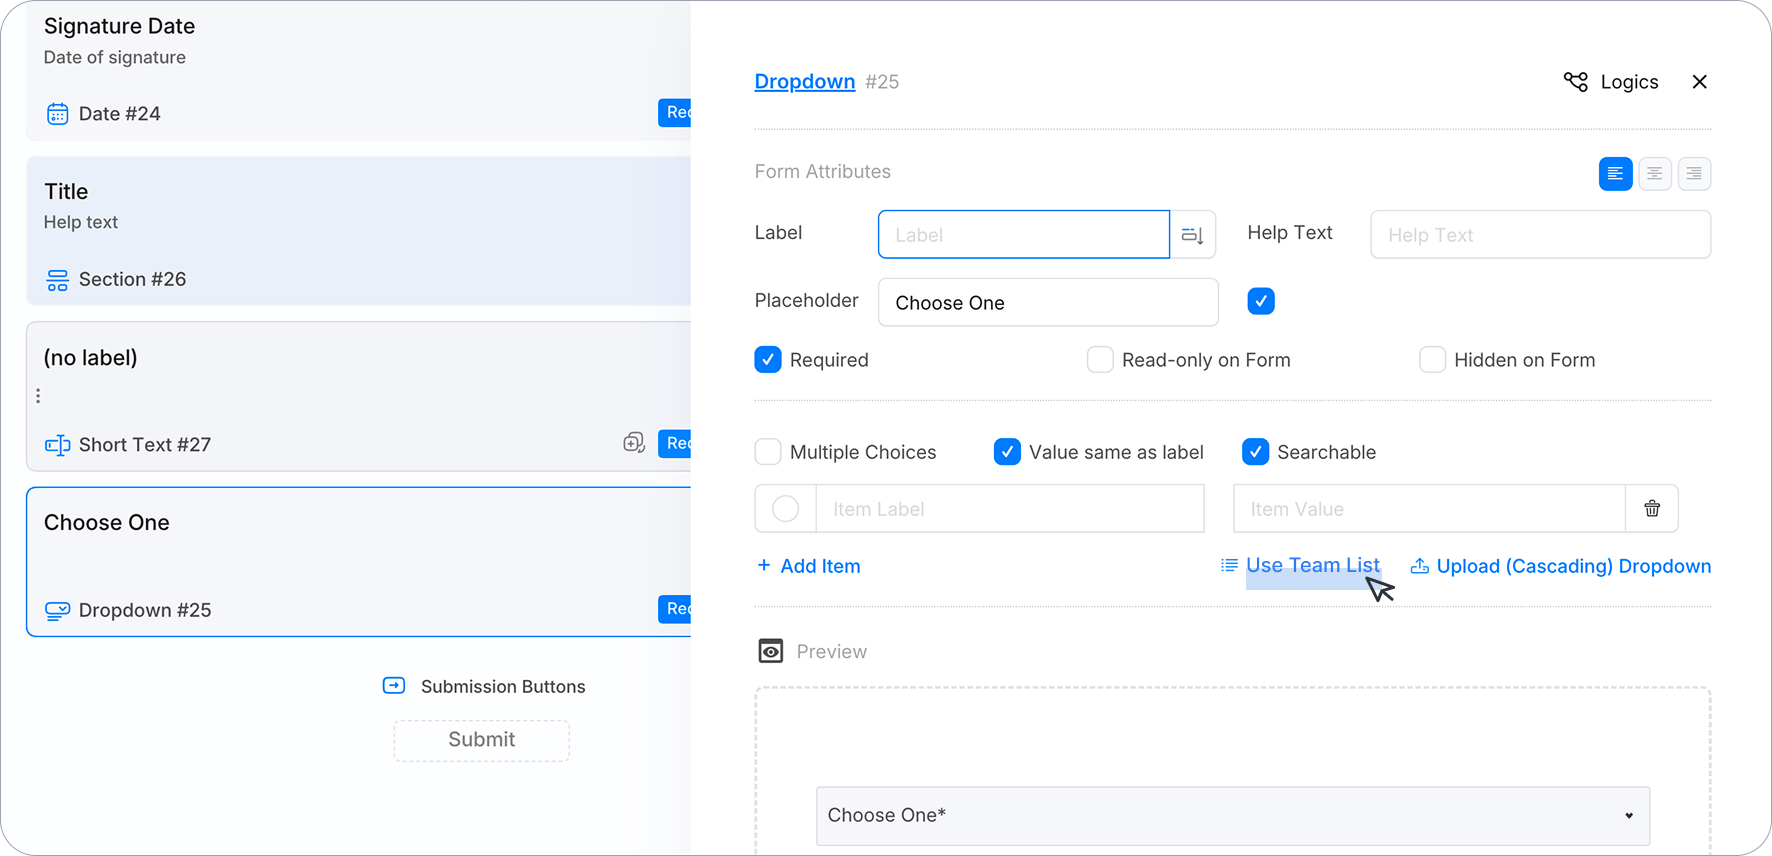
Open the form in the builder and click a Dropdown field’s label or ID to open its attributes panel.
-
Click Use Team List.
-
Select a list and click Apply.
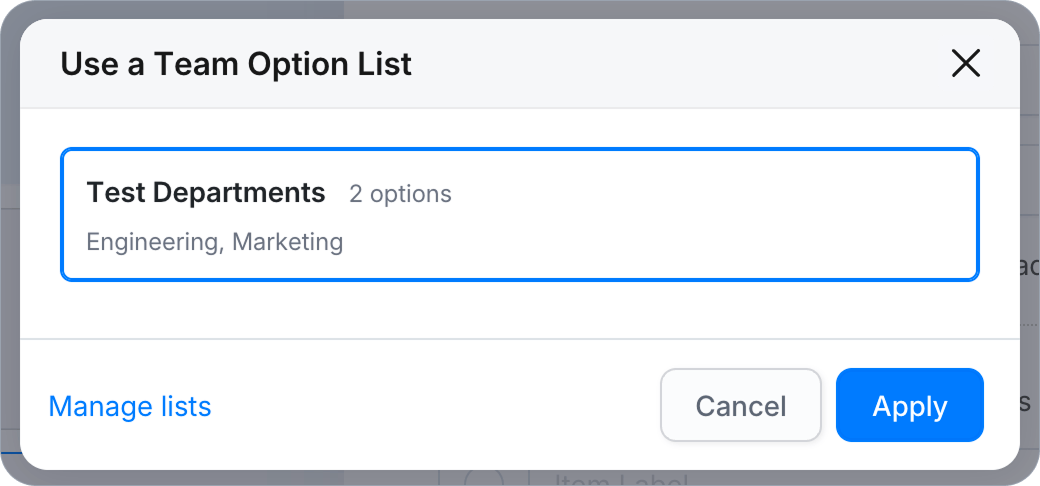
The field’s options are replaced by the list’s options.
-
Save the form. A field joins the list on the form’s next save — until you save, the list does not know about the field and will not update it.
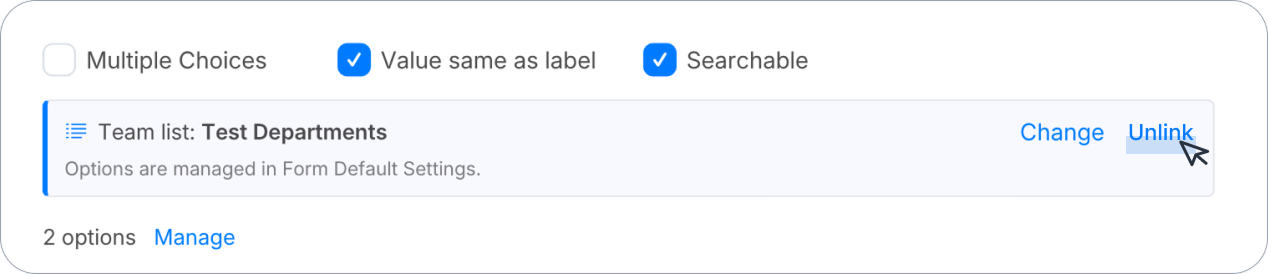
A linked field shows a Team list banner with the list’s name, plus Change (swap to a different list) and Unlink. While a list is attached, the options are not shown row by row — a list can hold thousands of entries — so the panel shows a count and a Manage link back to the Option Lists tab instead.
Team option lists work with Dropdown fields in Web Forms, PDF Fillable Forms, Web PDF Forms and Master Forms. Choice fields, Picture Choice fields and PDF Document Creator documents are not covered. A Dropdown cannot use a team option list and an uploaded CSV at the same time. While a team list is attached, the CSV upload option is hidden. The lower levels of a cascading dropdown always come from an uploaded CSV.
Update forms after editing a list
When you change the options in a list that is already linked to form fields, you can update the form drafts only or update the published forms too.
In Form Default Settings → Option Lists, select the list, edit its options, and click Save. If any forms use the list, a confirmation dialog shows which forms will be affected before you apply the changes.
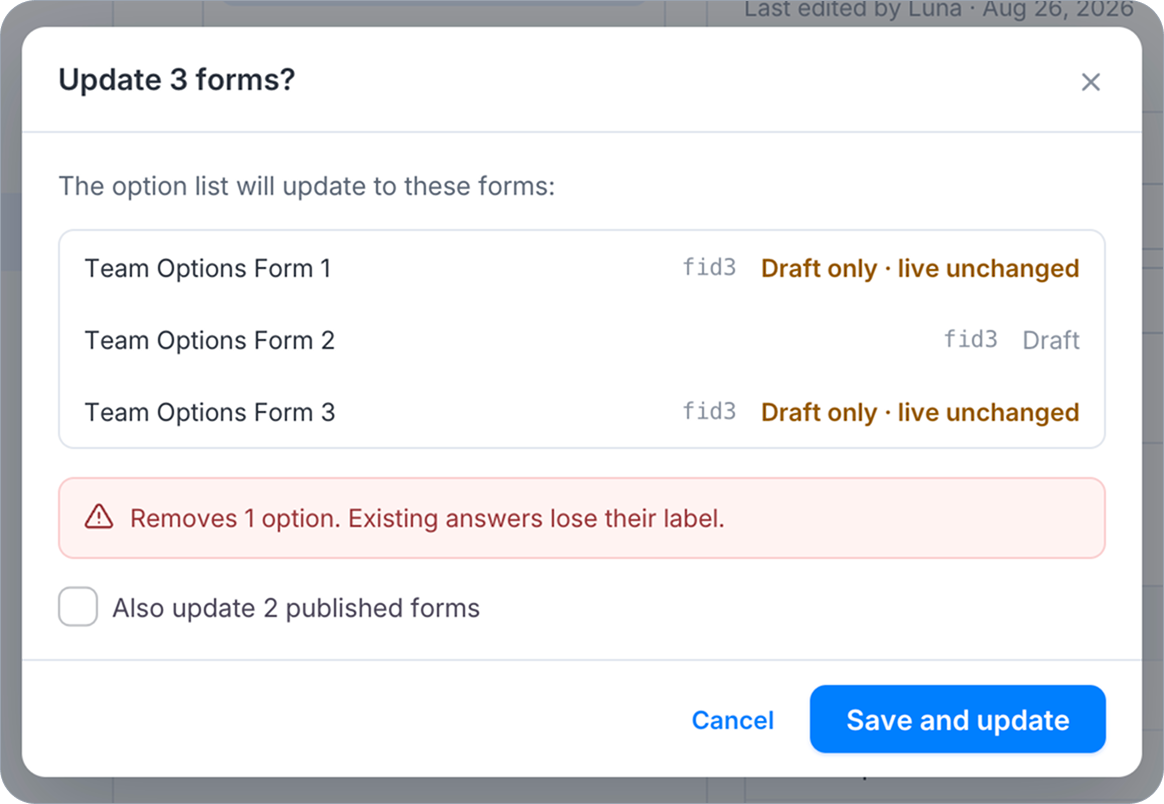
Saving updates drafts. Your team sees the new options in the form builder straight away. Published forms continue using their current options unless you choose to update them too.
To update published forms at the same time, select Also update published forms in the confirmation dialog. It is off by default. Each row shows whether the change will update the draft, the published form, or both.
To update published forms later, click Update live forms in the Used by panel.
Changing only a list’s name or description does not update linked forms, so no confirmation dialog appears. Updates to many forms may continue in the background.
Check where a list is used
In Form Default Settings → Option Lists, select a list. The Used by panel at the bottom shows every Dropdown field linked to that list and the status of its published form.
Each row identifies a linked Dropdown field and shows the publication status of its form:
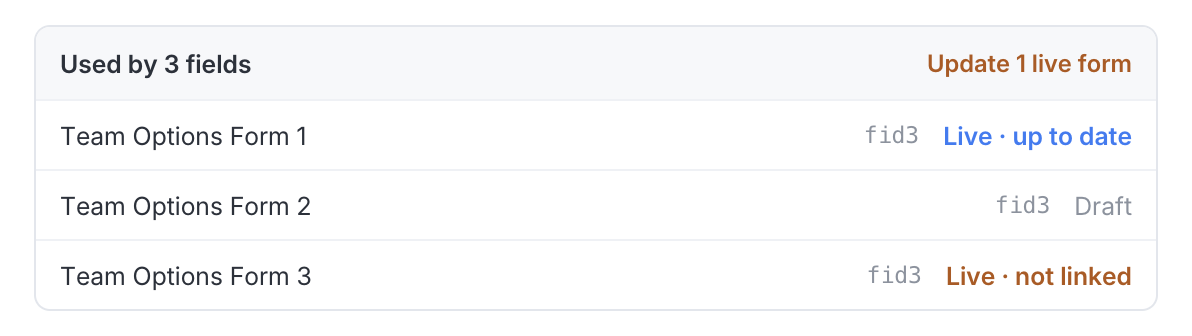
| State | Meaning |
|---|---|
| Draft | The form has never been published, so there is nothing live to update. |
| Live · up to date | The published form already has the list’s current options. |
| Live · out of date | The published form is behind — it still shows the options from before your last edit. |
| Live · not linked | The field was attached to the list after the form was last published. Updating live forms links it. |
| Not in published version | The field is not in the published version of this form at all. Publish the form to include it. |
Removing an option
Renaming an option is safe: existing submissions keep the answer and pick up the new wording. Deleting an option is not — a submission stores which option was chosen, so once the option is gone from a published form, earlier submissions that chose it can no longer show its text. The confirmation dialog warns you before the deletion is applied to any forms. If people have already answered, consider renaming the option instead.
Unlink a field
Click Unlink on the field’s banner. The field keeps exactly the options it has — nothing is cleared and no submission is affected — it simply stops following the list and becomes editable again in the attributes panel. After unlinking, Use Team List and Upload (Cascading) Dropdown become available again, so you can attach a different list later.
Delete a list
Click Delete list and confirm. Fields that used the list keep their current options: deleting a list never empties a form field and never affects submissions that have already come in. Those fields just stop following the list.
Copying and moving forms
- Clone a form inside the same team — the copy keeps the link and starts following the list once you save it.
- Copy or transfer a form to another team (including a form created from another team’s template) — the link is dropped and the copy keeps the options as its own, since the other team has no access to your list.
Good to know
- Option lists belong to a team. If you belong to more than one team, each one has its own lists.
- Attaching a list copies its options into the field. Everything downstream — form logic, PDF output, notifications, submission exports — keeps working exactly as before.
- If a form uses multiple languages, pushing a list update to the published form clears that field’s existing option translations. Review the field’s translations afterwards.